


Guide to Smooth and Luminous Skin Shading on Procreate
Are you stuck on ideas for shading a face and looking for a method to create natural, luminous skin on Procreate? This article is the solution for you. We will explore how to apply the super simple technique of dividing light and shadow areas to transform a flat face into a smooth, polished egg with depth and extreme appeal.
The secret to perfectly dividing light and shadow areas when drawing portraits with Procreate
The video content revolves around choosing the correct shadow color, using hard-edged brushes to determine the light source, and blending colors so that the facial mass emerges naturally. We will also add blush using an airbrush and highlight
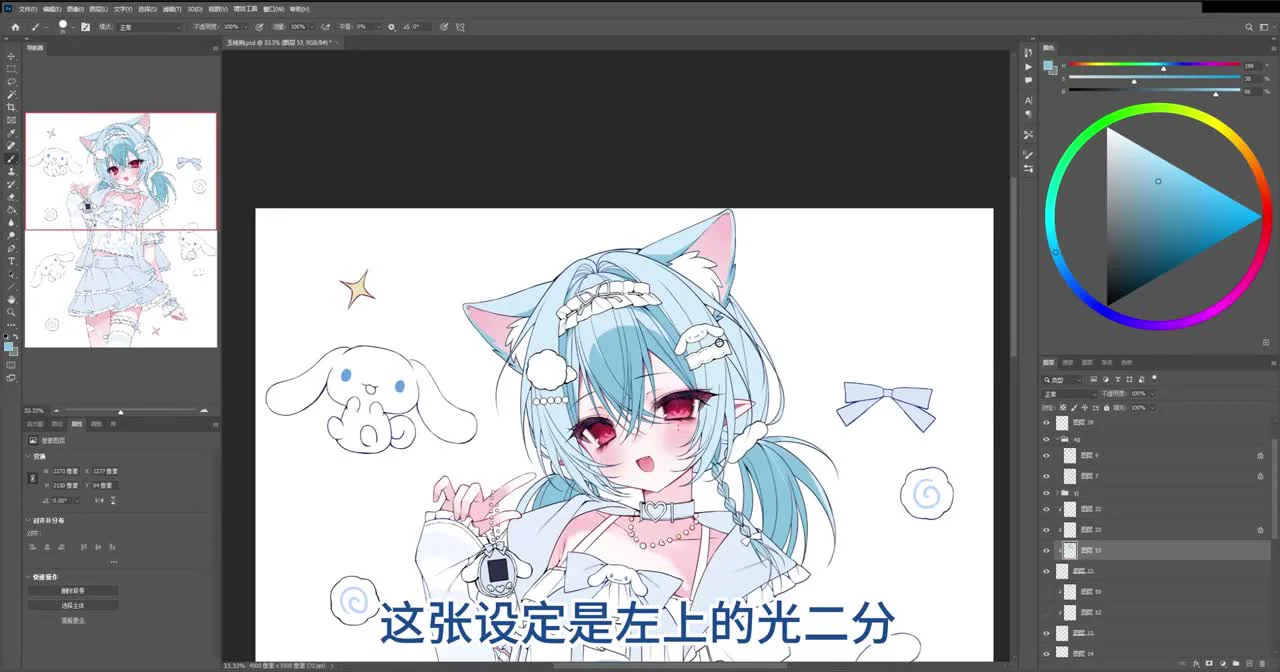
Start by dividing light and shadow areas
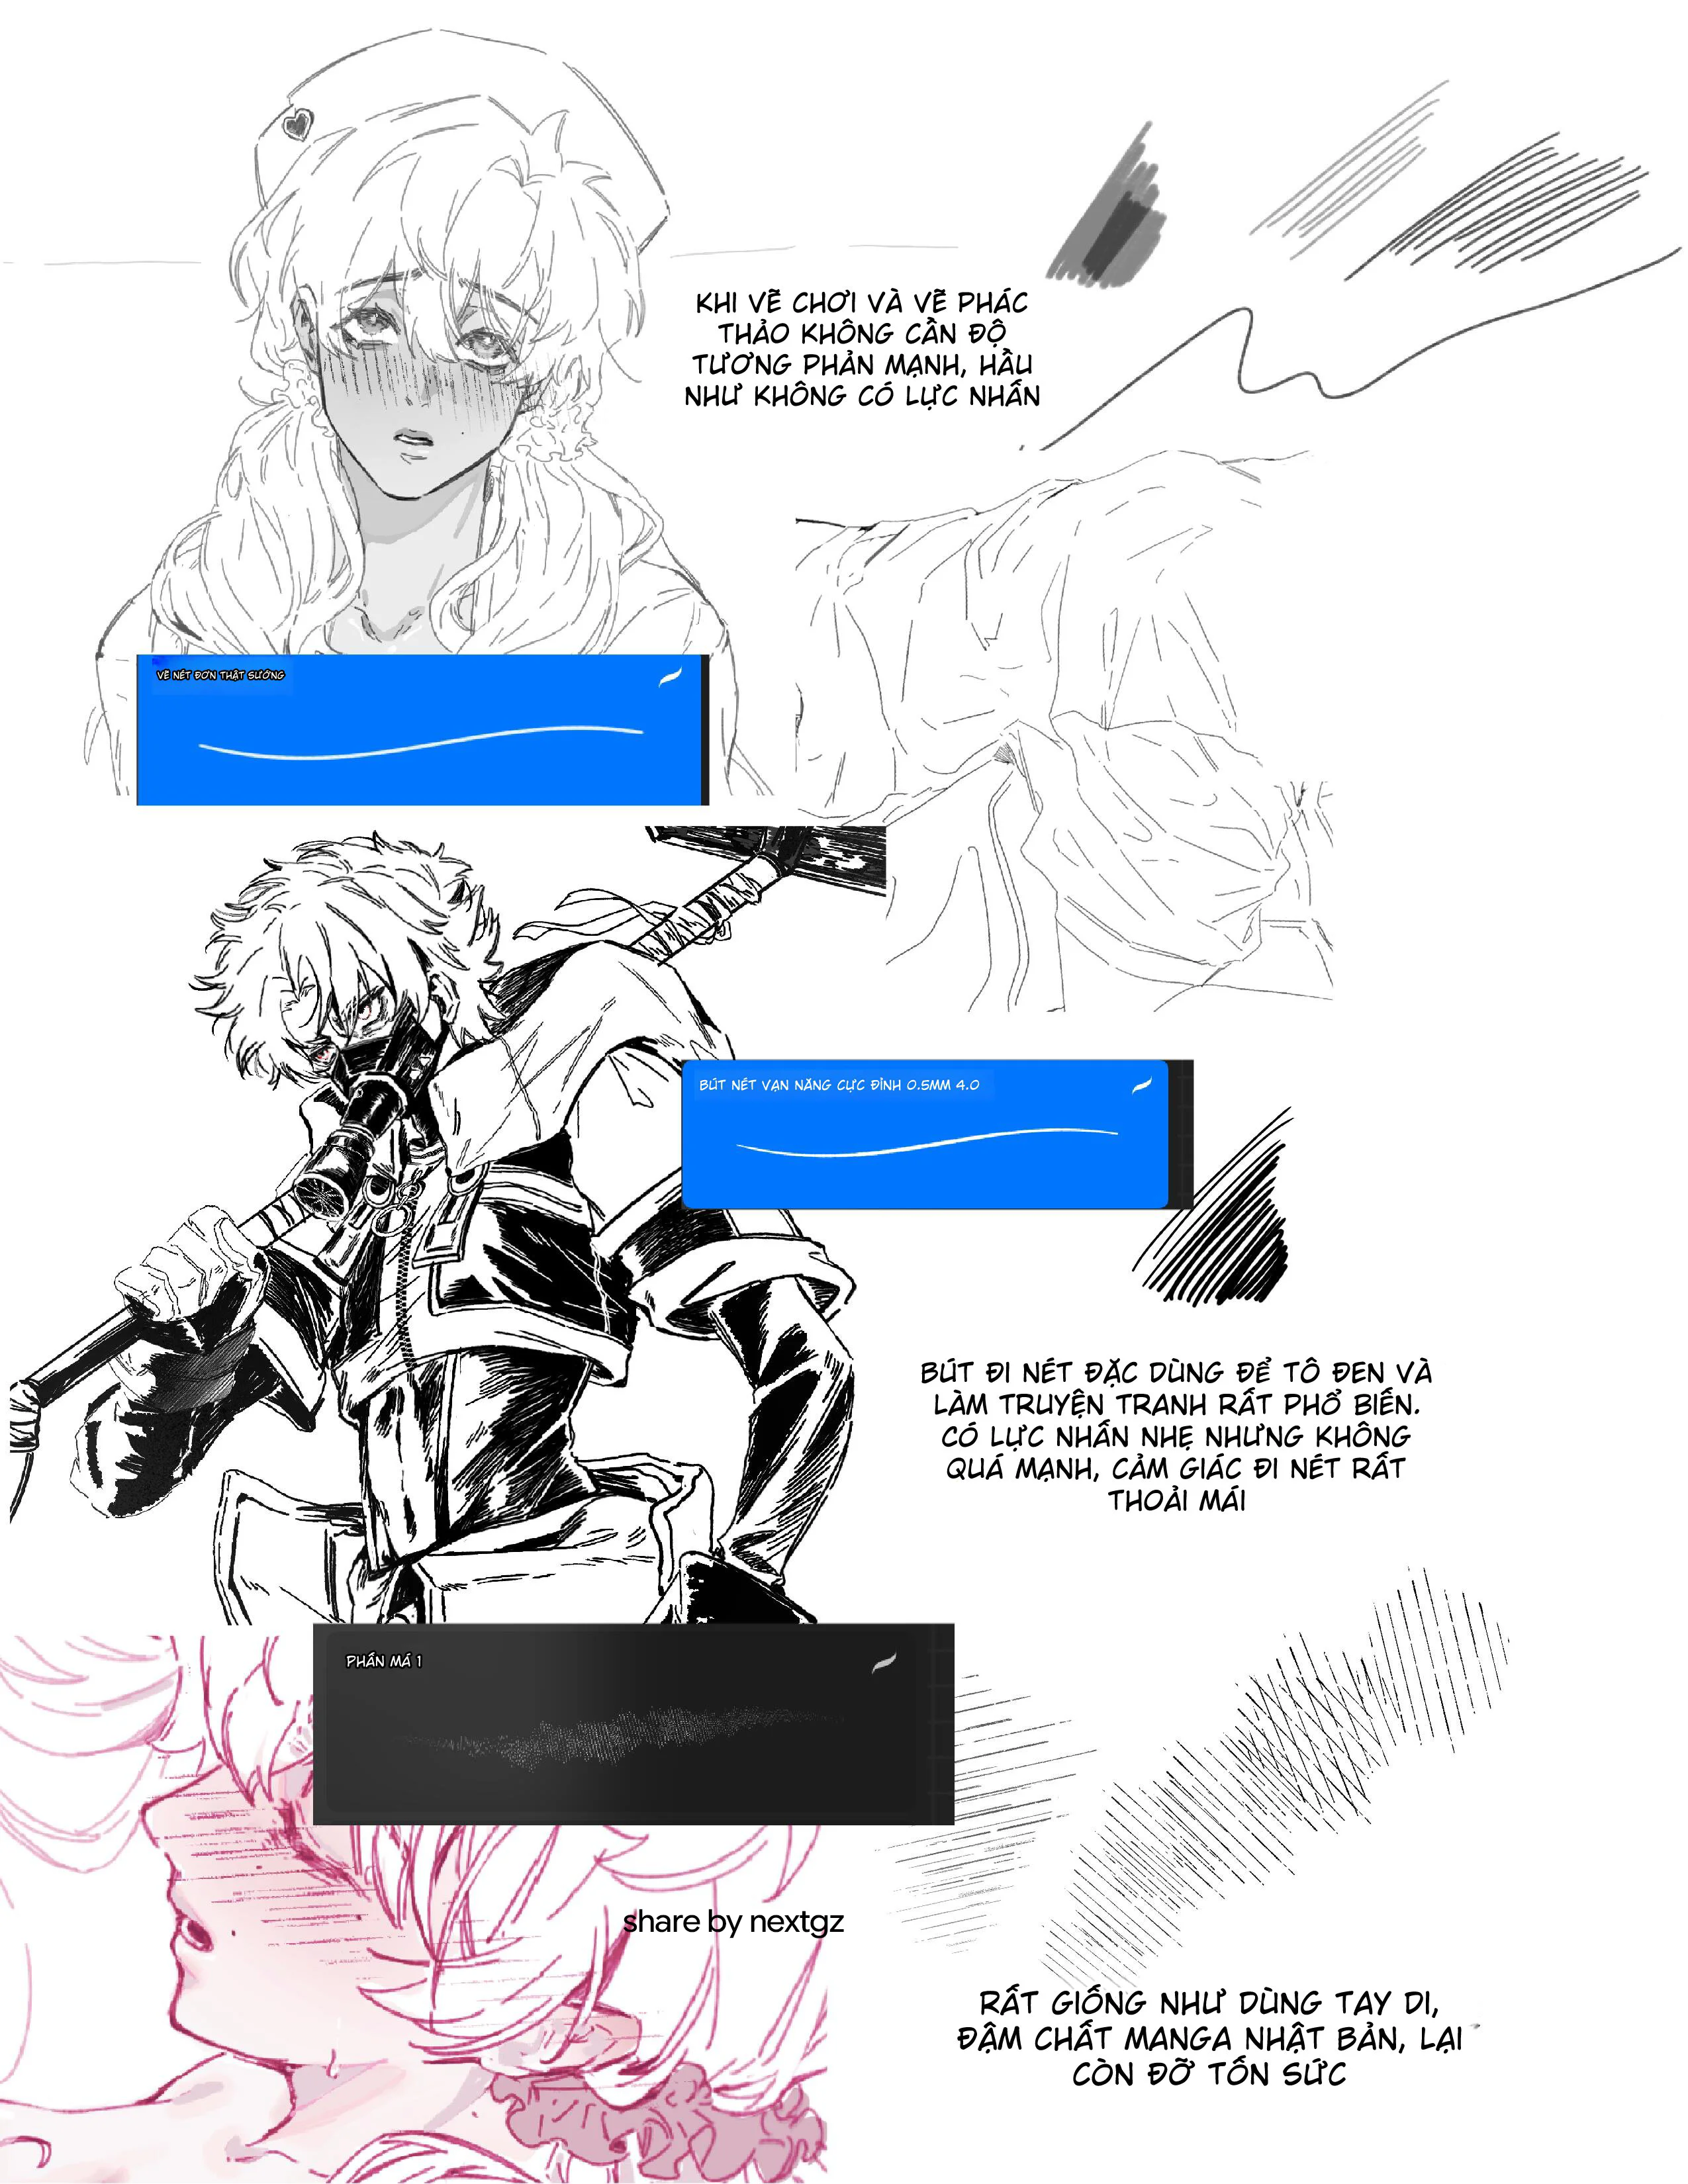
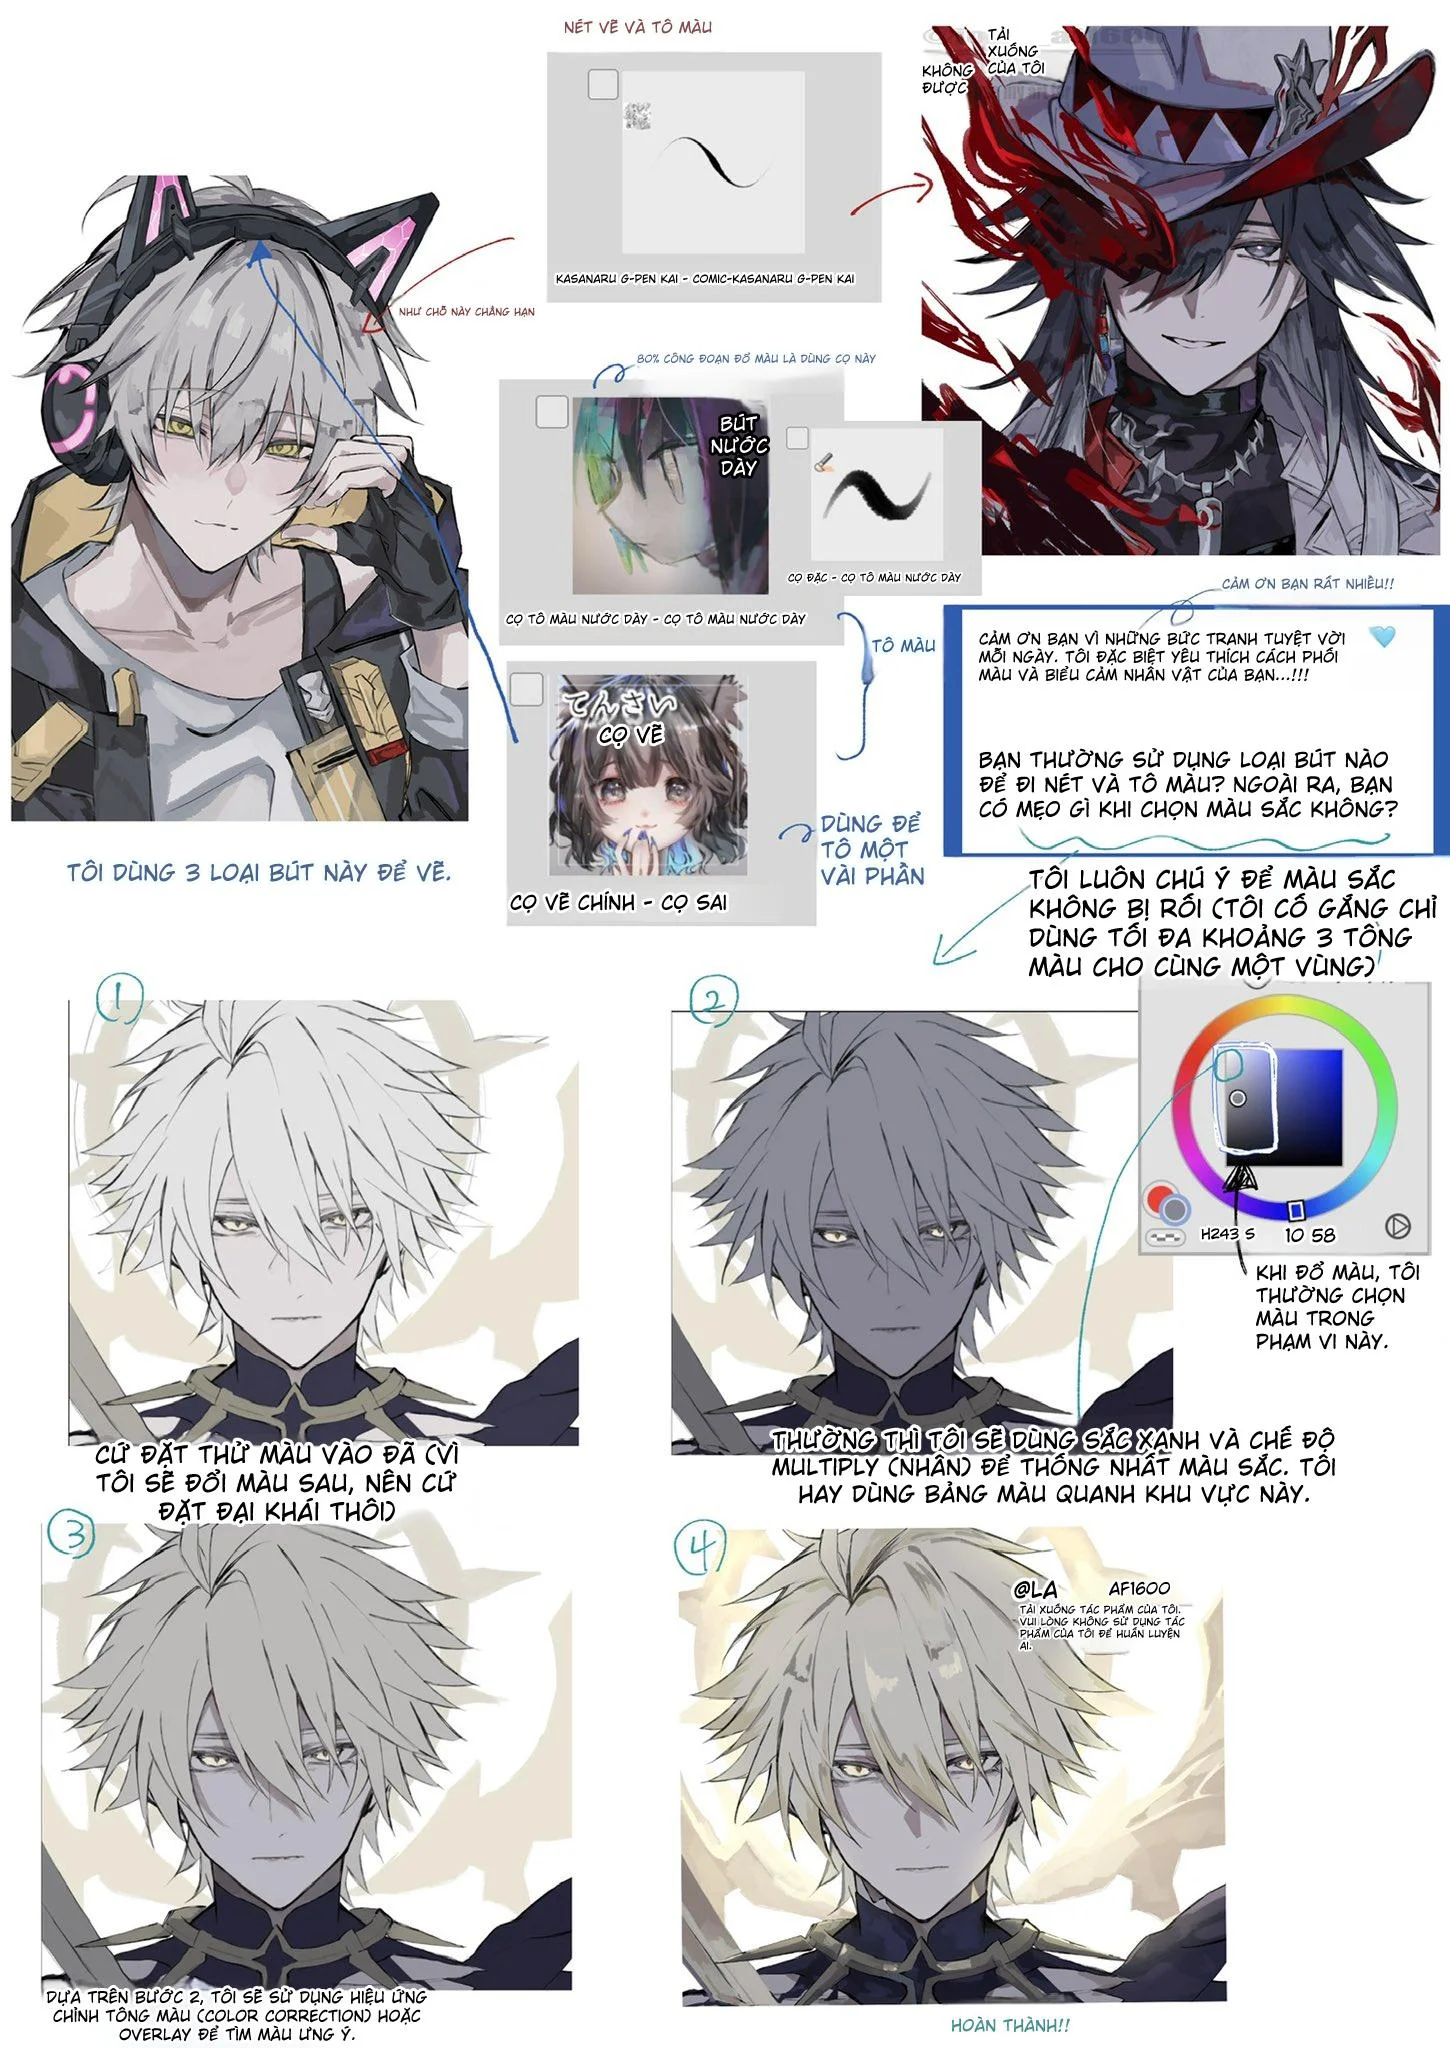
The first and most important step is choosing the right shadow color. Pick a tone darker than the base skin color but with slightly higher saturation so the skin doesn't look dull. Then, use a hard-edged brush to divide the light and shadow areas. Clearly identify where your light source is coming from. For example, if the light shines from left to right, the shadow area on the right will be larger, while the left side is the area receiving direct light.
Create volume and soften boundaries
After you have the basic shadow area, switch to a smudge brush or a blending tool to soften the boundaries. An extremely important note is not to smudge all the edges. Keep those sharp lines in areas where strong volume definition is needed. Just follow your feeling—leave sharp edges where needed, and lightly blend where smooth transitions are required to create depth.
Accentuate facial details
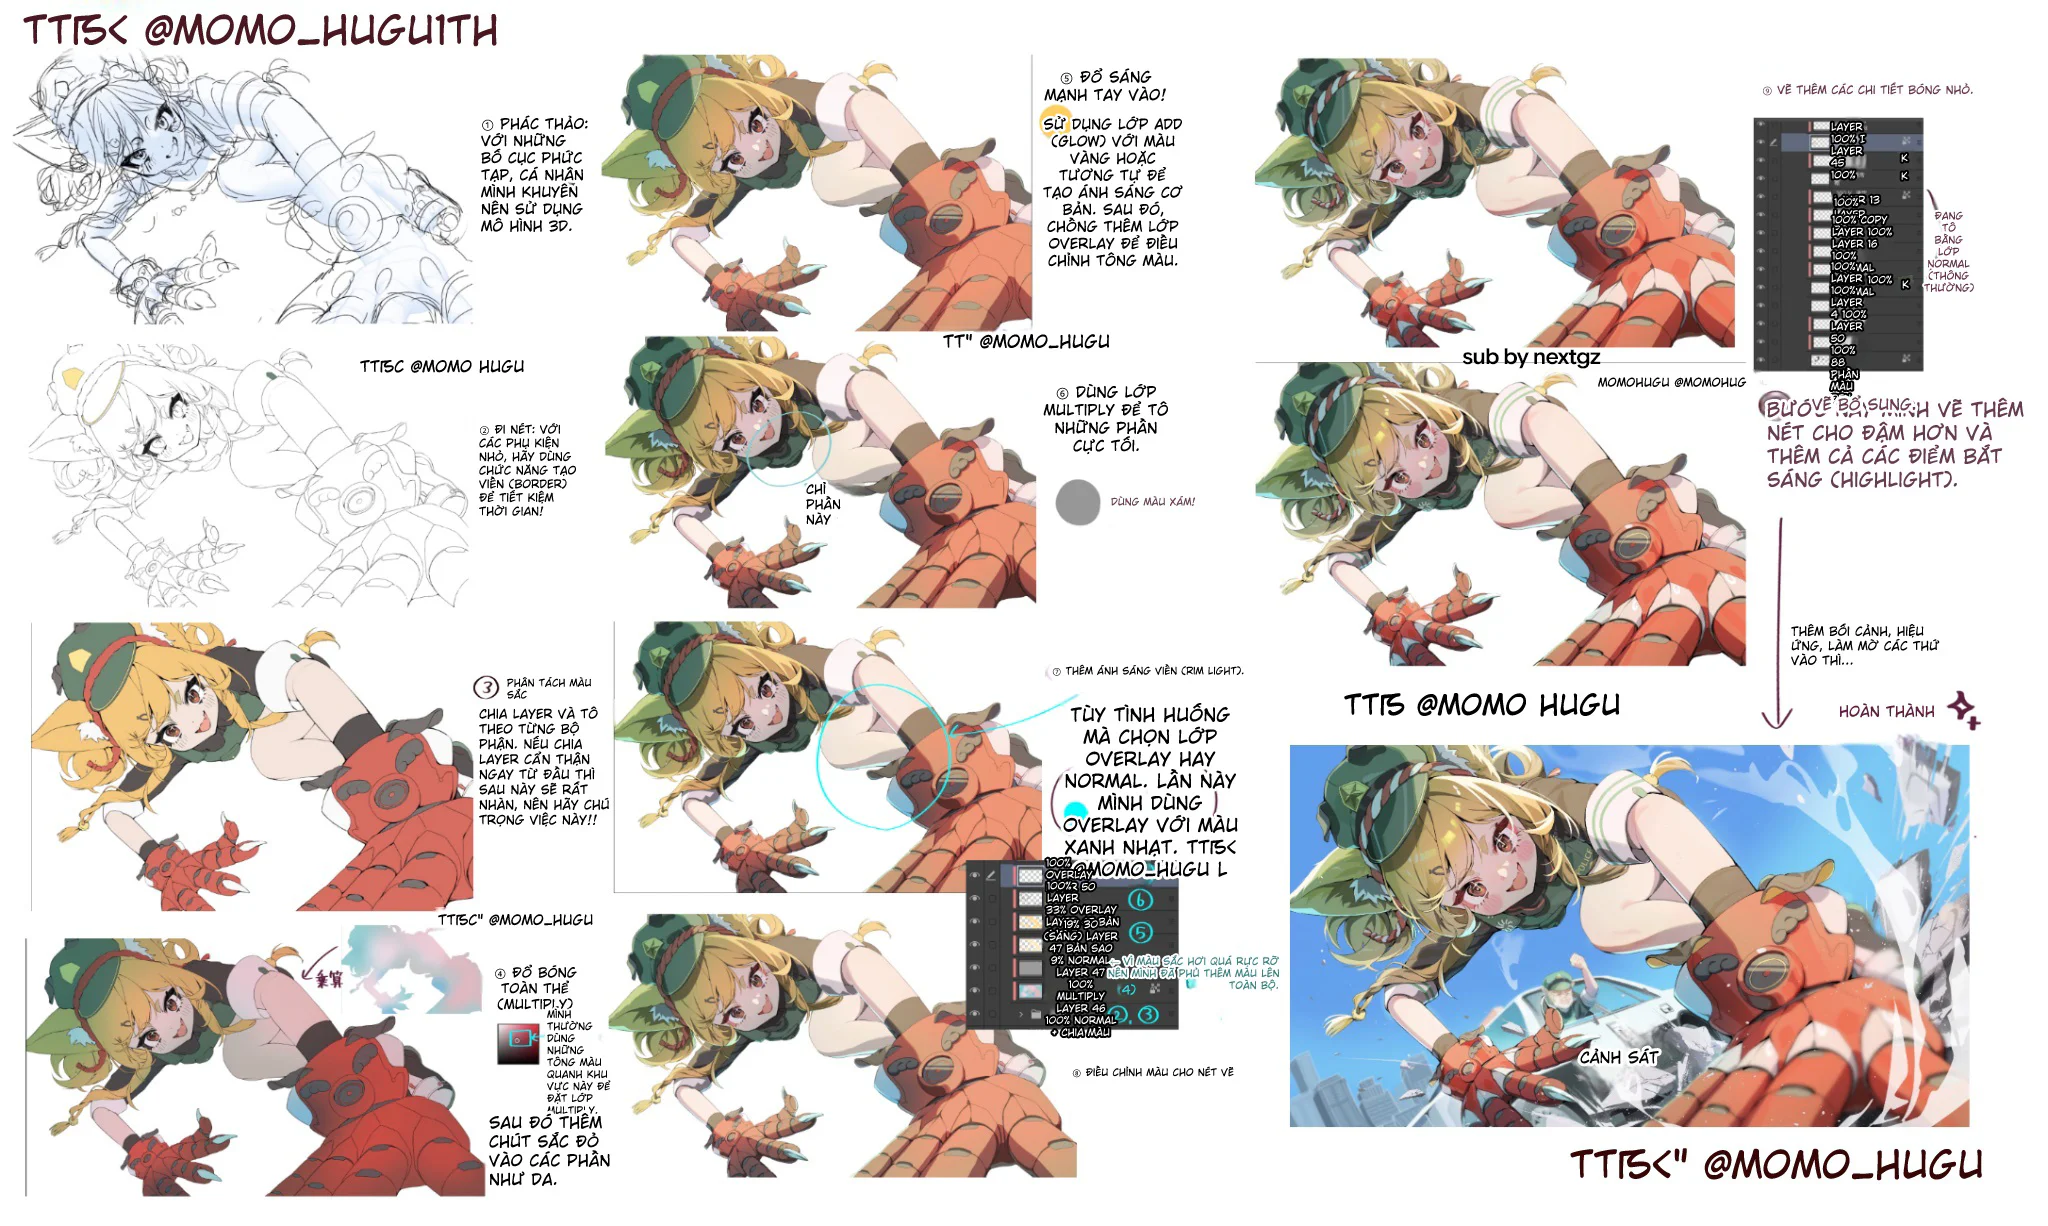
Next, we'll focus on specific details like the eye sockets, nose, and upper lip. You can use the selection tool, then create a light white gradient layer to make the shadow area look more transparent and not stifling. For the cheekbones, use an airbrush with a high-saturation tone to add a bit of blush. Lightly blend the cheek area in an inverted triangle shape to make the face look radiant and more adorable.
Finish with highlight points
To make the artwork truly shine, highlights are an indispensable step. Use a white watercolor brush to lightly dab on the lower lip, under the eyeball, and the philtrum area. Just these few tiny bright points are enough to make the overall face look plump, moisturized, and vividly lifelike.
Don't forget to visit nextgz.net to hunt for quality brushes and continuously update your Digital Art knowledge at genzacademy.vn. Happy practicing, everyone.


Bình luận
0 bình luận
Đăng nhập để tham gia thảo luận cùng cộng đồng!
Đăng nhập ngayĐang tải bình luận...