Loading...
Back40 Classic Watercolor Procreate Brushes – SAI/CSP Feel, Quick Coloring, Rich Texture
40 Classic Watercolor Procreate Brushes – SAI/CSP Feel, Quick Coloring, Rich Texture
BRUSH
34.830đ59.817đ
Tiết kiệm 42%
6 downloads5162 views0 comments12/14/2025
VIPUnlock VIP benefits for Chinese courses, Art Courses, Resource Art and member offers.
Join nowLoyalty
resource art
Nhận khoảng 3 điểm sau khi thanh toán
Điểm sẽ được cộng sau khi đơn hàng thanh toán thành công. Nếu đơn được hủy hoặc hoàn tiền, số điểm liên quan sẽ được điều chỉnh lại rõ ràng.
Số dư khả dụng
...
VIP tier
Base
Reward gần nhất
Đổi trong hub
Giá trị đơn
34.830 ₫
Áp dụng cho course, art course, resource art, product, membership và checkout đủ điều kiện.
Mở Loyalty HubDescription
If you're used to painting with Paint Tool SAI or Clip Studio Paint but are gradually switching to iPad and Procreate, you'll surely miss the "soft yet sharp watercolor" feel of those two programs. The good news is you no longer have to sacrifice that familiar brush experience.


This 40-brush watercolor set for Procreate is designed based on the classic brush feel of SAI and Clip Studio, re-optimized for Procreate, helping you paint anime, illustrations, and digital watercolor as smoothly as on desktop. The set lets you sketch, lay backgrounds, blend, add details and finish paintings with just a few core brush groups – no more hoarding hundreds of brushes while only ever using... 3 of them.
1. What Makes This 40-Brush Watercolor Set Special?
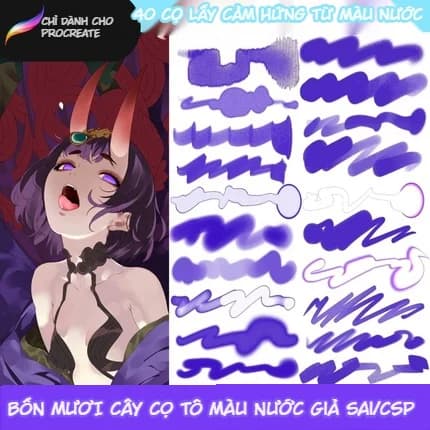
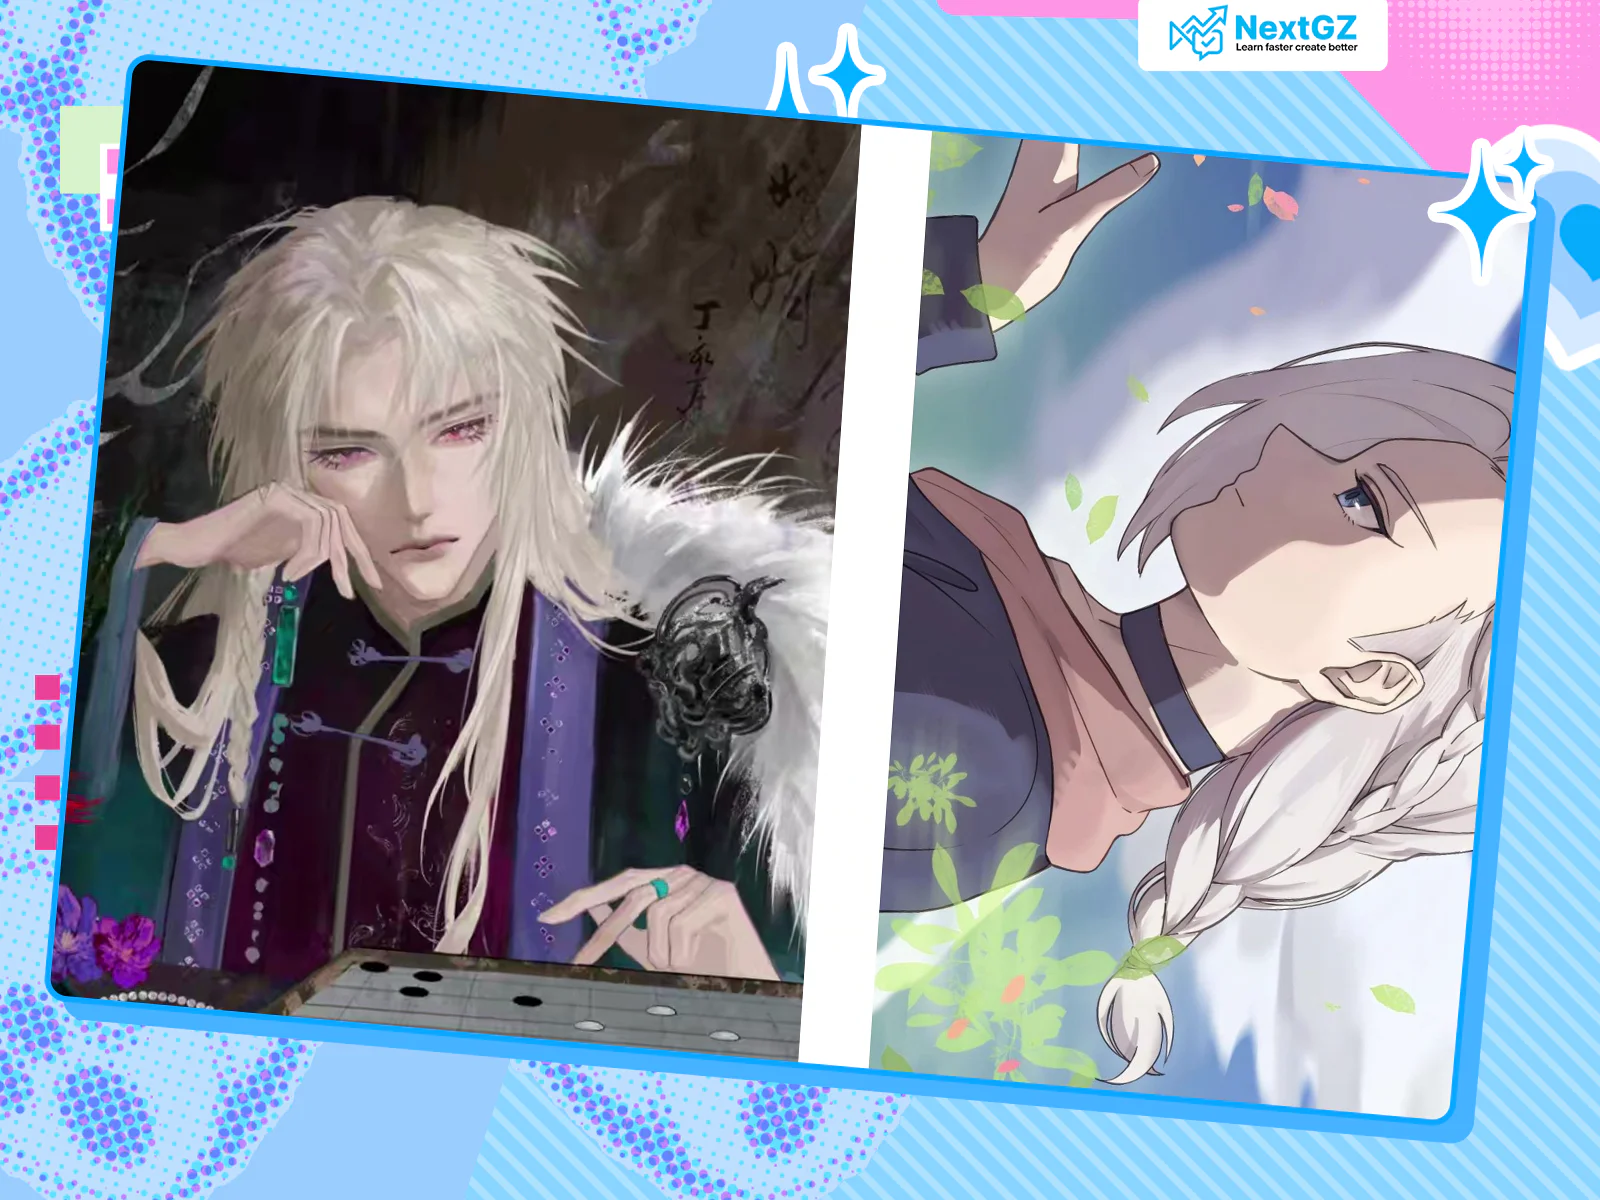
Looking at the demo swatches, you'll see each brush stroke tested on a purple background: from transparent water washes, thin watercolor, soft-edge bleeding to thick saturated strokes with sharp edges. Each type differs not just in opacity but also in hand-feel: which ones specialize in wet color application, which are for "dry" work, which create long smooth gradient strips.
Based on the original SAI & CSP style brush set for Procreate, this set is divided into several main groups:
Transparent watercolor group – creates thin color layers, builds up layer by layer like traditional watercolor, perfect for skin, skies, light backgrounds.
Opaque/anti-layer watercolor group – thick saturated strokes that don't bleed when touched, great for emphasizing dark areas or coloring hair and clothing.
Bleed, water stain, splash group – simulates paper absorption, color bleeding at edges, perfect for shadow edges, light edges or random texture creation.
Blend/blur group – pulls color from dark to light, mixes two color areas while preserving watercolor grain, no "digital blur" effect.
Special paper grain/effect brushes – e.g., paper grain watercolor brush, bright edge highlight brush, grainy line brush for watercolor-style linework.
Everything is packaged in a .brushset file exclusively for Procreate, optimized for pen pressure sensitivity and blending capability, compatible with newer iPads.
2. Who Should Use This Brush Set?
This brush set is made for both beginners and experienced artists, especially those who:
Previously worked with SAI / Clip Studio Paint and want to find a similar brush feel on Procreate.
Draw anime, manga, chibi, game characters, fantasy illustrations needing soft colors, multiple layers, easy skin-hair-clothing rendering.
Enjoy digital watercolor style: slightly bleeding color edges, light paper grain, not too "vector-like".
Are freelancers needing commercially-licensed brushes: book covers, comic illustrations, merch, posters... (original license allows personal and commercial use, only reselling the brush files is prohibited).
If you belong to the "endlessly tweaking brush settings but never getting the right feel" team, using a pre-tuned set like this for anime/illustration saves enormous time compared to building from scratch.
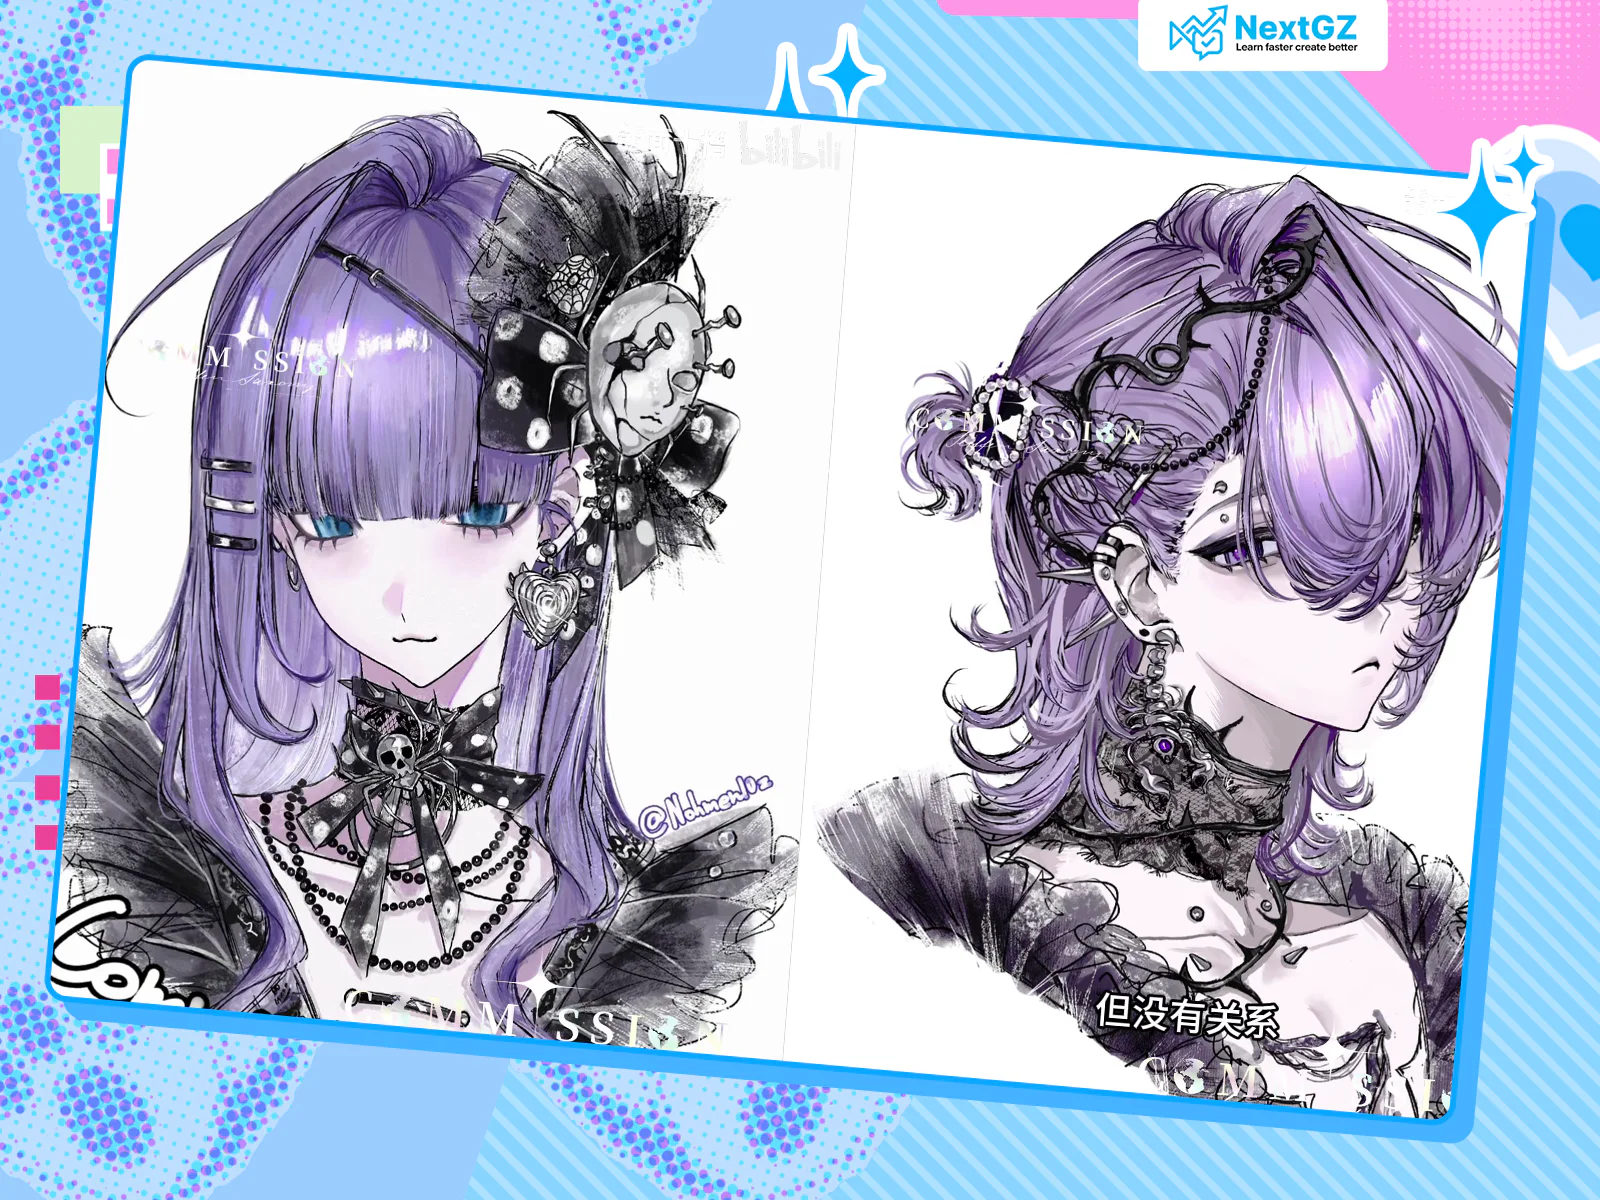
3. Detailed Brush Groups (Based on Demo Swatches)
Based on the two brush demo sheets, the 40 brushes can be divided into clear, easy-to-remember workflow groups:
3.1. "Clear Water" Group – backgrounds, washes, gradients
Transparent/wet watercolor brushes: long strokes, soft edges, high transparency. Used for sky backgrounds, skin, light-colored clothing. Just 2-3 passes for a smooth gradient.
Transparent water streak brushes: perfect for pulling shadows on necks, arms, or creating shine streaks on hair. Feels like using a large brush on wet paper, color pools at edges.
Several "transparent color spread" brushes: dense center – faded edges, very useful for painting body volume, cheeks, nose bridges.
3.2. "Opaque Watercolor" Group – volume, shadow, emphasis
Opaque/anti-layer watercolor: sharp strokes, high saturation, no excessive layering causing muddiness. Great for secondary shadows on skin, hair, clothing.
Damp/thin hard-edge watercolor: transitions from dark to light while maintaining "water edge", very authentic traditional watercolor vibe for edge emphasis.
Dedicated hair/bold volume brushes: long strokes, heavy pressure = dark, light pressure = faint – extremely convenient for painting hair strands or fabric folds.
3.3. "Bleed and Texture" Group – adding randomness
Water stain, bleed brushes: just lightly swipe across color transitions and instantly get color bleeding at edges, perfect for creating focal points around characters.
Paper grain watercolor brushes: add fine or coarse paper texture, preventing colors from looking too "digital". Use on the top layer at low opacity for great background effects.
Some bright edge/color edge brushes (white or neon purple strokes in the demo): can be used as outlines for magic effects, hair highlights or neon details.
3.4. "Blend & Finishing" Group
Blur-blend brushes: equivalent to smudge brushes but retaining texture; color bleeds wherever you drag, without erasing brush strokes.
"Transparent wet" brushes: both a coloring and blending brush, used to "smooth" areas with hard edges or harsh color transitions.
With this clear workflow division, you can set up a mini brush palette of 5-7 brushes per piece: 1 line brush, 1 background brush, 1 shadow brush, 1 bleed brush, 1-2 highlight/texture brushes. Keep the rest as "special weapons" for specific effects.
4. How to Use These 40 Watercolor Brushes in a Basic Anime Coloring Workflow
To visualize clearly, imagine you're coloring an anime character:
Step 1: Sketch & Line
Use 1 line brush with a sharp, slightly soft tip (the set usually includes a few inking brushes mimicking SAI/CSP linework).
After finishing lineart, lock the line layer and switch to coloring underneath.
Step 2: Base Coloring
Choose a transparent watercolor or wash brush, flat-fill each area: skin, hair, clothes, background.
For hair: choose a base color about 10-20% lighter than your target to leave room for layer building.
Step 3: Establish Major Light/Shadow
Use the opaque watercolor brush to divide major light-shadow areas following the light source.
For hair, drag one large shadow area on the dark side of the head; don't rush to divide into individual strands.
For skin, emphasize under chin, under nose, around eyes, under bangs.
Step 4: Blend and Create Bleeds
Use the wet/water stain brush to gently pull shadow edges into light areas, creating natural color bleeding.
Add a few water streaks near hair edges and clothing edges for more natural randomness.
Step 5: Deepen Shadows with Triangles
Choose a shadow brush one shade darker, paint small "triangles" where folds meet: hairline, collar edges, eye sockets, finger gaps.
This "triangle shadow" technique is a popular tip in digital watercolor for creating depth without needing too many colors.
Step 6: Highlight & Texture
Choose a highlight brush with slightly sharp edges, paint light strips on the crown, cheeks, nose bridge, lip edges.
For backgrounds or secondary details, use paper grain/dot brushes to add dry texture.
Step 7: Finishing
Use a soft blend brush to smooth overly harsh areas.
Add 1-2 neon or bright outline strokes using color edge brushes on focal details (eyes, jewelry, magic effects, light effects).
Technical Information
Resource type:BRUSH
File size:N/A
Status:Published
AI Artist AssistantNew
Ideation, color & technique assistant for artists
Affiliate NextGZ
Biến nội dung học tập của bạn thành thu nhập affiliate
Đăng ký miễn phí, lấy link riêng và giới thiệu NextGZ cho người cần học tiếng Trung hoặc Digital Art.
Hoa hồng 10-25% từ membership, khóa học và resource art
Bình luận
0 bình luận
Đăng nhập để tham gia thảo luận cùng cộng đồng!
Đăng nhập ngayĐang tải bình luận...