 Procreate
 Brushes & Tài nguyên




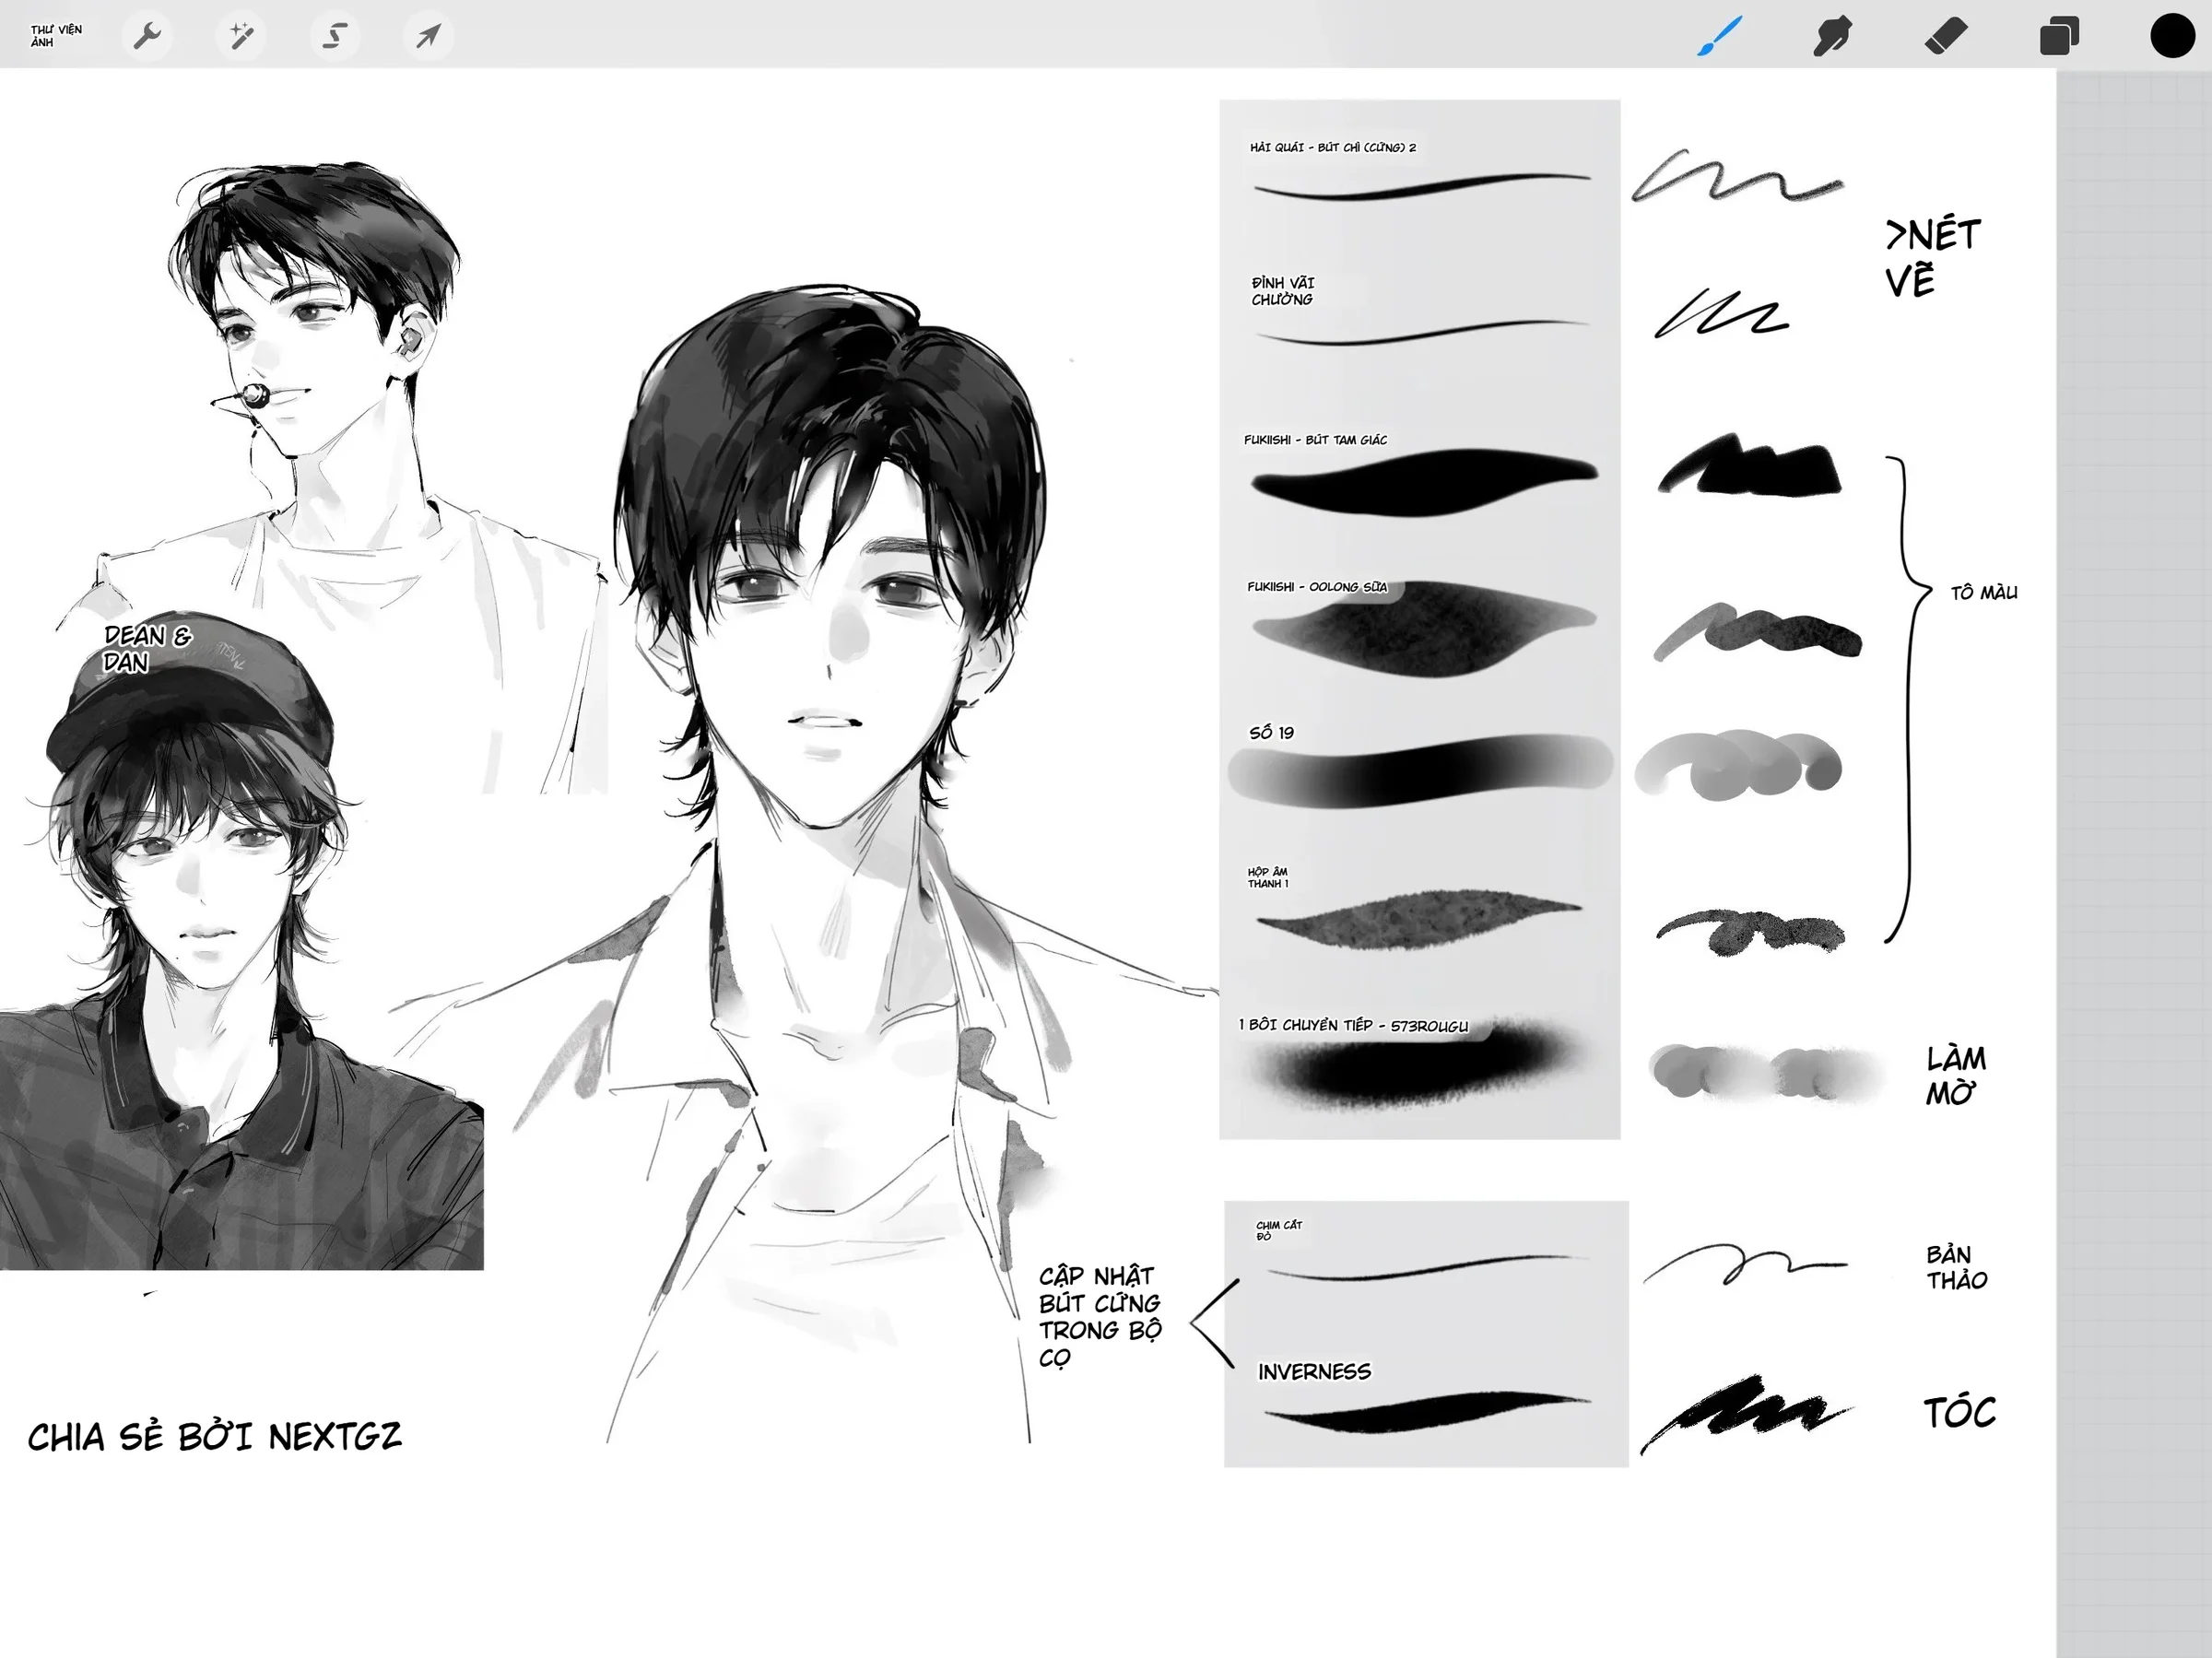
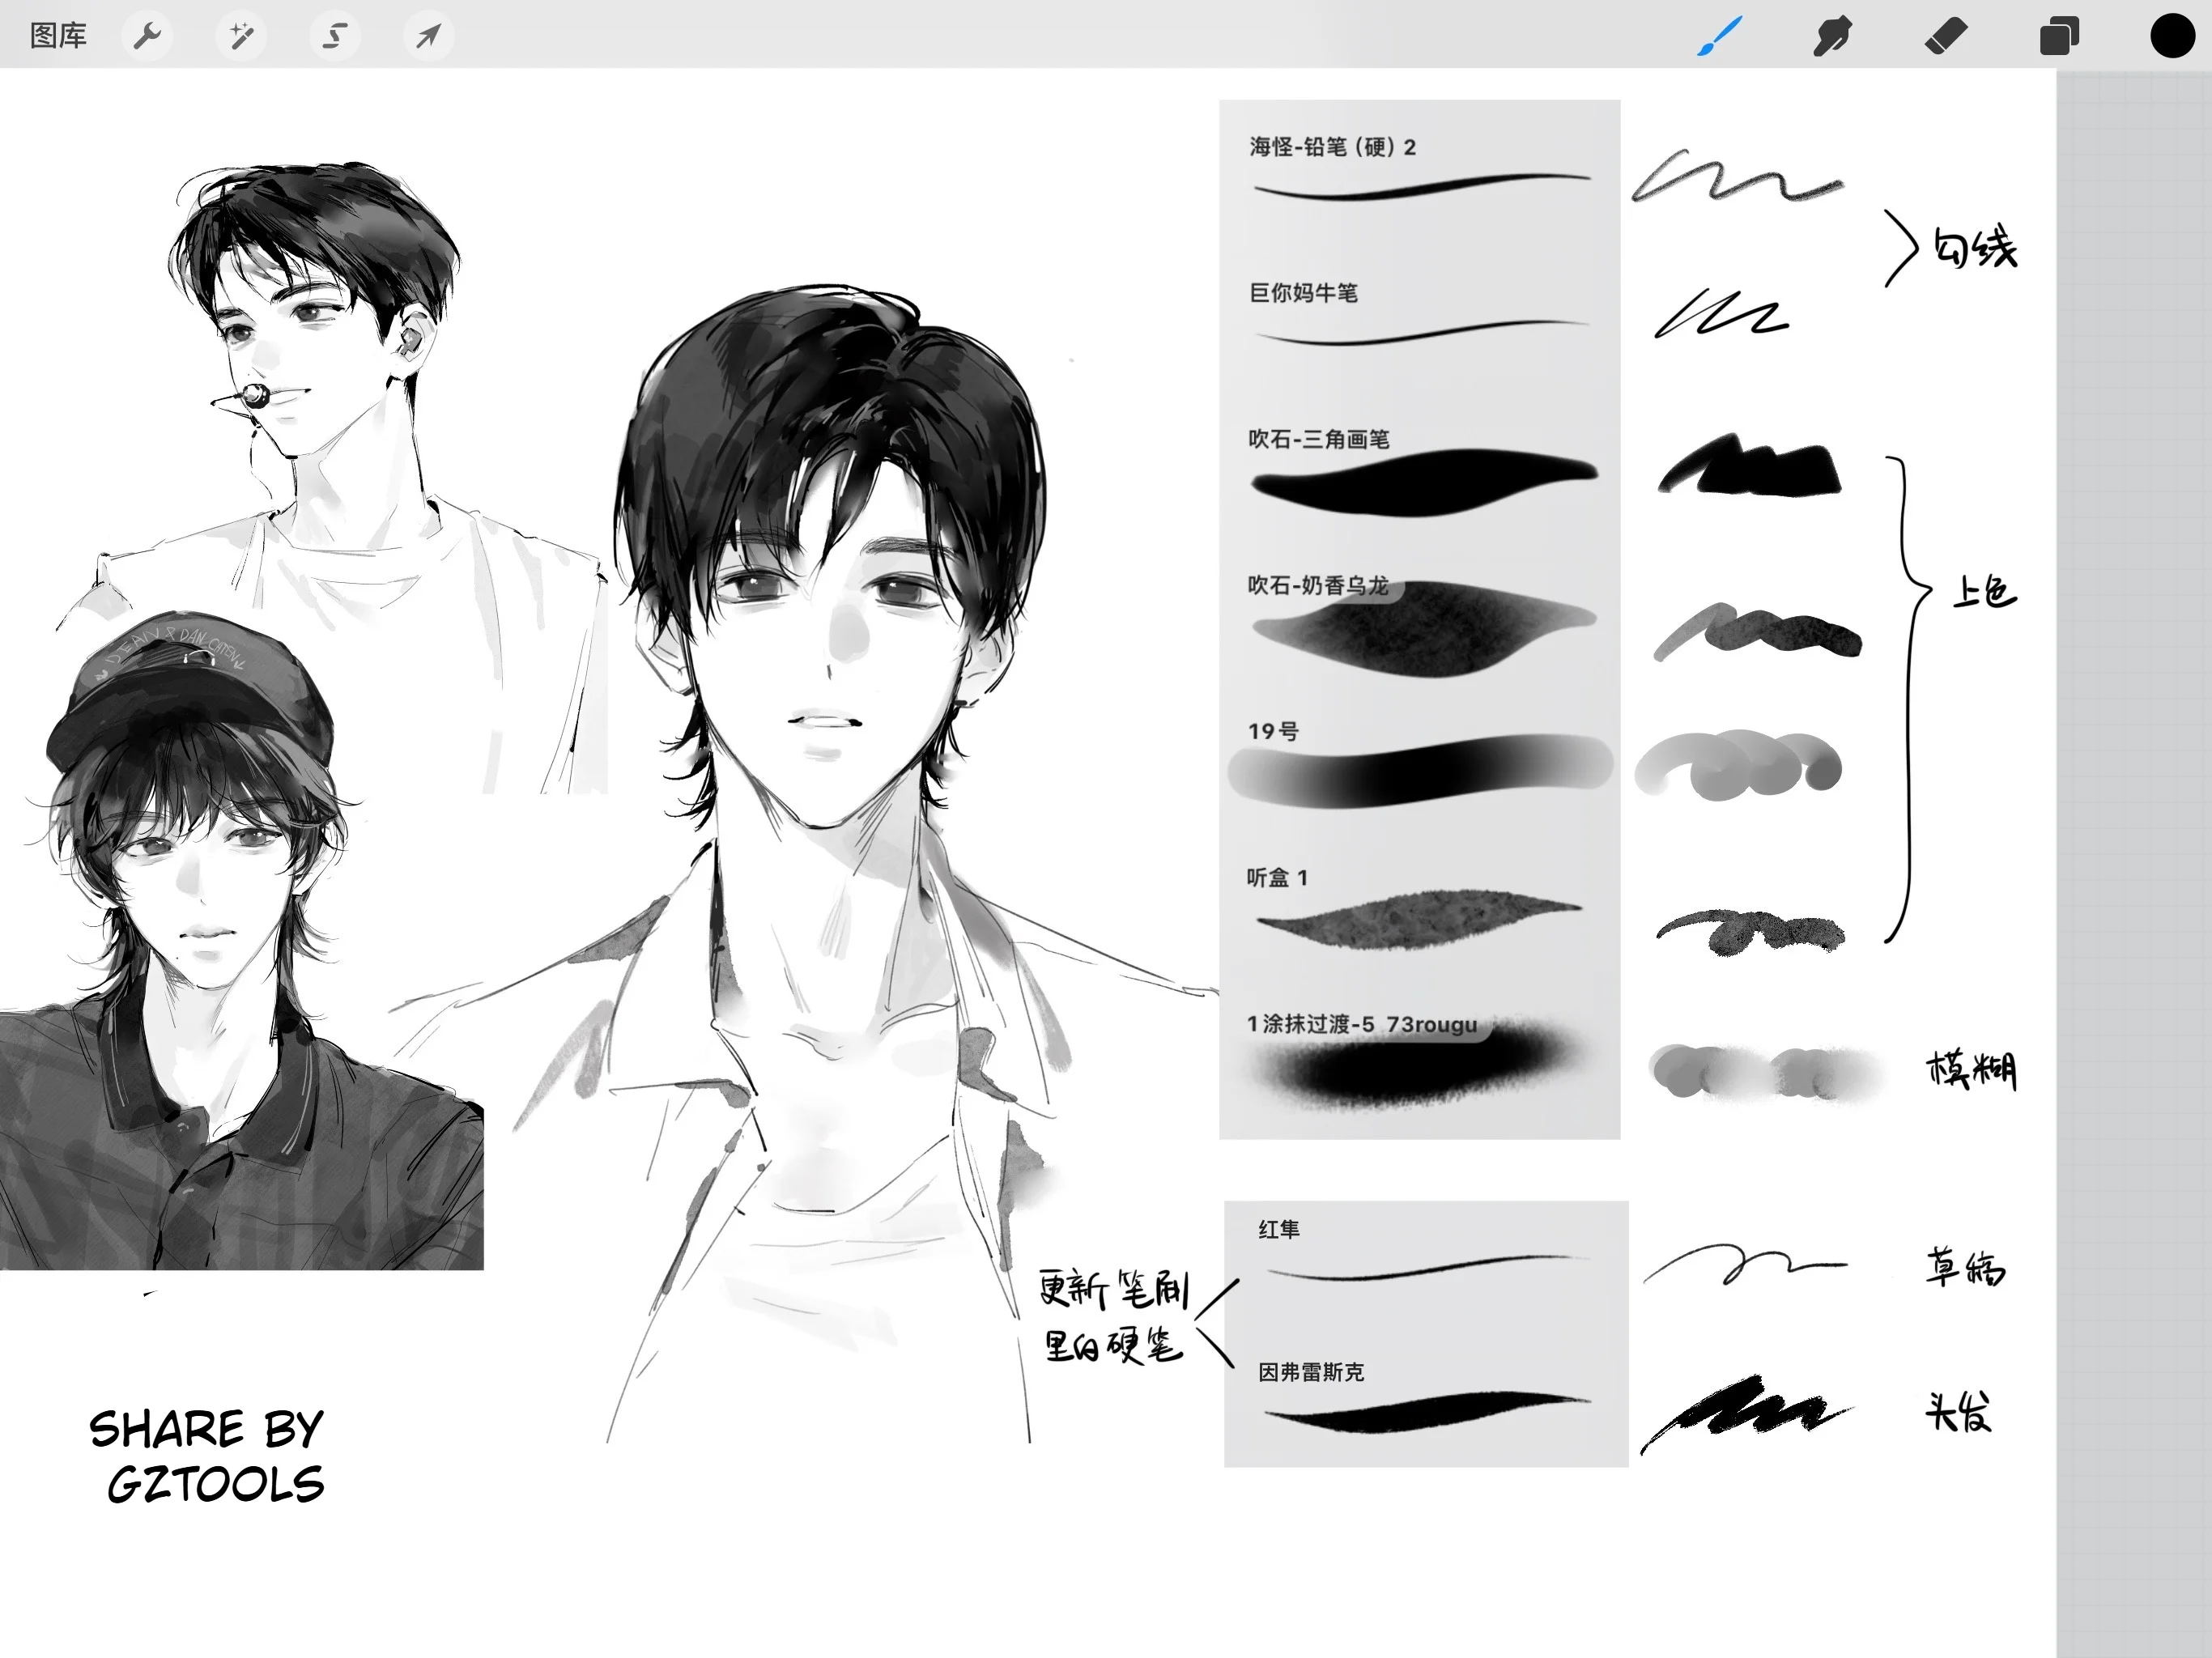
If you guys enjoy doing quick sketch-style black-and-white portraits with clean light and shadow while still keeping that "real pen" feel, then this black-and-white Procreate brush set was made exactly for practicing that. All the portraits in the demo images were drawn using this brush set, from sketching, blocking in forms, to final detail adjustments.
The goal of this brush set is: minimal but high quality. Instead of installing hundreds of brushes and then fumbling around choosing one every time you open Procreate, you only need a group of brushes that covers 80–90% of the workflow – that's more than enough to train your hand and complete a polished piece. This is also the approach many digital artists recommend when you're getting serious about digital painting: pick a few versatile brushes, really understand the characteristics of each one before adding more to your collection.Ctrl+Paint - Digital Painting Simplified
Who is this black-and-white Procreate brush set for?
– You guys who draw male characters, like a casual, everyday vibe with strokes that are a bit loose but not too "messy."
– Beginners transitioning from traditional drawing to Procreate, needing a brush set that feels close to pencil and traditional ink pens.
– Those practicing reading light and shadow, wanting to focus on masses rather than getting lost in color details.
– You guys who need a compact brush set to take your iPad to a café, sketch a few portraits on the go during the day.
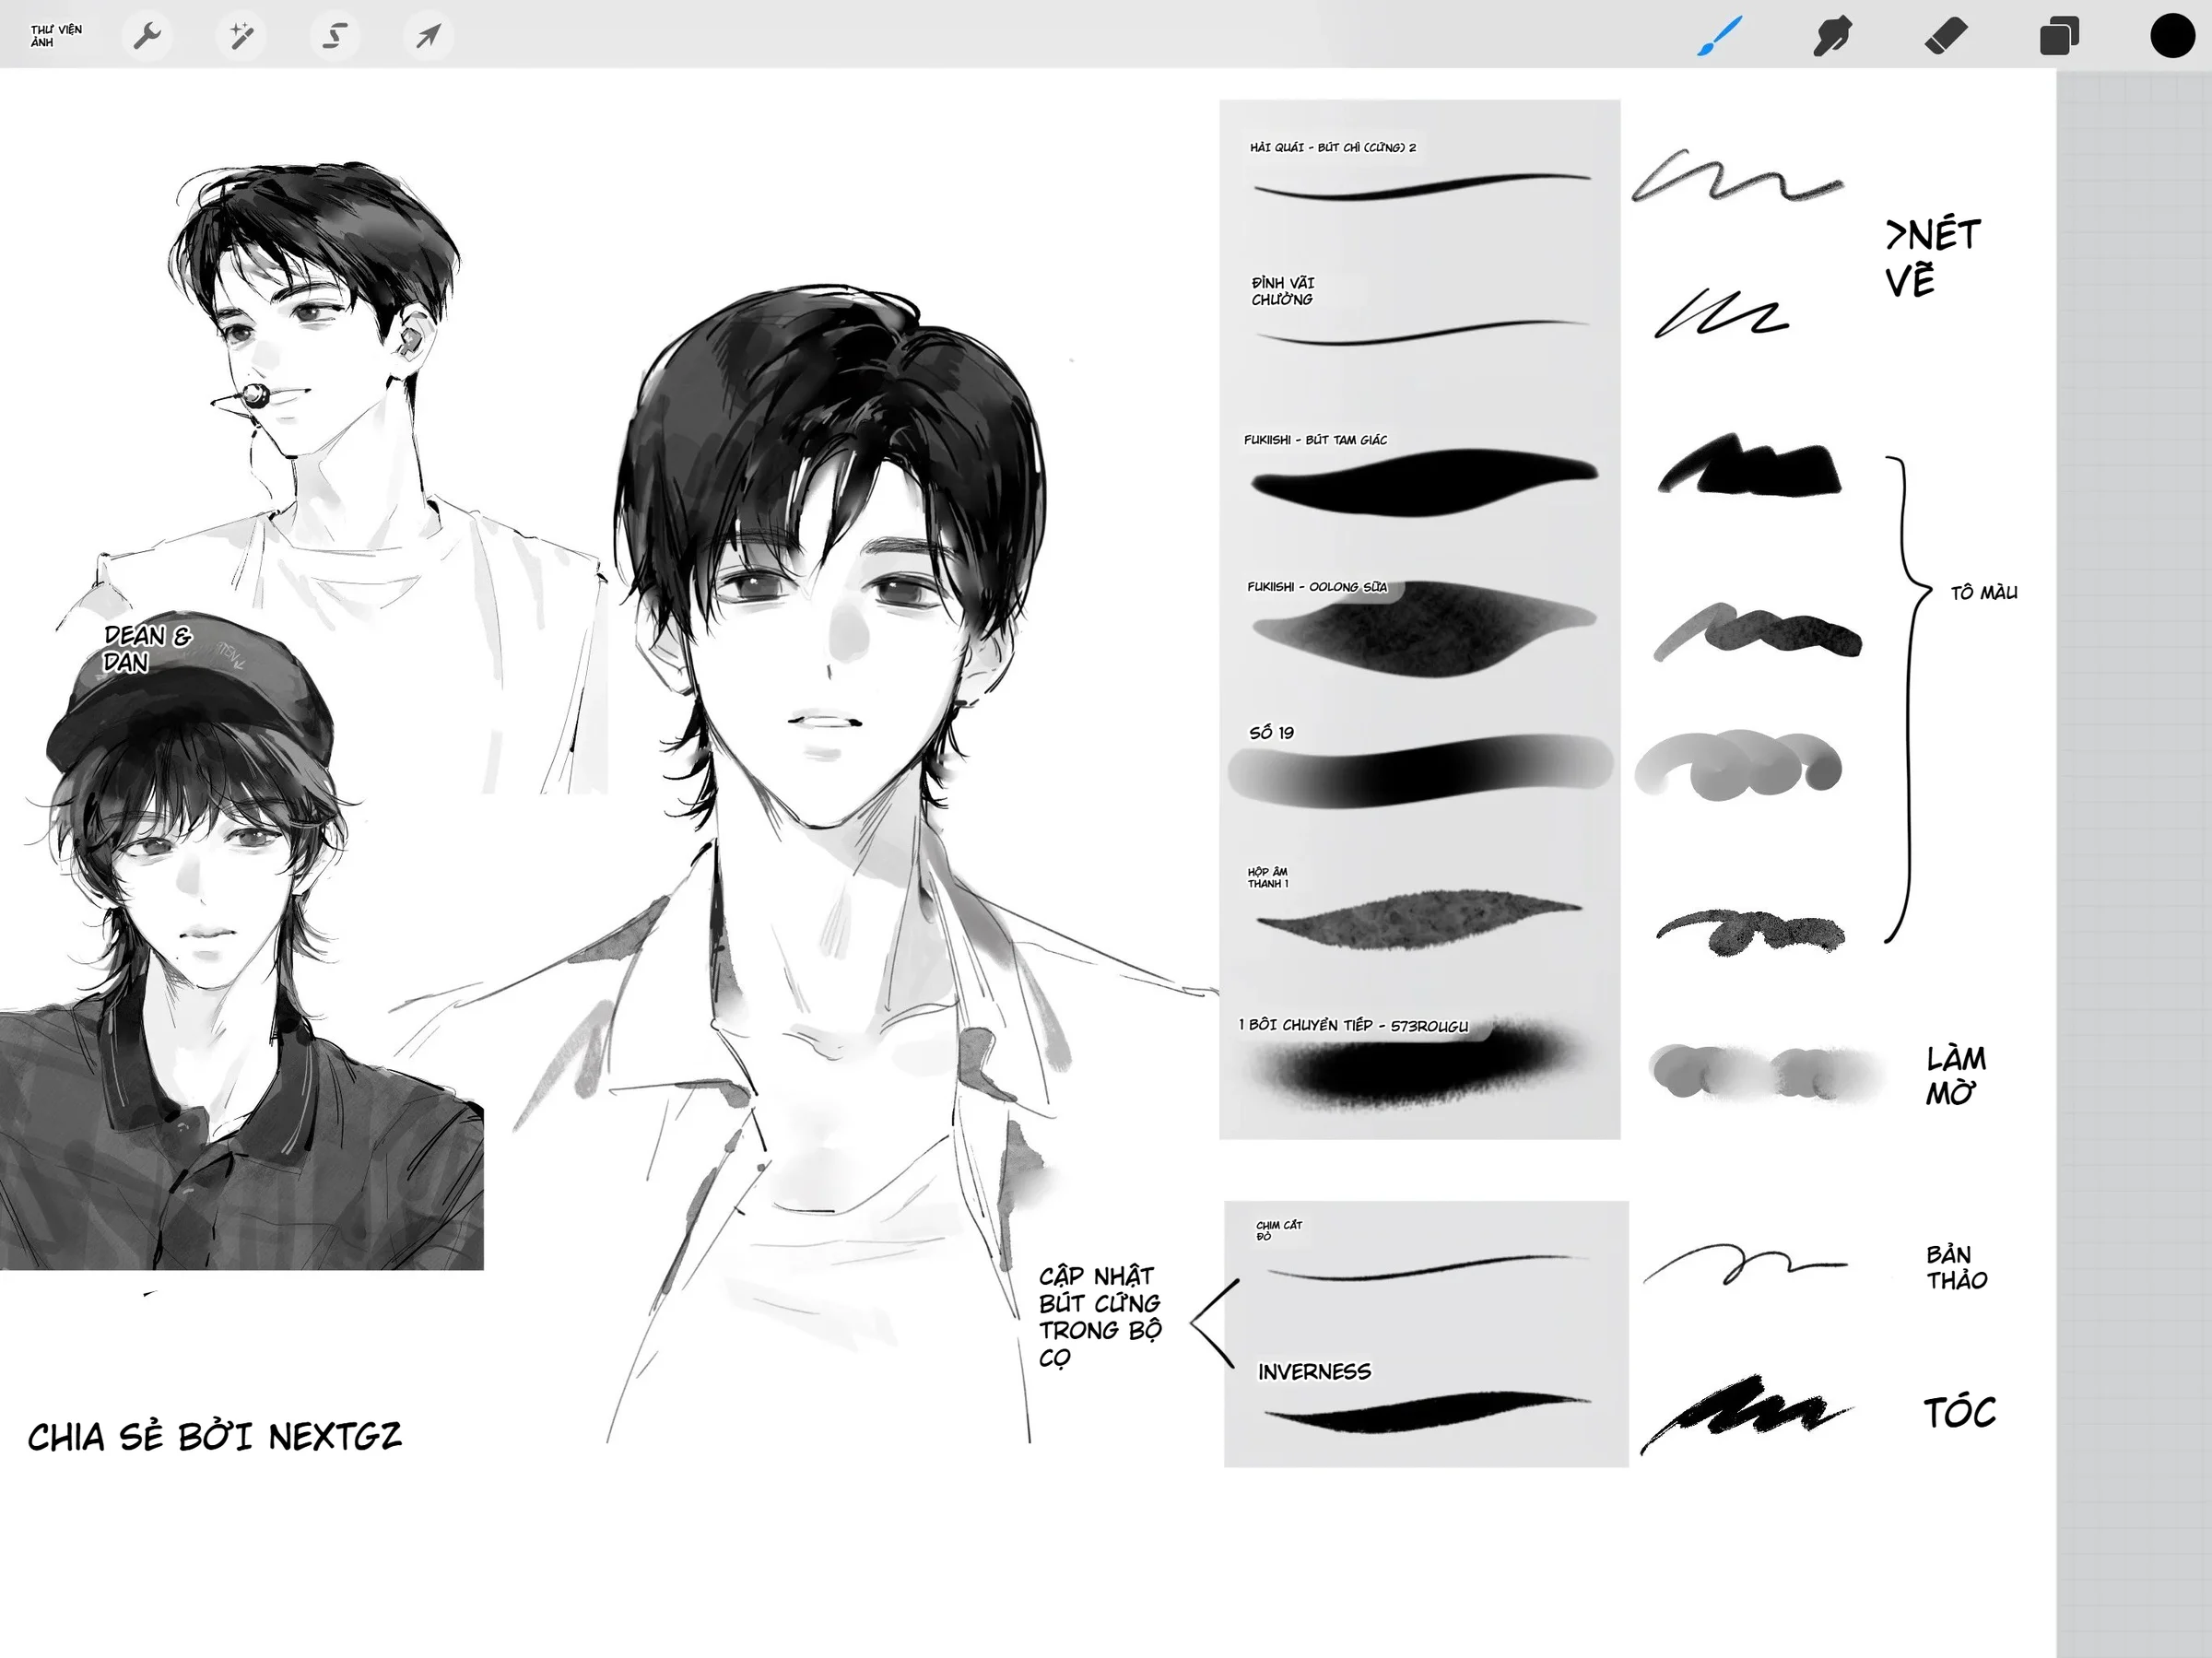
What groups are inside this brush set?
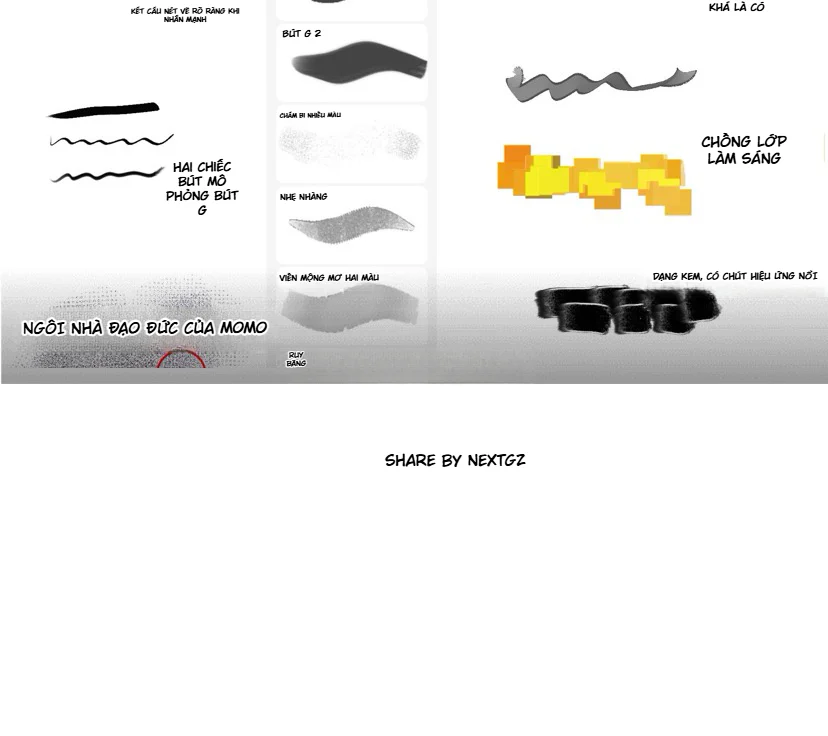
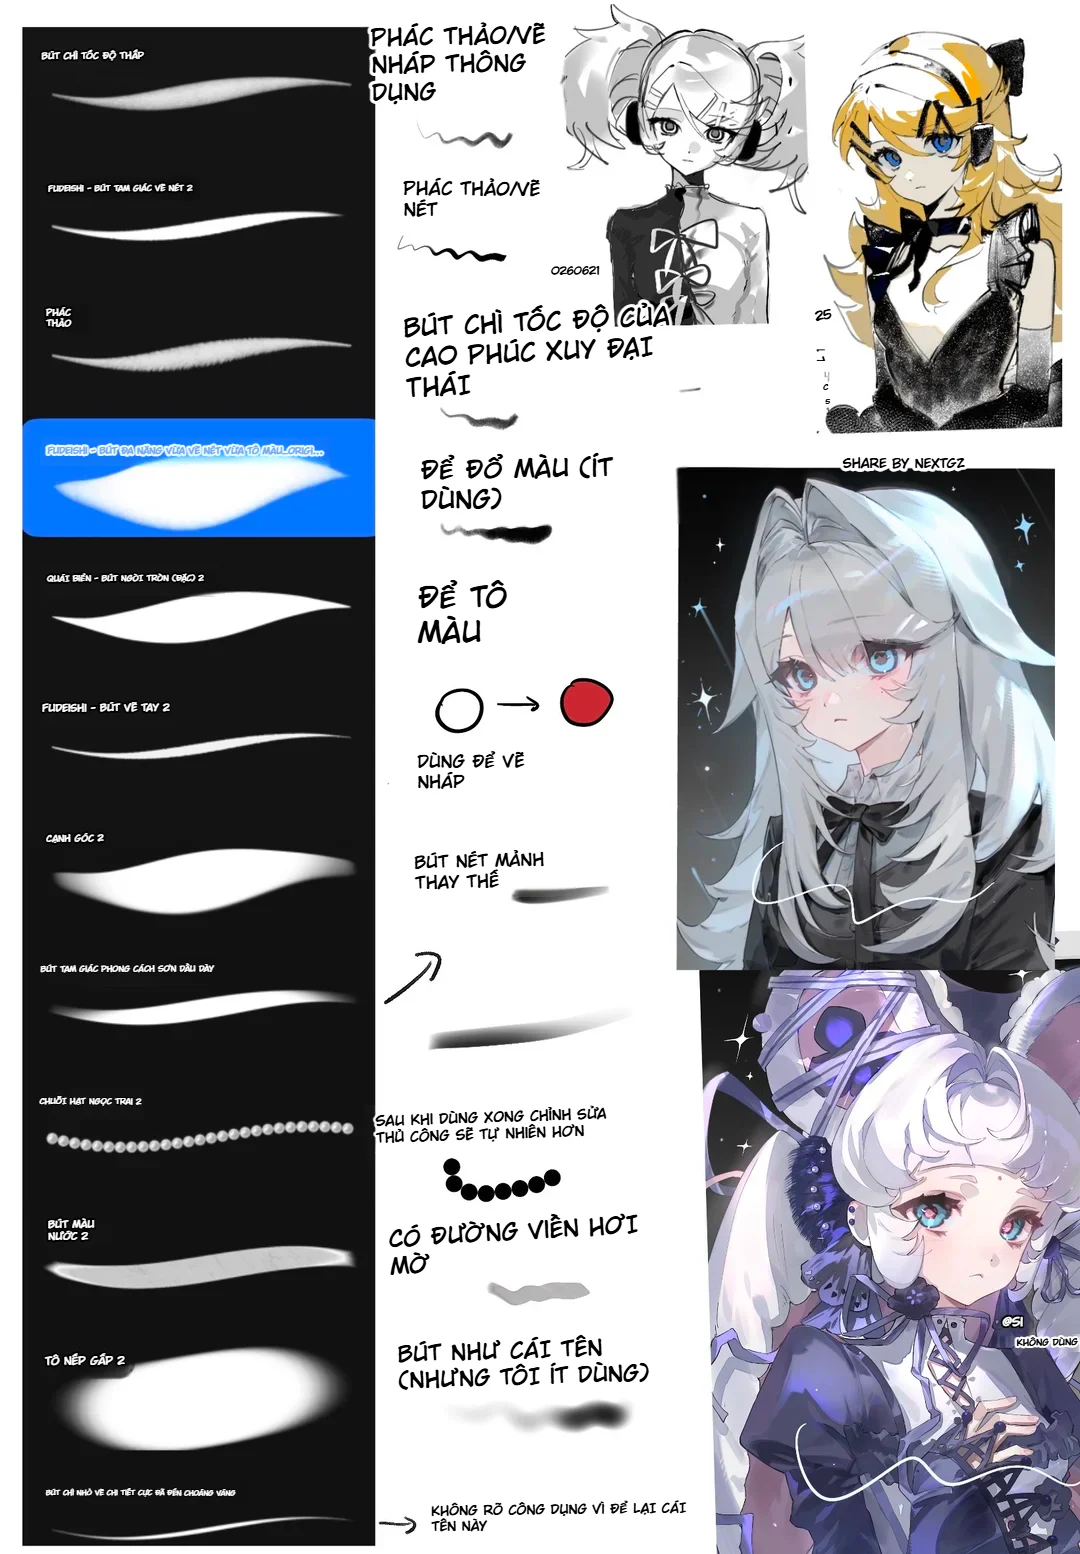
Based on the demo, I've divided this set into 3 main groups so you guys can easily understand and use them:
Line Art Brushes
– Fine strokes with good pressure sensitivity: press hard for thick lines, lift for thin lines, great for constructing facial features, hair, collars.
– Used for main lines, form boundaries, clothing folds, eye – nose – mouth details.
– Strokes aren't too "smooth and shiny," they keep a slight jitter so the drawing doesn't feel vector-like.Blocking & Fill Brushes
– Thick nib, creates soft gray masses, used for dividing large light and shadow areas on the face, hair, clothing.
– Some brushes have a slight grain texture, perfect for shading hair, collars, and shadows under the chin.
– Especially suitable when you want to paint using the "masses first – details later" approach, checking light and shadow values as you go.Texture, Blending & Erasing Brushes
– Soft-edged brushes, used to blend shadow edges, soften hard lines between light and dark areas.
– A few brushes have a grainy effect, good for lightly dabbing into dark areas to make skin and clothing surfaces less flat.
– Can also be used as soft erasers to fix mistakes without leaving harsh correction marks.
With such clear grouping, this brush set helps you build the habit of "choosing a brush based on the task": constructing – blocking – finishing. This is extremely important for those who want to optimize their drawing workflow and avoid using a different brush for every step, which makes things hard to control.
How to install the brush set into Procreate
This part is for the newbies:
Download the attached .brushset file from the post to your device.
Open the Files app on your iPad and find where the file is saved.
Tap the .brushset file, Procreate will automatically open and import it into the Brushes panel.
In the brush panel, you'll see a new folder with the same name as the brush set – just select it and start drawing.
If you want to customize further (pressure sensitivity, stroke smoothing, etc.), you can go into Procreate's Brush Studio to adjust Shape, Grain, and Stabilization for each brush to match your hand feel.Procreate Help Center
Suggested black-and-white portrait workflow with this brush set
Here's a basic workflow, you guys can refer to it and adjust to fit your own habits:
Step 1 – Sketch the composition and proportions
– Use a fine line brush with opacity around 40–60%, quickly block in the head shape, eye line, nose line, and hair frame.
– Don't get into details too early, focus on getting the big-to-small proportions right first.
Step 2 – Divide the major light and shadow areas
– Switch to a blocking brush, pick a neutral gray.
– Fill in all the dark areas: eye sockets, under the nose, under the lip, neck, and shadowed parts of the hair.
– Keep a few white areas as main highlights (e.g., bridge of the nose, cheekbones, chin tip).
Step 3 – Define the facial forms
– Use the line brush again but with thicker strokes to emphasize the "backbone" lines of the forms: nose contour, eyelids, hairline touching the face.
– Adjust stroke thickness based on the weight of the form: shadowed areas can have thicker lines, well-lit areas thinner lines.
Step 4 – Blend masses and add texture
– Take a soft/texture brush, gently pull between light and dark areas for smoother transitions, avoiding harsh edges.
– Use a grainy brush to dab extra texture onto the hair, clothing, and background to give the piece a more "atmospheric" feel, less flat.
Step 5 – Zoom out and check the overall piece
– Zoom out to check the entire drawing: does the focus land on the face? Is the shadow area too heavy on one side?
– Finally, use a fine line brush to add a few "key" details like eyelashes, lip corners, collar lines… then stop in time, avoid overworking it and making the piece heavy.
Practice tips with the black-and-white brush set
– In one session, use a maximum of 3–5 brushes from the set, no external brushes, so your hand gets familiar with the characteristics of each one.Ctrl+Paint - Digital Painting Simplified
– Practice speed by setting a 20–30 minute timer per portrait, focus on capturing light/shadow and expression first, details later.
– Vary your references: alternate between real photos, movie stills, idols, friend photos to practice different face types.
– Once you're comfortable with this brush set, you can add a few color brushes to gradually transition to color painting while still keeping that black-and-white mass-thinking foundation.
Complete the following requirements to unlock:




Bình luận
0 bình luận
Đăng nhập để tham gia thảo luận cùng cộng đồng!
Đăng nhập ngayĐang tải bình luận...