 Digital Painting






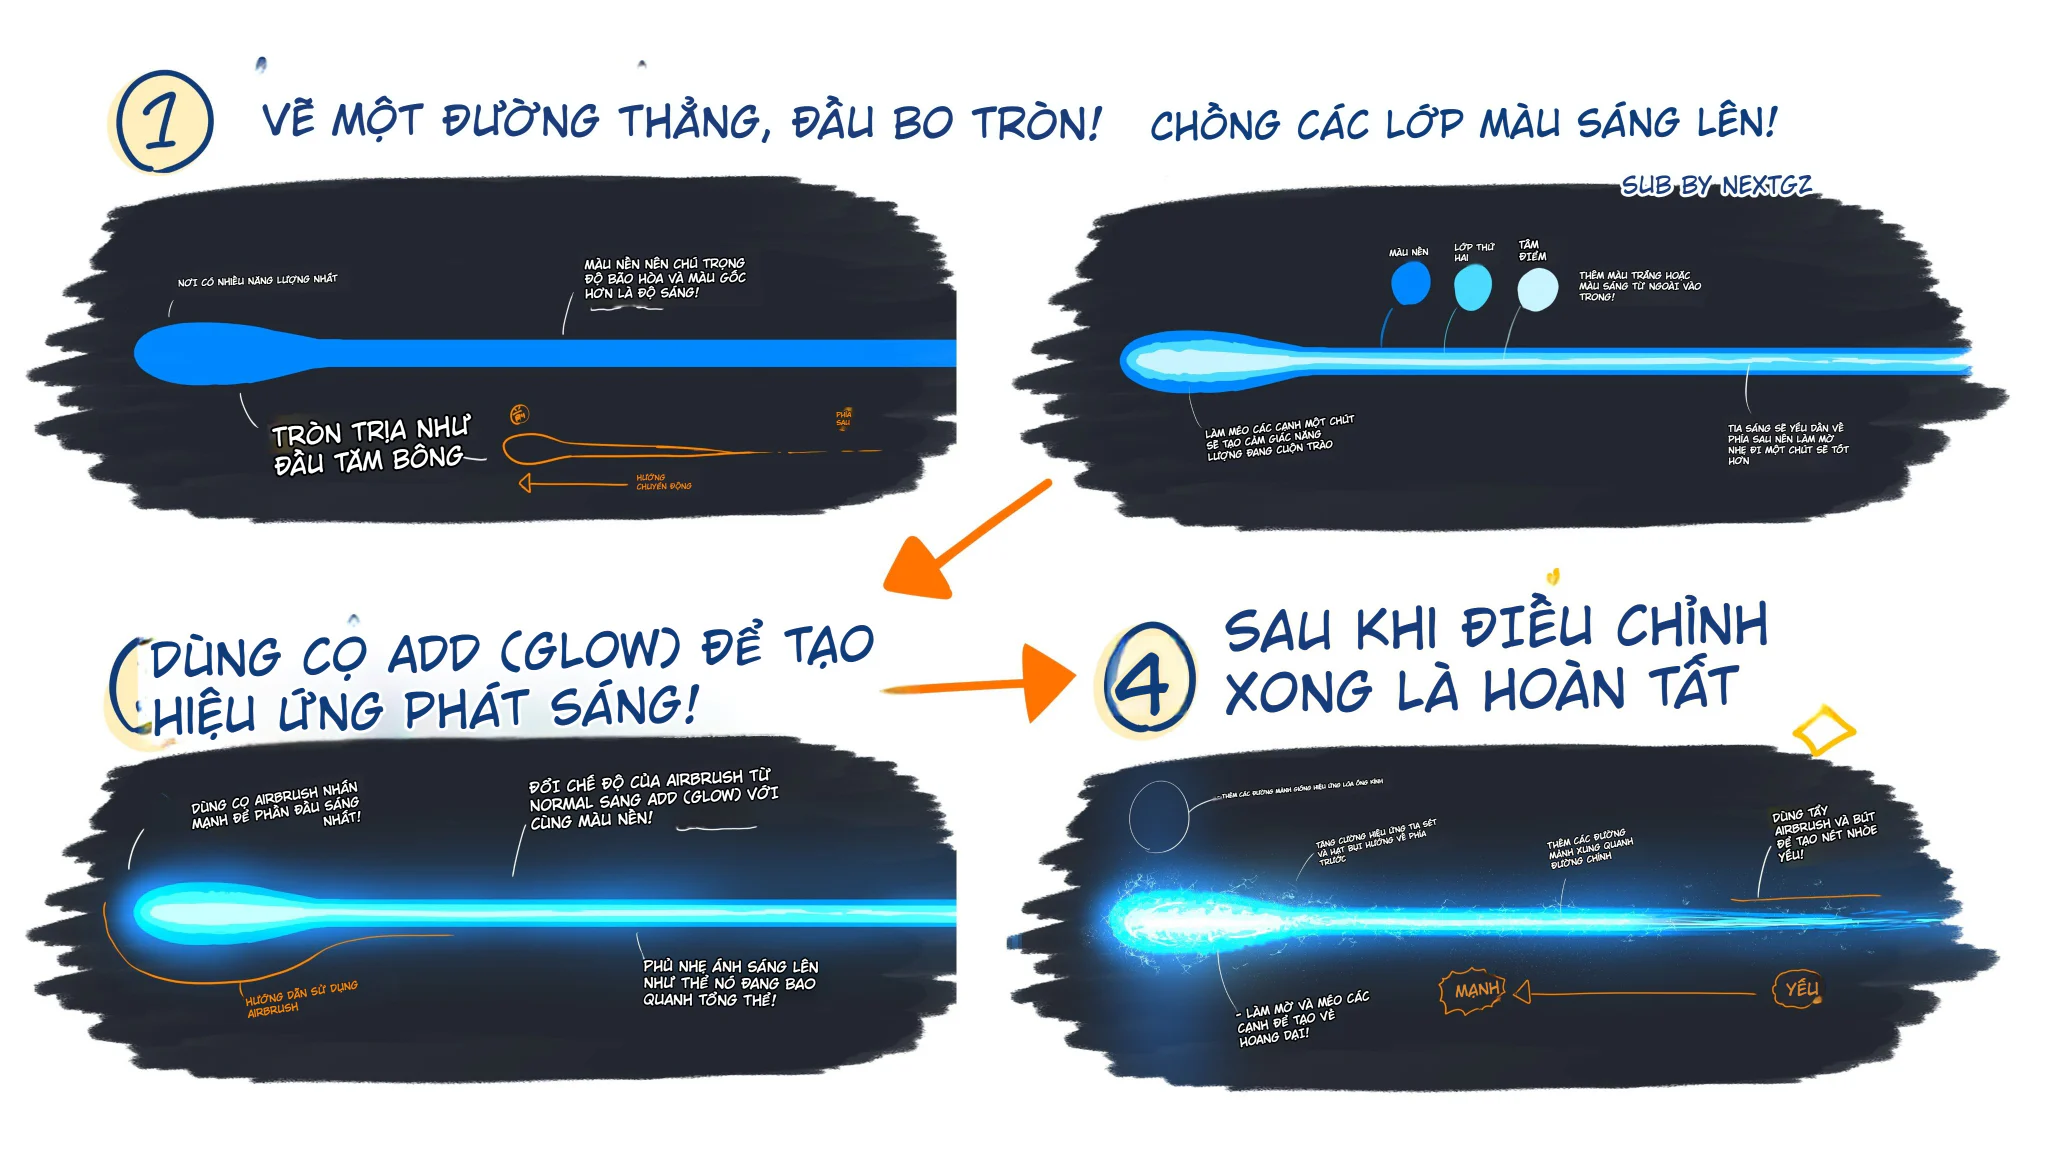
A convincing light beam is not created by drawing a blue line and then blurring the entire thing. A beautiful glow effect needs a clear structure: a moving silhouette, a bright core, surrounding color layers, a diffused halo, and energy details distributed with purpose.
This guide illustrates a four-stage process to create a blue light beam: constructing a straight stroke with rounded ends, stacking increasingly bright color layers, using Add or Glow mode to create a luminous halo, then adding energy lines and small details to finish. The following article analyzes the entire visual logic of the process, while expanding it into a method applicable in IbisPaint, Procreate, Clip Studio Paint, Photoshop, and similar digital painting software.
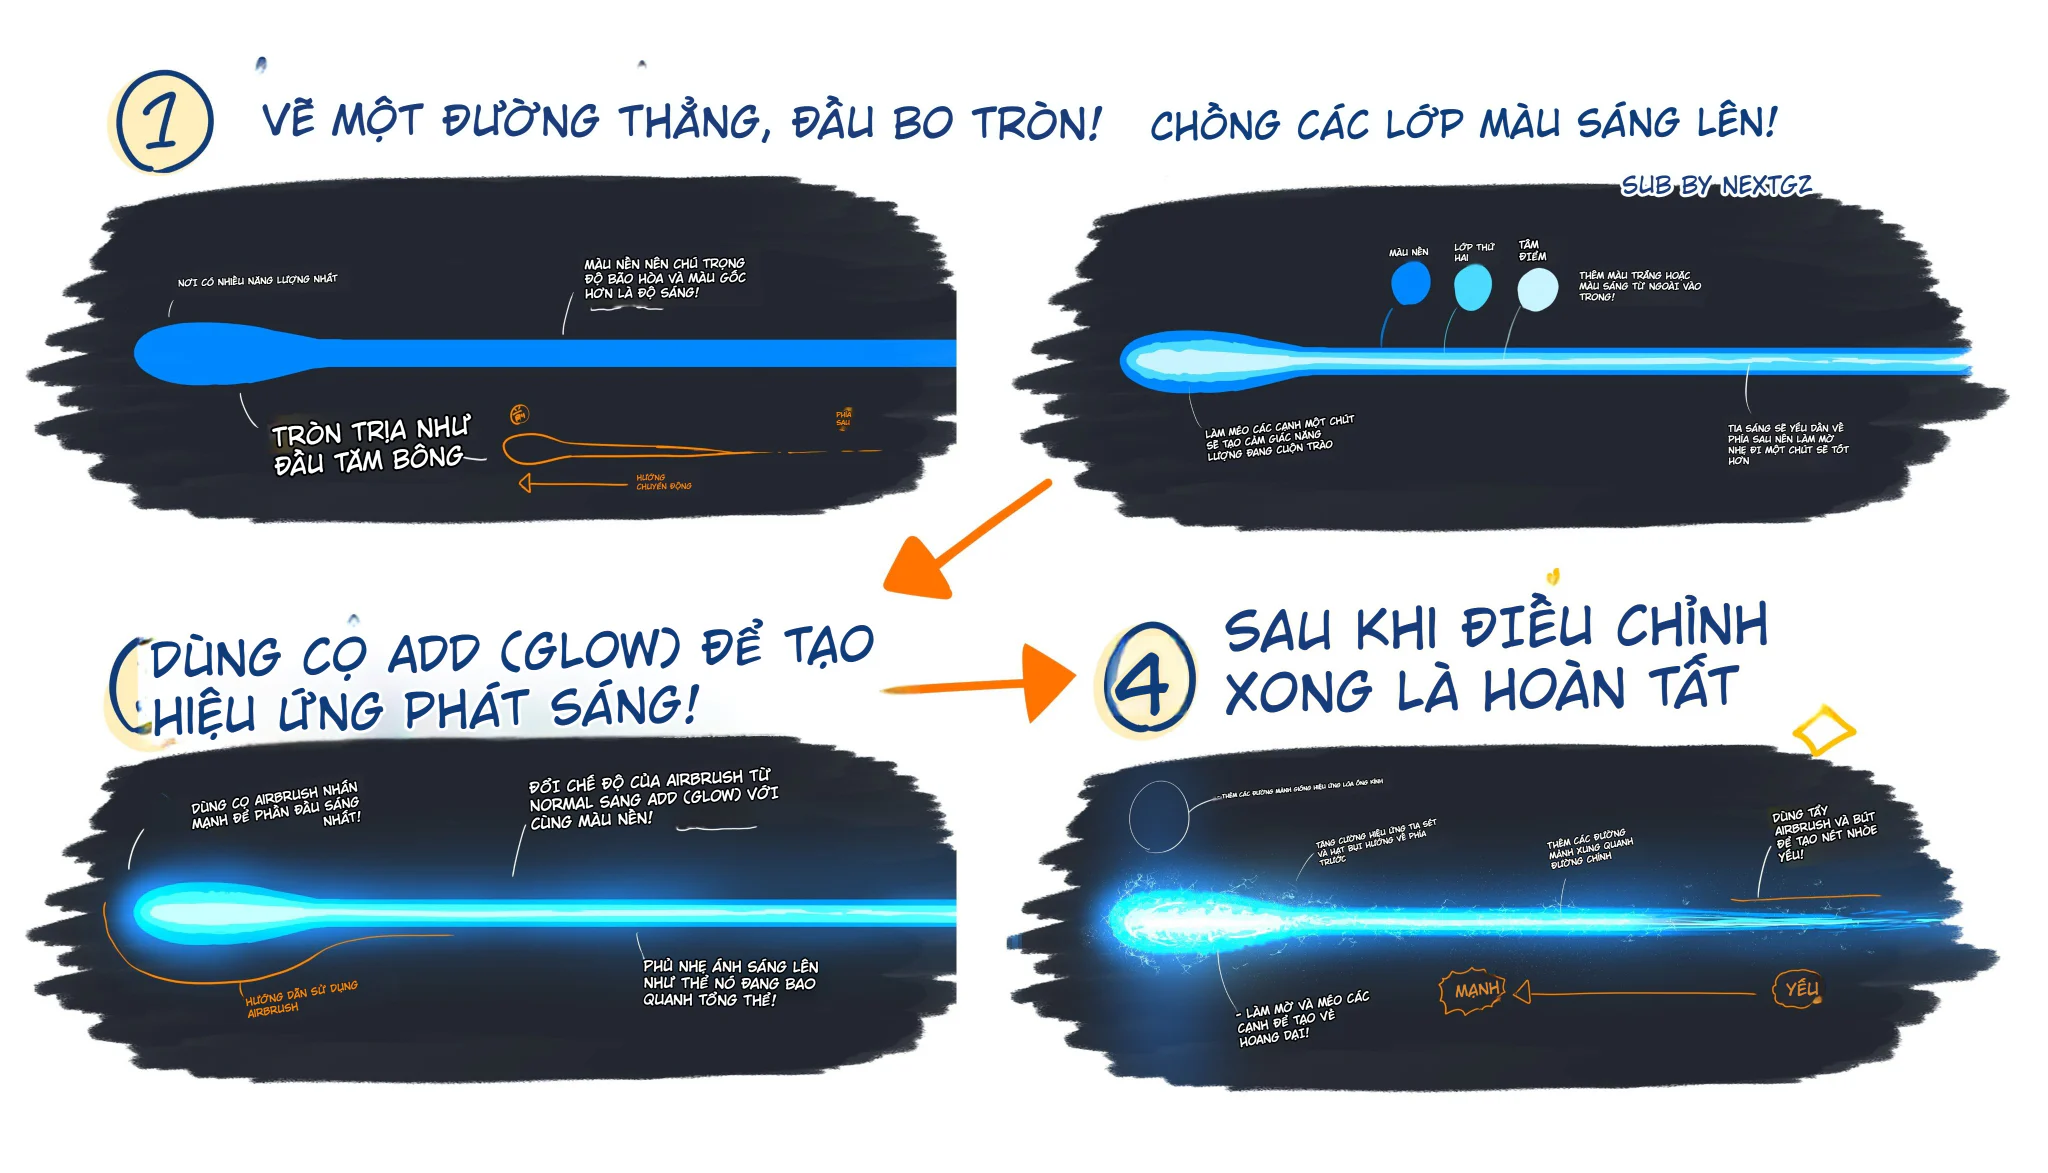
What components is the effect in the image built from?
Looking at the entire guide chart, the finished light beam can be divided into five visual layers. Understanding these layers is more important than precisely copying every brush stroke.
- Main silhouette: a nearly straight beam body, with a rounded, larger head and a narrower tail.
- Base color: dark blue, determining the overall shape and acting as a buffer zone for the light.
- Intermediate light layer: cyan or teal blue, inside the base layer and narrower.
- Core light: very pale blue-white, the area of highest intensity.
- Halo and energy details: soft glow, electric fibers, small beams, light particles, and broken outlines.
This order creates a sense of light having a center, thickness, and energy. Without a base layer, the beam easily looks thin and fake. Without a white core, it only resembles a colored streak. Without a halo, the beam does not affect the surrounding space.
Core principle: strongest light at the center, fading outward
In the image, the color layers are stacked from dark to light. The outer layer is wider and darker; the inner layer is narrower and brighter. This is a common structure in lasers, energy swords, magic, and electrical beams.
You can imagine the light beam in three zones:
- Core zone: small, nearly white, with relatively clear edges.
- Bright body zone: cyan or light blue, wider than the core.
- Diffusion zone: soft blue, low opacity, spreading into the background.
Intensity should not be uniform along the entire length. The emission point or impact point is usually brightest; the beam body is more stable; the tail or area far from the source can be narrower, fainter, and gradually less detailed.
Step 1: Draw a straight line and round the beam's head
The first stage in the image uses a simple blue shape. The beam body runs horizontally, while the left end is rounded like a cotton swab tip. This is a silhouette design step, not yet a light-creation step.
1. Determine the direction of movement
Before coloring, establish where the beam comes from and where it goes. In the image, the large end is on the left and the body extends to the right, so the viewer understands energy is emitted from the left and travels horizontally.
For diagonal or curved beams, first construct a centerline. All subsequent light layers must follow this line. If each layer shifts in a different direction, the beam will appear shaky and lack a sense of force.
2. Create a volumetric emitting head
The beam's head should not be a circle rigidly attached to the body. Stretch it into a teardrop or bullet shape: the front rounded, the back narrowing to connect with the body. This method creates a sense of energy being compressed at the head then launched outward.
3. Control beam body width
The beam body can be nearly straight but does not have to be perfectly uniform. A slight variation in width makes the effect more natural. However, at the construction stage, keep the silhouette clean and readable; flickering, broken edges, and energy noise will be added later.
4. Choose a base color based on saturation and brightness
Notes in the image emphasize that the base color should prioritize saturation and brightness over simply picking the right shade of blue. A color too dark will struggle to glow when layering; a color too bright leaves insufficient room for the white core. Choose a relatively saturated blue that is still noticeably darker than the cyan and white in later steps.
Step 2: Stack bright color layers from outside to inside
The second stage builds the light's thickness using three color groups: the blue base color, a second cyan layer, and a blue-white focal point. The layers do not have the same width; the further inward, the narrower and brighter.
1. Keep the base layer as an outline
Do not completely cover the blue base with the cyan layer. Leave a dark blue border on both sides. This border helps separate the light beam from the dark background and makes the cyan layer appear brighter by contrast.
2. Narrow the intermediate light layer
The cyan layer should sit in the middle of the beam body, wider than the white core but narrower than the base layer. At the beam's head, you can make the cyan layer slightly thicker to emphasize concentrated energy. As you pull toward the tail, gradually narrow it.
3. Place the white core at the strongest area
The white or blue-white core is the point of highest intensity. It is not necessary to use pure white along the entire length. Keep pure white at the emission head, then gradually transition to a very pale blue on the body to give the beam depth and avoid a cut-out digital line feel.
4. Create controlled imperfections
The guide image shows that the core is not perfectly ruler-straight. A few small oscillations give the beam a feeling of vibration or motion. However, the oscillation must be much smaller than the overall width; if too wavy, the effect will turn into electricity or lightning instead of a focused light beam.
5. Soften the head
At the emitting head, the edges of the layers should blend together more softly than on the body. This is the area of accumulated energy, so wider color transitions and a larger halo make sense. On the body, the core can be sharper to maintain a sense of speed.
Step 3: Use Add or Glow to create a luminous halo
After the shape and color are stable, the guide chart switches to Add or Glow blending mode. The purpose of this step is not to turn the entire beam into a blurry mass, but to create light spreading around the existing core layers.
How does Add/Glow mode work?
In many software programs, this mode adds brightness and color values to the layers below. Name may vary:
- IbisPaint: Add, Add Glow, or equivalent mode depending on version.
- Clip Studio Paint: Add (Glow).
- Photoshop: Linear Dodge (Add), Screen, or Color Dodge depending on effect.
- Procreate: Add, Screen, or Color Dodge.
Add is usually stronger and burns brighter faster than Screen. Therefore, lower the opacity and build the effect with multiple thin layers rather than using a single layer at maximum intensity.
1. Create a large glow layer with an airbrush
Create a new layer below or above the beam group, set it to Add/Glow mode, then use a soft airbrush. Spray a wide blue halo around the beam's head, then gently drag along the body.
The large halo should have low opacity. It helps the beam interact with the background without obscuring the shape. If the background is an object or character, the glow can cast blue light onto adjacent surfaces.
2. Create a local glow at the emission head
The illustration emphasizes the head with a stronger bright area. Use a smaller airbrush, with cyan or blue-white color, sprayed concentrated around the head. This area can be many times brighter than the body because that's where energy accumulates.
3. Switch the brush from Normal to Add
One method in the image is to change the airbrush itself from Normal to Add/Glow while keeping the same base color. When adding light, the blue base becomes a more radiant halo while still in the same color family, thus the effect stays less off-tone.
4. Apply light along the direction of propagation
Do not spray a uniform round halo around the entire beam. The light should follow the shape and direction of movement. At the head, the halo can be round and large; on the body, the halo should stretch out; toward the end, it becomes smaller and weaker.
5. Preserve sharp edges
A beautiful light beam needs both sharp and soft parts simultaneously. The white core, some cyan lines, and a few energy edges must remain clear. If everything is blurred, the beam will look more like a blue mist streak than concentrated energy.
Step 4: Finish with energy fibers, light particles, and strength-weakness
In the final stage, the illustration adds many small electrical lines, light particles, and uneven outlines. This is the step that transforms a clean light bar into an energetic effect with rhythm.
1. Enhance the emission or impact area
The left end is brightly lit, with many noisy details and a thick glow. If the beam is used to hit a target, this area can be understood as the emission point or impact point depending on composition. Either way, this is the strongest point and requires the highest density of detail.
2. Create thin electric fibers
Use a small, hard-edged brush to draw short cyan or blue-white lines running around the core. The lines should be broken, change direction slightly, and not be perfectly parallel. You can add a slight glow to some fibers, but not all need to be equally bright.
3. Distort edges purposefully
The guide chart notes blurring and distorting edges to create a sense of energy. Alternate between three edge types:
- Straight and clear edges on the stable body part.
- Slightly vibrating edges in areas where energy escapes.
- Completely lost edges inside the halo at the emission head or overly bright areas.
4. Distribute details from strong to weak
The density of electric fibers, light particles, and glow should not be uniform. Concentrate them at the emission head, gradually decreasing along the beam's direction. This "strong-weak" rule helps the viewer instantly recognize the direction and source of energy.
5. Use airbrush and line brush for two different roles
The airbrush creates diffused light; the line brush creates structure and detail. Do not use the airbrush to paint the entire effect, and do not use only hard brushes. The combination of soft and sharp is what creates a glowing sensation.
Suggested layer order
An easy-to-control layer structure can be arranged from bottom to top as follows:
- Dark background or scene background.
- Large blue glow, Add/Screen mode, low opacity.
- Blue base silhouette of the beam.
- Intermediate cyan layer.
- Blue-white core.
- Local glow at the emission head.
- Electric fibers and energy lines.
- Light particles, debris beams, and small details.
- Cast light onto surrounding objects or characters.
- Overall color adjustment layer.
Group the layers into a folder for easy movement, transformation, or duplication of the effect. When changing the beam's direction, you can transform the entire group instead of editing each layer individually.
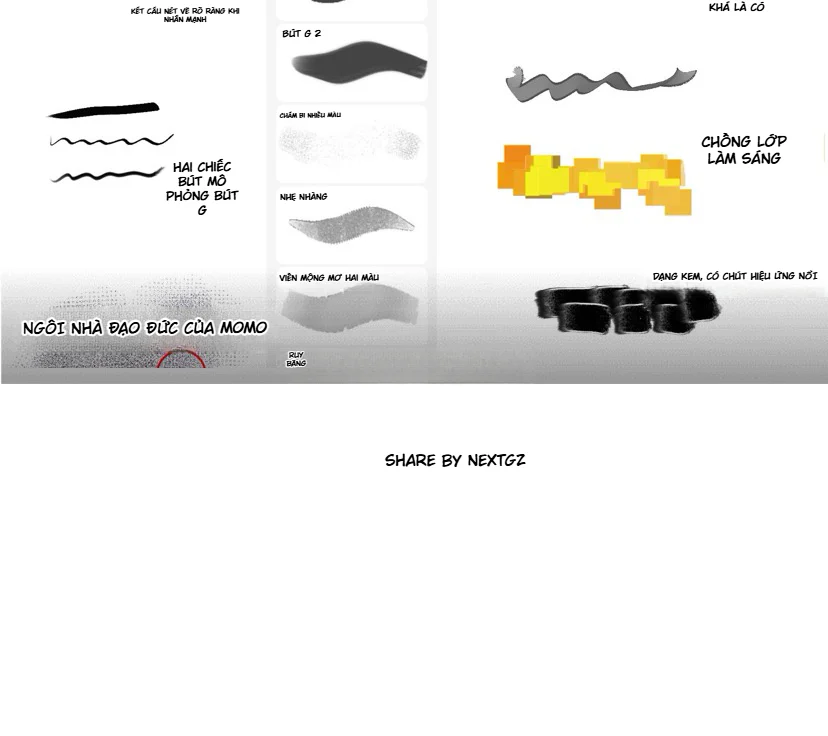
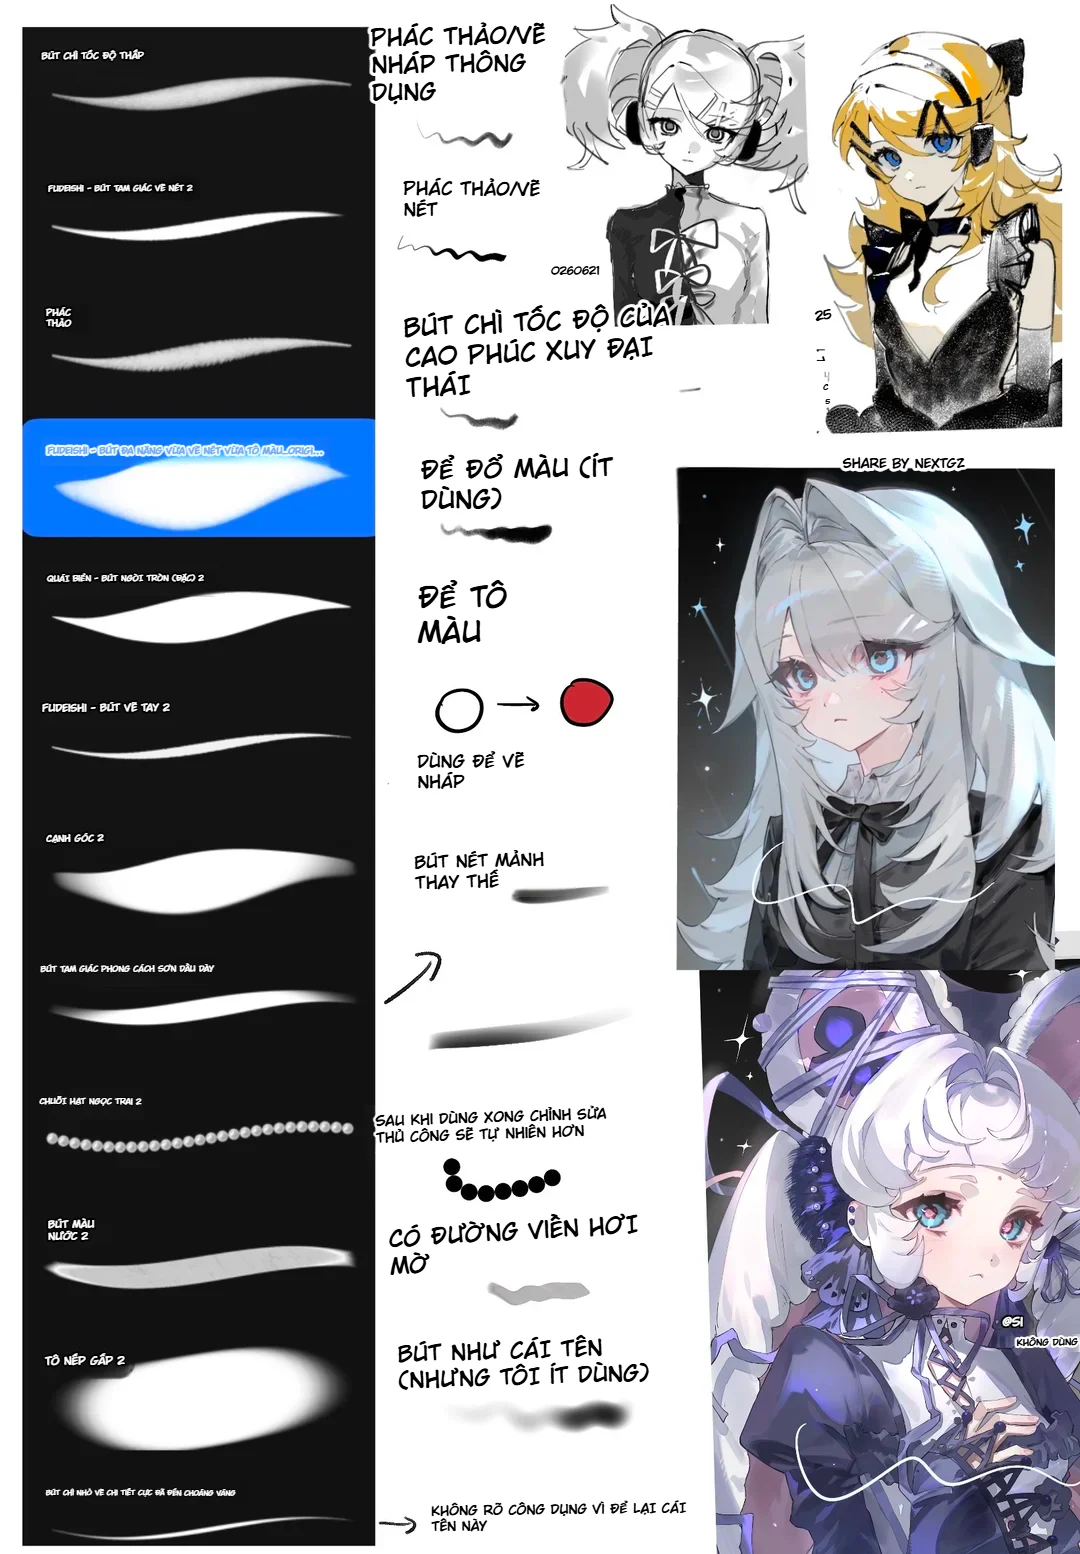
--- ---Setting up practice brushes
The parameters below are practice suggestions, not mandatory numbers in the image. Adjust according to your canvas size and software.
Blocking-in brush
- Hard round or pen with a relatively hard edge.
- High opacity for a clean silhouette.
- Moderate stabilization to keep the beam straight.
Glow brush
- Soft airbrush, low hardness.
- Low to medium brush opacity.
- Use multiple light passes instead of one heavy pass.
- Create at least two sizes: a large halo and a local glow.
Electricity and detail brush
- Small pen, hard edge.
- Enable pressure size so the stroke tip varies.
- You can use a texture or scatter brush for light particles, but erase some to avoid a uniform stamped pattern.
How to apply the effect to different cases
Light sword
Keep the beam straighter and more stable, with the emission point at the hilt or blade. The bright core runs evenly, fewer electrical details, and the glow hugs the blade closely.
Tech laser
Use sharp straight lines, little shaking, relatively uniform color. Narrow glow and a clear white core. You can add circles, HUD interfaces, or focal points at the emission point.
Magic beam
Let the beam oscillate slightly, add many energy strands, light particles, runes, or magic rings. The color can transition from blue to purple or white along the direction of travel.
Electric attack
Reduce the straight portion, increase zigzag lines and branching. Still keep a bright core, but the overall silhouette will be more unstable than a laser.
Energy flow in comics
Can use exaggerated shapes, a very large head and a trailing tail. Combine with speed lines, dust, debris, and strong reflected light on the character.
Common mistakes
Using only a single shade of blue
A single blue gradient without a bright center makes it hard to create a glowing feel. Build at least three levels: base blue, cyan, and blue-white.
Blurring the entire effect
Glow does not replace the shape. First, get a clean silhouette, then add the halo. Always keep part of the core and a sharp edge.
White core too wide
If the white part takes up almost the entire width, the blue is only a thin border, and the beam easily gets blown out. Narrow the core, especially at the body and tail.
Glow intensity equal from start to end
This makes the beam flat and directionless. Choose one strongest point, then gradually reduce glow and detail with distance.
Energy details distributed evenly like a pattern
Electric lines and light particles need clusters, gaps, and weak areas. Controlled randomness feels more natural than even distribution.
No reflected light on the environment
A strong light beam must affect nearby objects. Add a light blue layer over skin, armor, fabric, ground, or smoke to connect the effect with the scene.
Using Add too strongly
Add easily washes out color and detail. Reduce opacity, use many thin layers, and frequently toggle a gray or dark background to check.
Quick 20-minute practice workflow
- 2 minutes: determine the direction and emission point of the beam.
- 3 minutes: block in a blue silhouette with a rounded head and tapered body.
- 4 minutes: overlay cyan and a blue-white core.
- 4 minutes: create a large glow and local glow using Add/Screen.
- 4 minutes: add electrical strands, light particles, and jagged edges.
- 2 minutes: add reflected light on the environment.
- 1 minute: zoom out, check direction, strength vs. weakness, and blown-out areas.
Pre-finish checklist
- Can the viewer immediately recognize the beam's direction of motion?
- Is the emission point larger and brighter than the tail?
- Are there enough three levels: base color, intermediate bright layer, and bright core?
- Is the bright core narrower than the cyan layer and base layer?
- Does the glow follow the shape rather than creating a uniform halo?
- Is there a combination of sharp and soft edges?
- Are the energy details concentrated in the strong area and tapering off?
- Do the background or nearby objects receive reflected light?
- When the Add/Glow layers are turned off, is the basic shape still clear and appealing?
- Does the effect retain its blue color instead of blowing out into a white patch?
Conclusion
The workflow in the image can be summarized into four steps: block in a readable silhouette, overlay color layers from dark to light, add a halo with Add/Glow, and finish with rhythmically placed energy details.
The most important point is not to use blur to cover up a weak shape. Make the light beam work well from the base color layer, then add the core, glow, and texture. When you control the relationship between sharp and soft parts, between the bright center and the diffusion area, you can turn the same structure into a tech laser, energy sword, magic beam, or electric attack without relying on a special brush set.



Bình luận
0 bình luận
Đăng nhập để tham gia thảo luận cùng cộng đồng!
Đăng nhập ngayĐang tải bình luận...