How to draw lychee in digital art: render juicy lychee flesh and red textured skin
Detailed guide on how to draw a lychee fruit in digital art, from laying down the base color, establishing light and shadow areas, using Overlay, creating the translucent white flesh, to adding the red skin texture and highlights.
 Free
FreeDrawing a lychee may sound simple at first, but once you get started, you realize it's a rather "finicky" subject. The flesh isn't completely white, nor is it entirely transparent like glass. It has a slight opacity, a soft reflective sheen, environmental colors seeping in, and a pinkish-red speckled skin wrapping around it. If handled incorrectly, the lychee can easily turn into a lump of white plastic or a glossy marble.
This tutorial series is well worth studying because it approaches the matter from the right foundation: build the large block first, add tonal values next, handle the light and shadow, and finally spread the texture and small highlights. This is a concise yet sturdy workflow that can be applied to many other juicy fruits like longan, peeled rambutan, plums in strong light, or fictional fruits with semi-translucent flesh.
Why is the lychee difficult to draw?
The hardest part of a lychee lies in its flesh. The flesh feels white and translucent, juicy, but not completely transparent. It both reflects light on the surface and has a subtle color within. If you fill it with a flat white, the fruit loses its juiciness. If you add too many sharp highlights, it becomes glass.
To capture the true feel of a lychee, you need to maintain three layers:
an off-white or creamy gray base layer
a layer of faint tonal values inside the flesh
a layer of small highlights on the surface
When these three layers are clearly separated, the lychee will begin to feel soft, plump, and full of moisture.
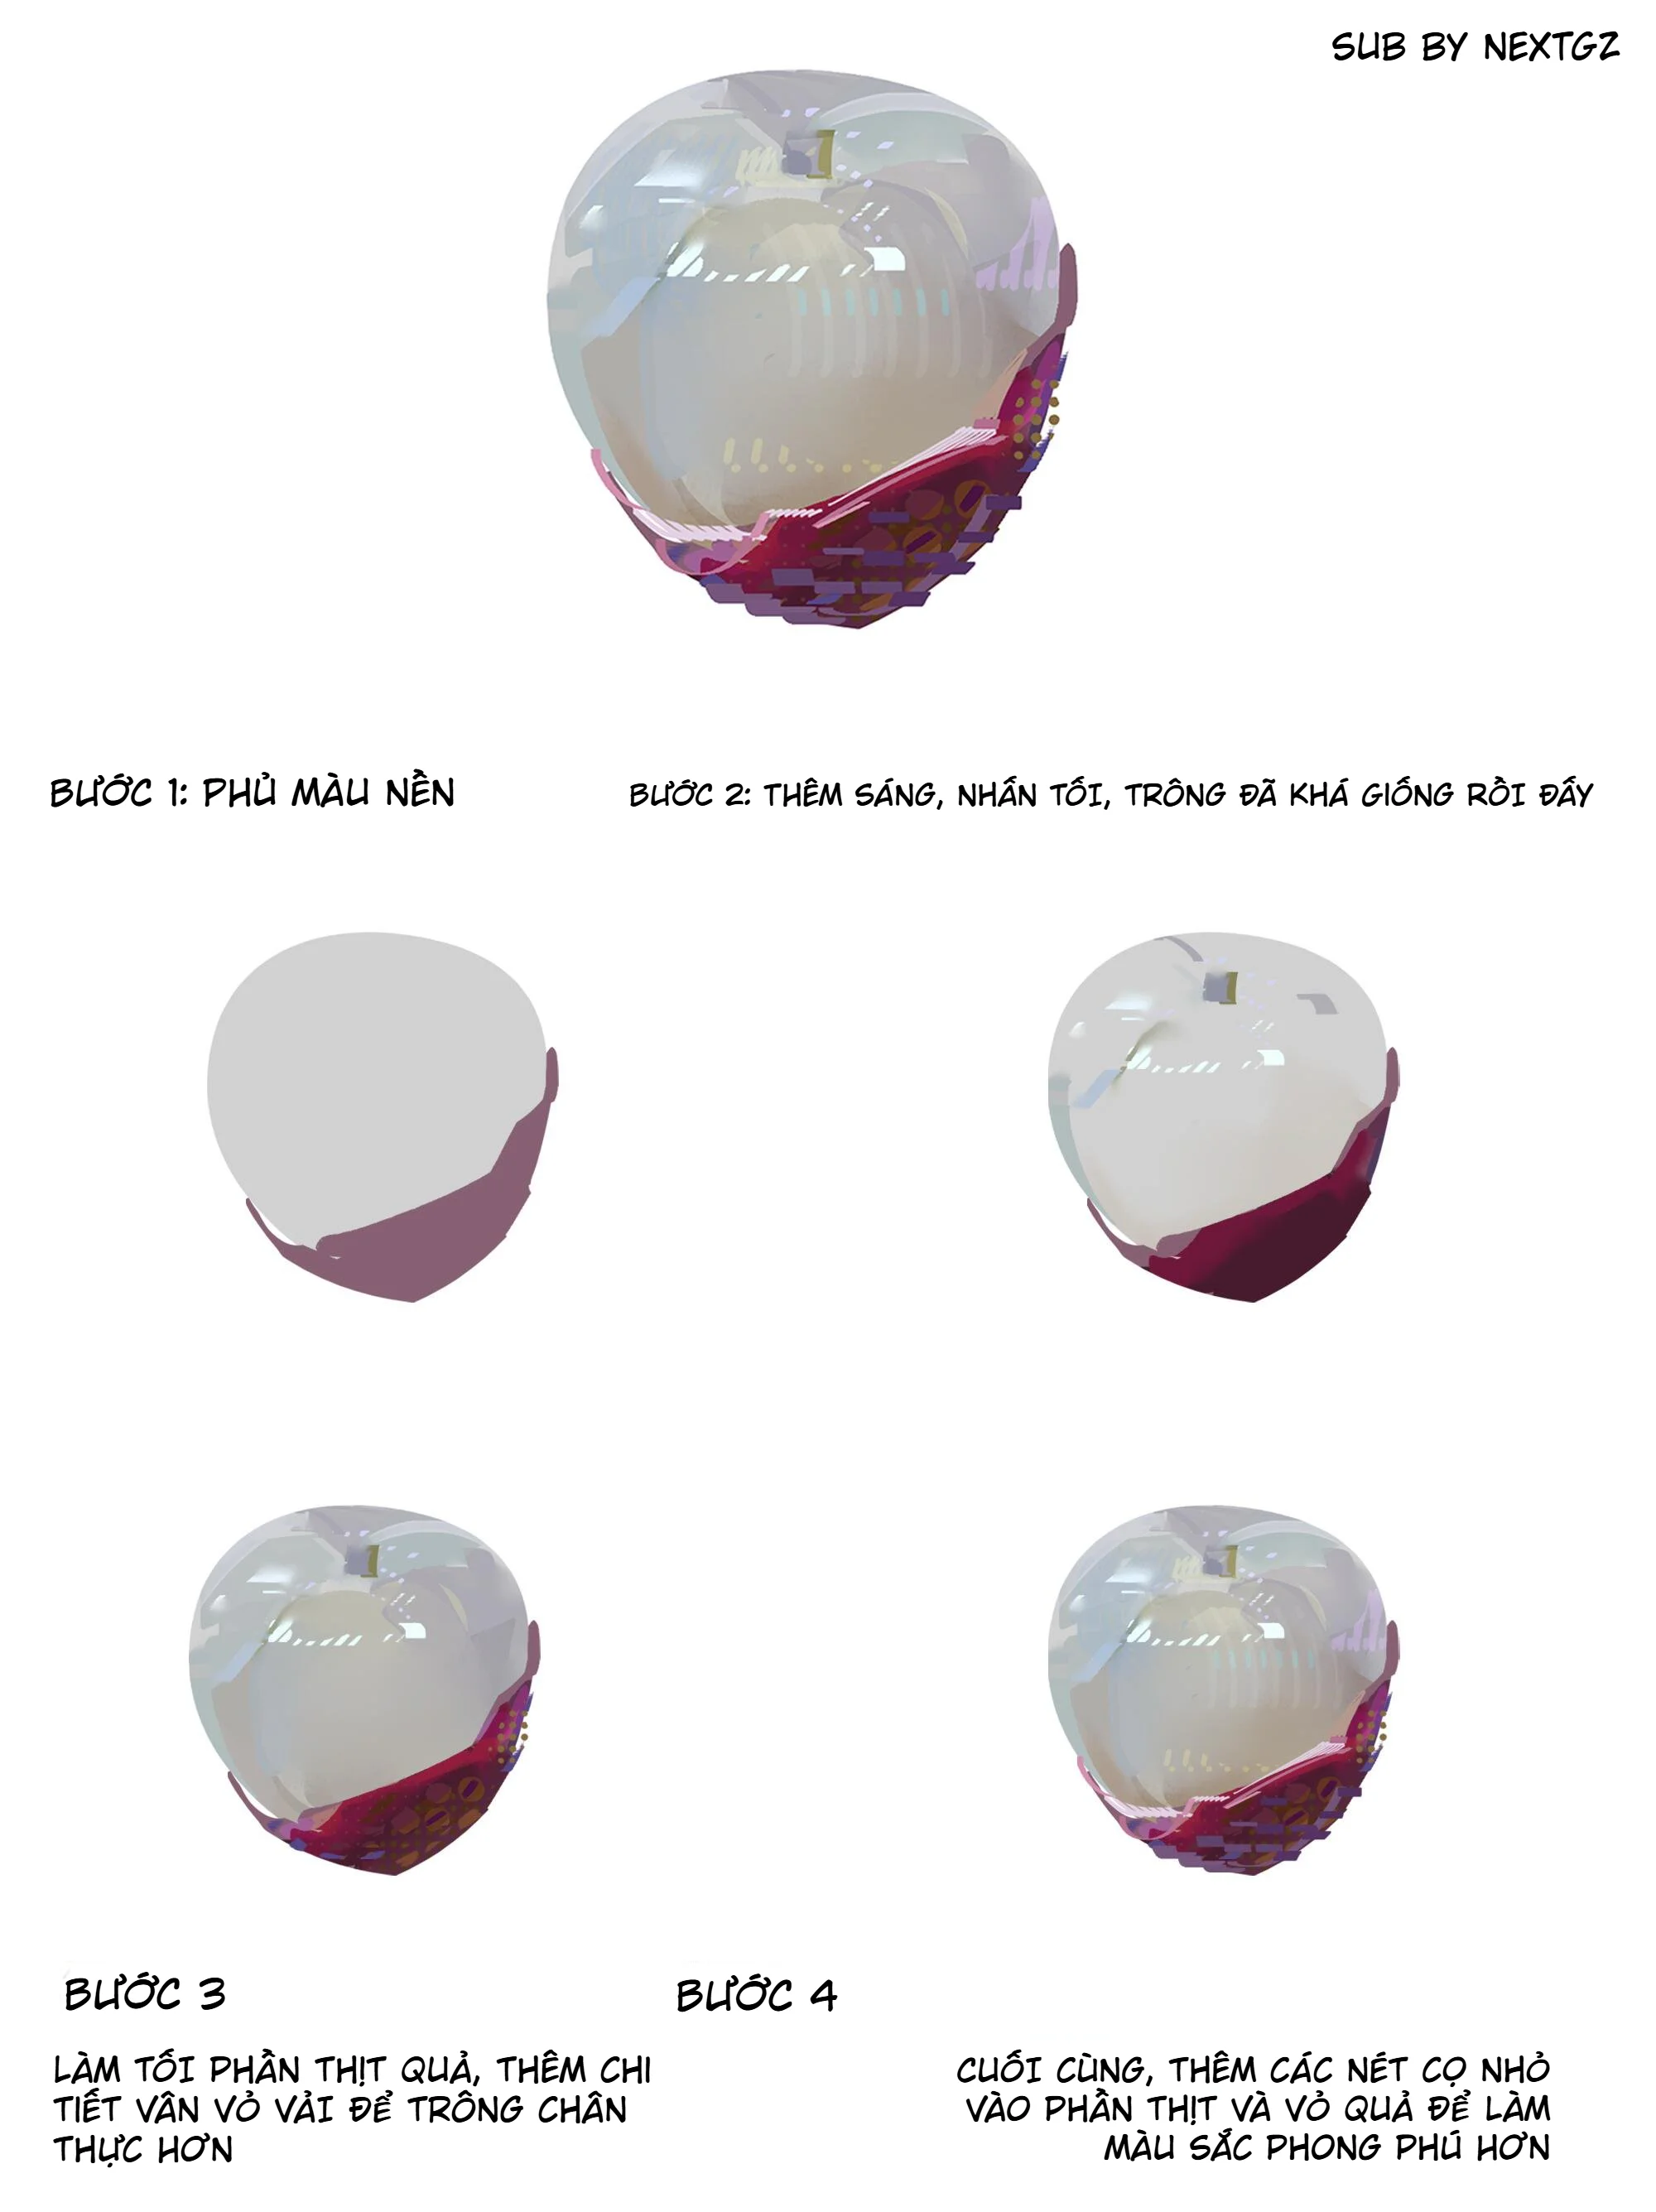
Step 1: Apply a base color to lock in the shape
Start with a simple base color block. For the flesh, don't use pure white right away. Choose off-white, pale beige, light blue-gray, or a very light creamy yellow. This color will serve as the foundation for the light and dark layers to work on.
For the skin, you can use reddish-brown, red-orange, or red-violet. If you want the lychee to look appetizing and relatable, let the skin have a bit of pinkish-red. If you're leaning towards a fashion illustration or concept art style, you can push the skin towards plum purple, wine red, or cool red.
At this step, only the overall shape needs to be solid. No veins, no highlights yet.
Step 2: Add dark areas and shift hues using Overlay
After you have the base, add darker patches around the edges, the contact area with the skin, the stem indent, and a few shadowed spots. If you're using software with layers, you can try the Overlay blending mode to create hue shifts while preserving the translucent feel of the base layer.
Overlay is very suitable for this kind of rendering because it doesn't simply darken or lighten. According to Adobe's description, Overlay combines Multiply and Screen depending on whether the base is light or dark, so it can increase contrast while retaining the existing light/dark feel of the layer underneath.
A small note: don't shade with dirty gray. For a lychee, the shadows can be slightly yellow, slightly pink, slightly blue, or slightly purple depending on the surrounding light. This will make the flesh feel more natural.
Step 3: Build large light areas
Once the form has soft shadows, add large light areas. For lychee flesh, the highlight shouldn't be as sharp as glass. It should be soft, slightly spreading, and have a "milky" quality.
You can use a soft brush or a brush with slightly feathered edges to place light patches of white-blue, white-purple, or white-cream. The light areas should follow the curvature of the fruit. The most protruding parts receive more light, while the edges and indentations should be softer.
This is the step that determines whether the lychee looks juicy or not. If the light area is too small, the fruit lacks moisture. If the light area is too white and hard, the fruit becomes shiny plastic.
Step 4: Suggest flesh texture and internal structure
In the image, the flesh has a few faint lines resembling fruit flesh texture and soft lines around the indent area. This is a very nice detail. It helps the viewer understand that this is not a glass sphere, but fruit flesh with a soft internal structure.
The flesh texture should be very subtle. Just a few strokes of opaque white or light gray are enough. If drawn too clearly, it will look like plastic fibers or cracks.
You should place the texture in these areas:
around the depression at the top of the fruit
near the edge of the skin
the part of the body where light passes through
a few transition spots between light and shadow
Step 5: Create texture for the lychee skin
The lychee skin should not be a smooth red patch. It needs dots, fragmented patches, small cells, and shifting tonal values. In the image, the author uses many small dots, tiny squares, and purple-pink patches on the skin to enrich the surface.
You can handle the skin in three layers:
a red base layer
a dark red or dark purple layer for shaded areas
a layer of light/pink/purple dots to create a bumpy texture
The rougher the skin, the softer the flesh feels. These two materials should contrast each other: the skin rougher, the flesh softer.
Step 6: Add small catchlights on the flesh
Once the form is solid, add small catchlights. This step quickly creates a juicy feel. Just a few clusters of white dots or small squares on the convex areas are enough.
Don't scatter highlights all over the fruit. Focus them on:
the main light area
the upper edge of the flesh
the edge near the skin
around the indent if light hits it
Small highlights are the final seasoning. Used correctly, the fruit looks more appetizing. Overdone, it becomes sparkling decoration.
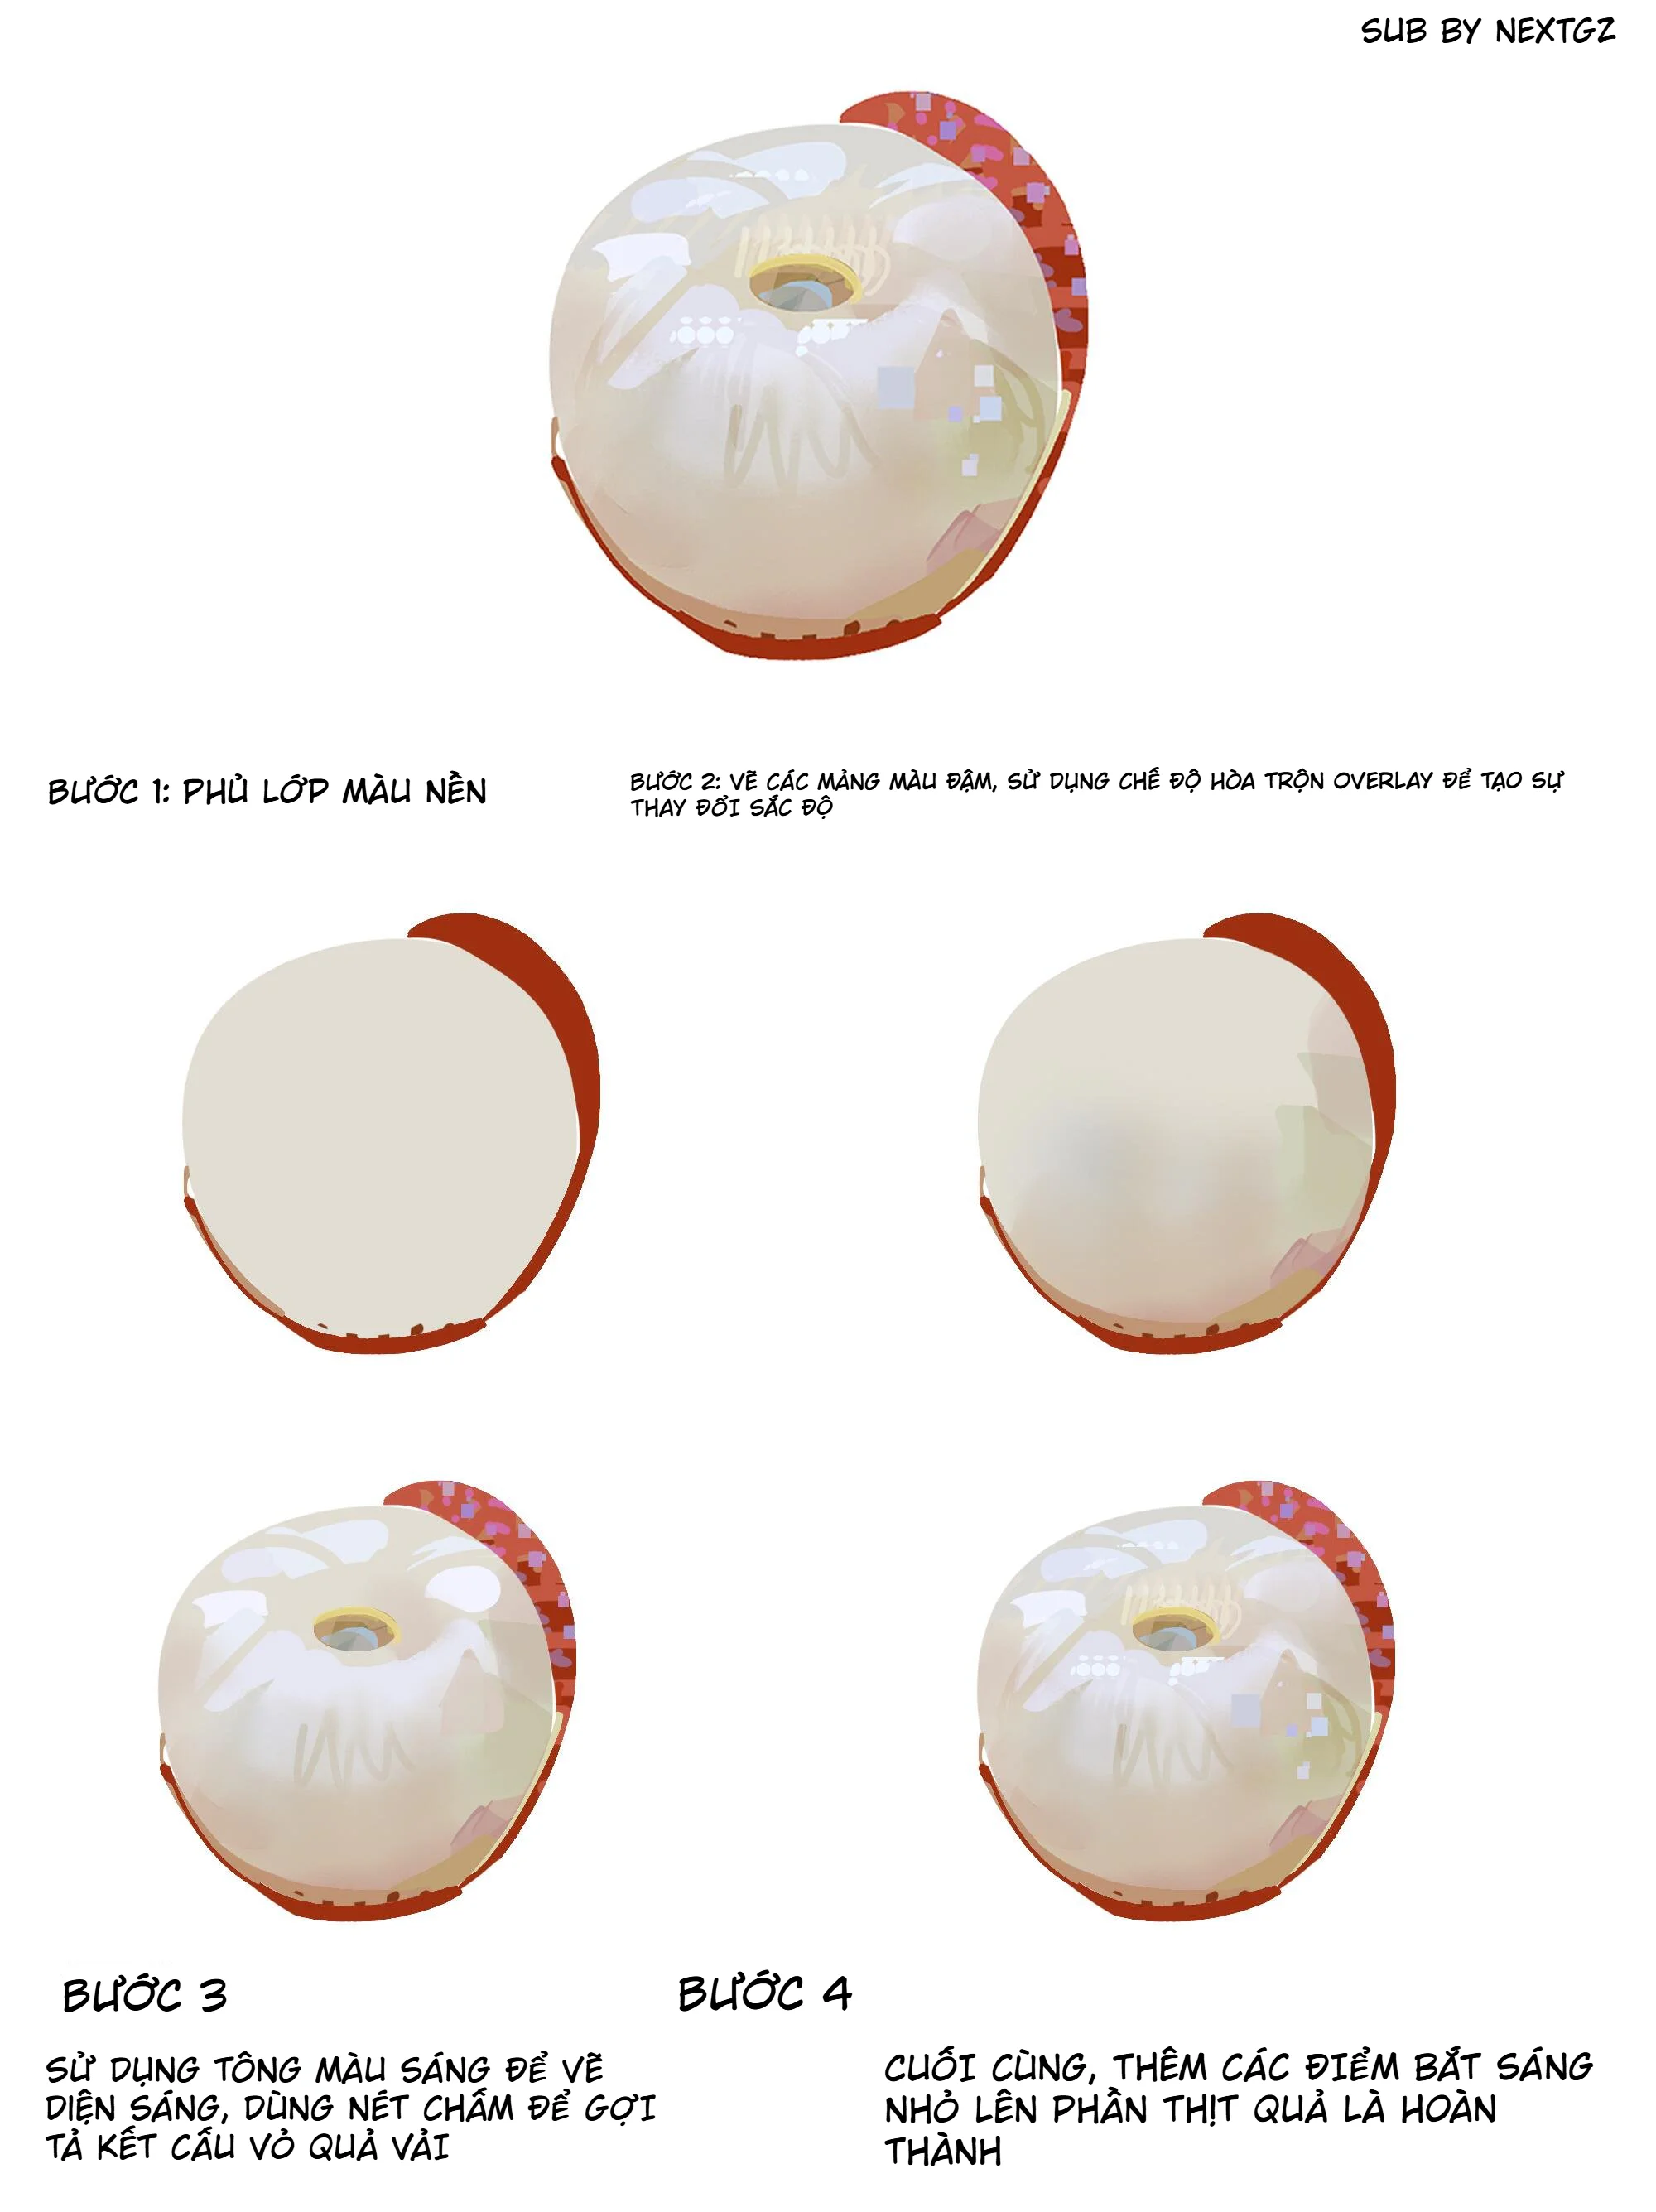
Step 7: For a more translucent version, add environmental colors
The next two images show a more complex variation, where the flesh is more translucent and has more reflected colors. This is a very worthwhile method if you want to draw higher-grade materials.
Instead of only using white and beige, the author adds:
blue-gray in cool areas
pale purple in reflective areas
pale yellow in light areas
red-violet reflected from the skin onto the flesh
small streaks like light reflections or environmental reflections
Clip Studio TIPS, when guiding on drawing transparent objects, also mentions observing the differences between types of transparency and how objects are influenced by what's behind them, reflections, and surface materials. This aligns well with the rendering in the second image: the lychee flesh is not just "white and translucent," but also contains the colors of the environment and the surrounding skin.
Common mistakes when drawing a lychee
Using pure white too early
If you fill the flesh with white from the start, you'll have no room left to push the highlights. Start with off-white or creamy gray.
Shadows that are too gray
Dead gray shadows will dirty the lychee flesh. Let the shadows have a hint of color: pink, yellow, blue, or purple depending on the environment.
Highlights that are too sharp
Lychee flesh is not glass. Highlights should be mostly soft, with only a few really sharp small dots at the end.
Skin that is too smooth
The lychee skin needs texture. If the skin is smooth, viewers will have a hard time recognizing it as a lychee.
Drawing too many internal veins
Flesh texture should only be suggested lightly. Too much will make the fruit look old, dry, or like a synthetic material.
Tips to make the lychee look appetizing and more substantial
Keep the flesh slightly warm in the middle area and slightly cool at the edges. This makes the fruit feel more translucent. The skin should be darker than the flesh to create contrast. If you want the fruit to look juicy, place a large highlight on top, small highlights on convex areas, and a bit of red reflection from the skin bouncing onto the flesh.
Another tip is not to make the lines too dark. For soft materials, lines should be light or blend into the color. Only the skin, hidden edges, and contact areas need sharper edges.
What other materials can this workflow be applied to?
This formula isn't just for lychees. You can apply it to:
peeled longan
partially peeled rambutan
white jelly (agar)
translucent gummy candies
fictional fruits in concept art
opaque jade or semi-translucent stone materials
Just remember the principle: soft base, colored shadows, large highlights first, small catchlights later, and textures separated by material.
Conclusion
To draw a beautiful lychee in digital art, don't think of it as a shiny white block. See it as a soft, juicy, semi-translucent object with a bumpy skin and light passing partially through it.
The easiest workflow to remember is:
apply the base first, add dark areas next, build large light areas, suggest light flesh texture, add skin texture, and finally place small catchlights.
Following this order, the lychee won't appear flat or plastic, but will have a translucent, plump, cool, and very "eye-appetizing" feel.
Frequently asked questions
Should I use white or cream when drawing a lychee?
Start with creamy white, pale beige, or light blue-gray. Pure white should only be used for the final highlights.
Should I use Overlay to draw a lychee?
You can, especially when you want to increase hue shifts while preserving the translucent feel of the base. Overlay is suitable for boosting contrast and hue in midtone areas.
How should I draw the lychee skin to avoid it looking flat?
Use small dots, dark red patches, pinkish-purple, a few small bright cells, and broken lines to create a bumpy feel. Don't fill the skin with a single smooth red.
How do I make the flesh look translucent but not like glass?
Keep large highlights soft, add very subtle environmental colors, limit overly sharp edges, and only use a few small catchlights at the end. Lychee flesh needs a milky opacity, not crystal-clear transparency like glass.
Đánh giá bài viết
More from author
Cách vẽ nếp gấp váy áo trong digital art: tô vải xanh trắng mềm, có khối và bắt sáng
Phân tích cấu trúc cơ lưng nam trưởng thành: khung xương, cơ bắp và chia sáng tối
Top 5 Bảng Vẽ Wacom Dưới 2 Triệu Năm 2026: Đánh Giá Chi Tiết Và Lời Khuyên

Bỏ Phố Về Quê: Hành Trình Cải Tạo Nhà Vườn 4 Mùa Bình Yên & Bài Học Tiếng Trung Chữa Lành
You might also like

Tự Học Clip Studio Paint Cơ Bản: Hướng Dẫn Toàn Diện Cho Người Mới Bắt Đầu
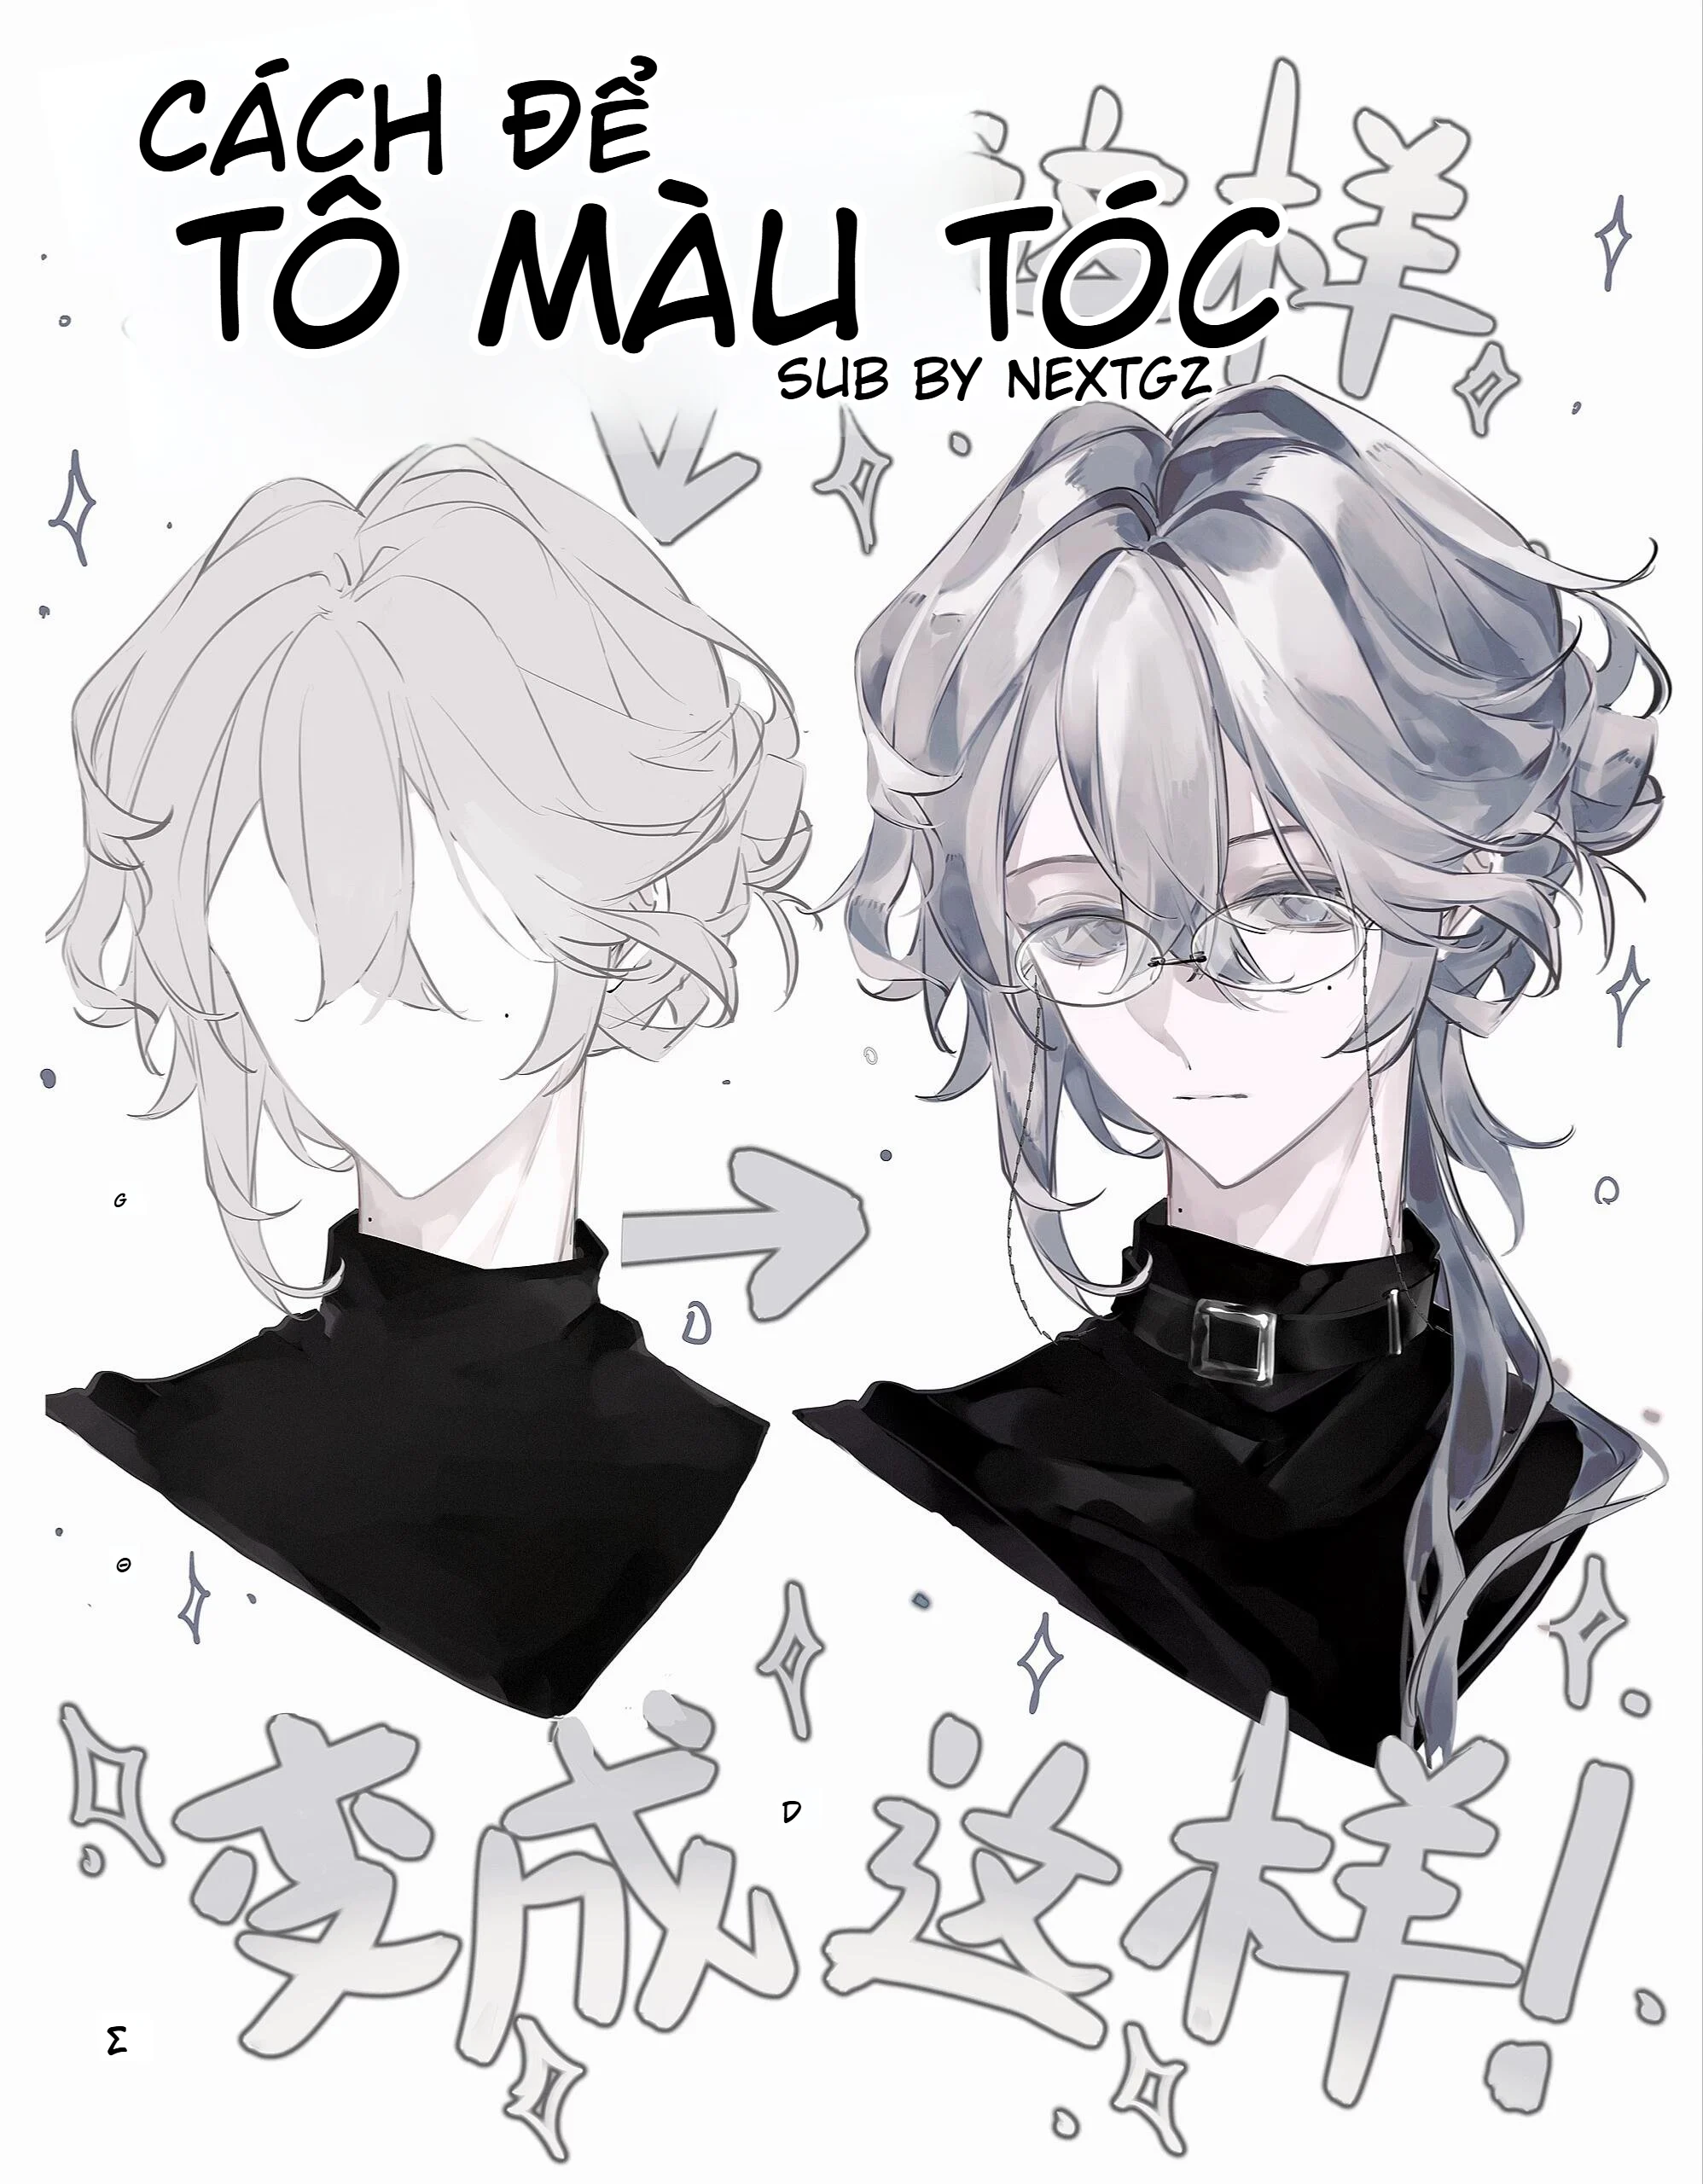
Cách tô màu tóc bạc anime: quy trình đổ bóng, hòa màu và hoàn thiện tóc xám đẹp hơn

Cách bố trí ánh sáng trong nhà khi vẽ anime: tăng tương phản, chiều sâu và chất liệu


Bình luận
0 bình luận
Đăng nhập để tham gia thảo luận cùng cộng đồng!
Đăng nhập ngayĐang tải bình luận...