Guide to drawing with Ruler and Guide in Clip Studio Paint for Lineart, Architecture and Manga
In-depth guide: Drawing with Ruler and Guide in Clip Studio Paint for Lineart, Architecture, and Manga, with workflow, exercises, and practice checklist.
Official interface/diagram image. Author/provider: CELSYS / CLIP STUDIO PAINT User Guide; source: https://help.clip-studio.com/en-us/manual_en/510_ruler/Drawing_along_a_perspective_ruler.htm; credited per original documentation.
Guide to Drawing with Ruler and Guide in Clip Studio Paint for Lineart, Architecture, and Manga
Official interface/diagram image. Author/provider: CELSYS / CLIP STUDIO PAINT User Guide; source: https://help.clip-studio.com/en-us/manual_en/510_ruler/Drawing_along_a_perspective_ruler.htm; credited per original documentation.
Have you ever drawn lineart with shaky hands, imprecise straight lines, or inaccurate architectural scenes? Clip Studio Paint (CSP) offers a powerful set of Ruler and Guide tools, giving you absolute control over every stroke. In this article, we will guide you through a clean and efficient workflow to make the most of rulers and guides, from basic lineart to architectural perspective and manga panels. All information is based on official CSP documentation and practical experience.
Basic Concepts of Ruler and Guide in Clip Studio Paint
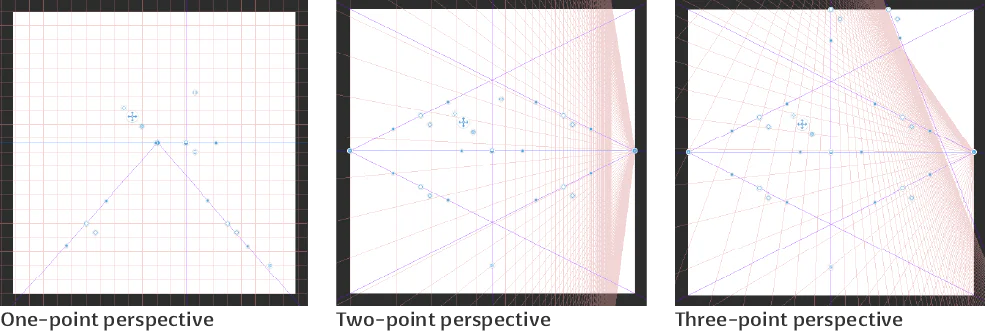
Official diagram comparing perspective types. Author/provider: CELSYS; source: CLIP STUDIO PAINT User Guide; credit: CELSYS.
Before diving into practice, you need to understand how these two tools differ and how they work. According to official CSP documentation, Rulers are pre-existing lines or shapes that allow you to draw along them, while Guides are temporary guidelines from the ruler bars used to assist with alignment.
What is a Ruler? Main types of rulers
A Ruler in CSP is a vector object that can be created from the menu Layer → Ruler/Frame → Create Ruler. You can choose from various types of rulers, suitable for different drawing purposes. Common types include:
Straight Line Ruler: Allows you to draw perfect straight lines at any angle.
Curve Ruler: Creates Bézier curves or freehand curves for smooth strokes.
Circle/Ellipse Ruler: Supports drawing precise circles and ellipses.
Polyline Ruler: Draws broken lines or closed polygons.
Symmetry Ruler: Draws symmetrically across an axis – extremely useful for faces, bodies, or patterns.
Perspective Ruler: Creates 1, 2, or 3-point perspective grids, helping to draw accurate architectural scenes.
Parallel Line Ruler: Draws lines parallel to a reference line.
Grid Ruler: Creates a square or rectangular grid.
Each type of ruler can be edited after creation: reposition, rotate, scale, or switch between modes. You can place a ruler on a separate layer called a Ruler layer or attach it directly to the drawing layer.
What is a Guide? How to create and use guides
Guides are temporary guidelines originating from the ruler bars located at the canvas edges. To create a guide, simply drag from the horizontal or vertical ruler bar into the canvas. Each guide is a straight blue line (by default) used for aligning objects or as a reference point. Guides do not snap to strokes like rulers do, but you can enable the Snap to Guide function to draw along them. Additionally, you can create a guide from a vector layer by selecting Layer → Ruler/Frame → Create Guide from Vector. Recommendation: Use guides as a preliminary step before creating rulers, especially when you need quick alignment of basic lines.
Setting up Rulers for Clean and Accurate Lineart
Official interface/diagram image. Author/provider: CELSYS / CLIP STUDIO PAINT User Guide; source: https://help.clip-studio.com/en-us/manual_en/510_ruler/Drawing_along_a_perspective_ruler.htm; credited per original documentation.
Lineart is the foundation of many digital works, from illustrations to manga. Using rulers correctly helps make your lineart sharp, steady, and consistent.
Using Straight Line and Curve Rulers for Stable Strokes
When drawing lineart, combining the Straight Line Ruler and Curve Ruler is the best way to achieve strokes that are firm yet fluid. First, create a new layer for the ruler (Layer → New → Ruler Layer). Then, select the Ruler tool from the toolbar (ruler icon) and choose the type you need. For example, to draw straight hair, you can use the Straight Line Ruler. To draw curly strands, use the Curve Ruler with Bézier control points. Note: When drawing, you need to enable the Snap to Ruler function (magnet icon on the Command Bar) so strokes automatically follow the ruler. If snap is off, you will draw over the ruler without its effect.
Technique for Drawing Along Rulers Without Drifting
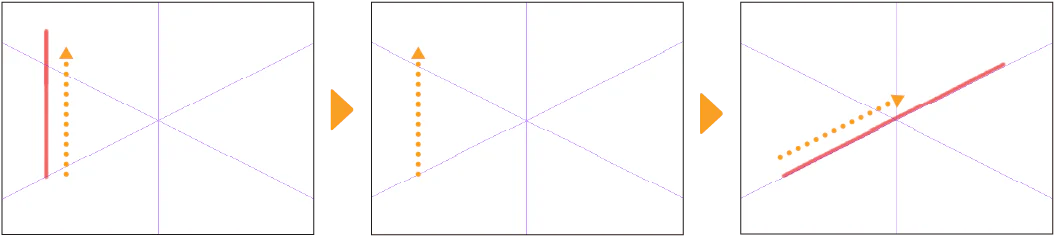
A common issue is that when drawing quickly, your hand may drift away from the ruler. To fix this, CSP offers the Snap sensitivity option in the Sub Tool Detail panel. You can increase this value to make strokes cling more tightly to the ruler. Additionally, you should use a stylus with good pressure sensitivity and reduce drawing speed when high precision is needed. Recommendation: Experiment with different Snap sensitivity values (from 50% to 80%) to find the level that suits your drawing style. Note: If you draw too fast, CSP may not calculate the snap in time, causing strokes to drift.
Creating Custom Rulers for Repeated Details
In complex lineart, there are often repeated details like mesh, tiles, or decorative patterns. Instead of drawing each one individually, you can create a custom ruler using the Figure Tool or by drawing a sample vector path, then selecting Layer → Ruler/Frame → Create Ruler from Vector. This ruler can then be duplicated by copying the ruler layer and moving it to the required position. This is an efficient way to maintain high accuracy without spending too much time.
Applying Rulers in Architectural Drawing
Official interface/diagram image. Author/provider: CELSYS / CLIP STUDIO PAINT User Guide; source: https://help.clip-studio.com/en-us/manual_en/510_ruler/Drawing_along_a_perspective_ruler.htm; credited per original documentation.
Architectural drawing demands precision in perspective and proportion. The Perspective Ruler is an indispensable tool in CSP, helping you easily build three-dimensional space on a 2D plane.
Drawing Perspective with the Perspective Ruler
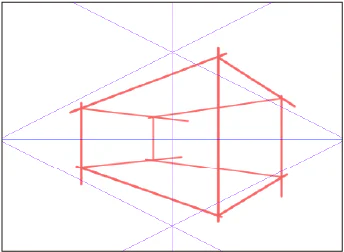
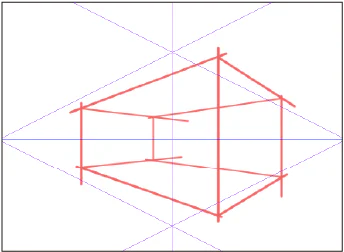
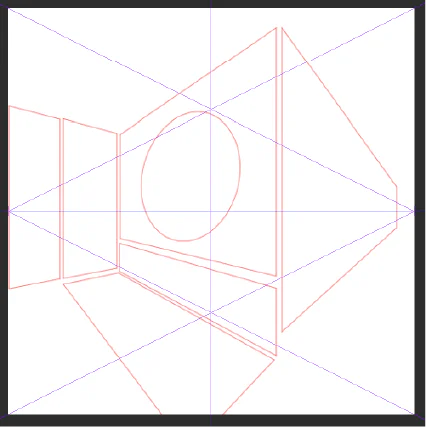
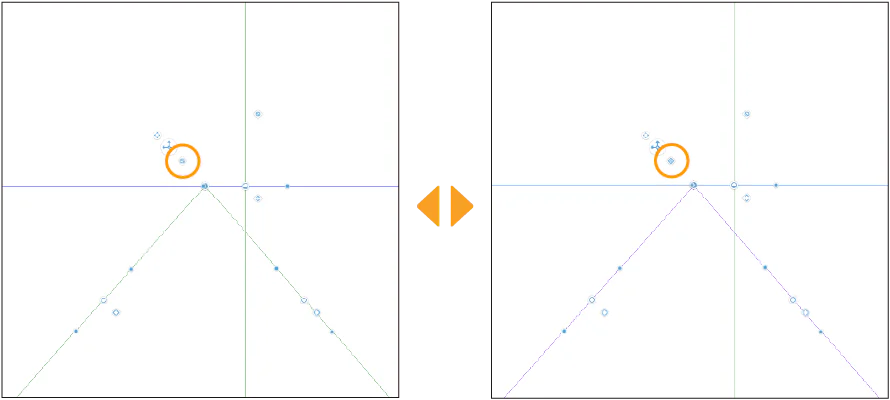
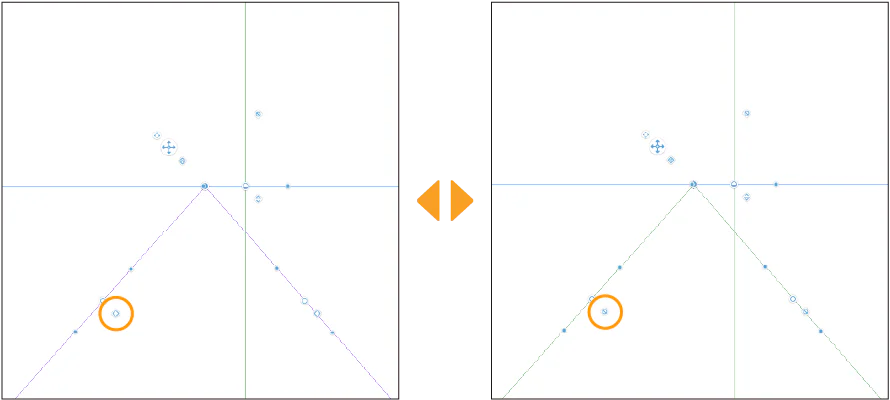
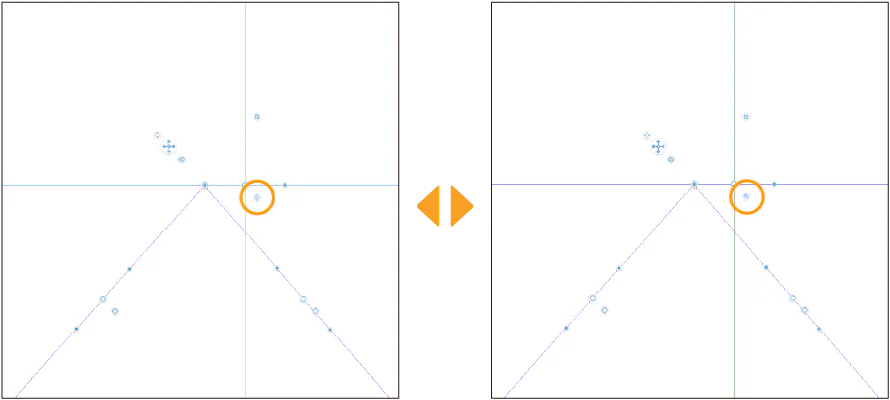
To create a Perspective Ruler, go to Layer → Ruler/Frame → Create Perspective Ruler. A dialog box appears allowing you to choose the number of vanishing points (1-point, 2-point, 3-point perspective). You can place the vanishing points by dragging them on the canvas. Once created, you will see perspective lines emanating from each vanishing point. When drawing, enable Snap to Ruler, and every stroke will automatically follow the correct perspective direction. For example, to draw a building, you simply draw vertical lines (perpendicular to the ground) and horizontal lines (converging towards the vanishing point). CSP will align them automatically. Note: You can create multiple Perspective Rulers on the same layer to combine different perspectives.
Creating 1, 2, and 3-Point Perspective Grids
A perspective grid helps you visualize space better. In the Perspective Ruler creation window, you can enable the Display grid option to show grid cells. You can also adjust the spacing between grid lines and the number of cells. For 1-point perspective, the grid consists of parallel lines and lines converging towards the vanishing point. For 2-point perspective, the grid is more complex with two sets of receding lines. For 3-point perspective, additional vertical lines appear. Recommendation: Create a dedicated template with a perspective grid saved to Material for reuse in future projects. You can save the ruler as an Image Material or Layer Material.
Drawing Parallel and Perpendicular Lines with Guides
In addition to the Perspective Ruler, you can use Guides (from the ruler bars) to draw parallel or perpendicular lines. Drag a horizontal guide from the top ruler bar, then drag a vertical guide from the left ruler bar. You will have two reference lines. To draw a line parallel to a guide, use the Parallel Line Ruler and set the guide as the reference line. To draw a perpendicular line, you can combine the guide with holding down the Shift key (while drawing with the Straight Line Ruler) to lock the angle to 90 degrees. Note: CSP allows creating guides with pixel-level precision; you can enter exact coordinates for guides in the Edit → Guide Settings panel.
Rulers and Guides for Manga – Creating Panels and Effects
Official interface/diagram image. Author/provider: CELSYS / CLIP STUDIO PAINT User Guide; source: https://help.clip-studio.com/en-us/manual_en/510_ruler/Drawing_along_a_perspective_ruler.htm; credited per original documentation.
In manga creation, creating panels and special effects is a crucial step. Rulers and Guides help you do this cleanly and consistently.
Creating Manga Panels with Rulers
To create panels, you can use the Frame Border Tool. This tool automatically creates border lines as rulers, allowing you to cut and arrange cells. You can also create panels manually by drawing straight lines with the Straight Line Ruler and then converting them to rulers using Create Ruler from Vector. Another tip is to use the Grid Ruler to evenly divide the canvas into several cells, then edit each cell individually. Recommendation: Use the Frame Border Tool because it allows you to easily change the size and spacing between panels later without affecting the lineart inside them.
Using the Symmetry Ruler for Symmetrical Details
The Symmetry Ruler is a lifesaver for drawing faces, human bodies, or symmetrical objects. Create a Symmetry Ruler by selecting Create Ruler → Symmetry Ruler. An axis of symmetry appears; you can rotate and move it. When drawing, every stroke on one side is automatically mirrored to the other side. This helps you draw eyes, ears, or arms with perfect symmetry. However, be careful when drawing asymmetrical details (like a side-swept fringe). Recommendation: Use the Symmetry Ruler only during the sketching and basic lineart phase, then turn it off to draw individual details to avoid stiffness.
Drawing Motion Effects and Speed Lines
Motion effects and speed lines often require parallel straight or curved lines. You can create a Parallel Line Ruler oriented along the effect's direction, then draw a series of dashed or continuous lines. To create a motion blur effect, use the Curve Ruler to draw soft curved lines in the direction of movement. You can also combine this with Gradient or Filter to create a fading effect. Note: When drawing multiple parallel lines, hold down the Shift key so consecutive strokes snap to the same ruler.
Clean Workflow: Step-by-Step Process for Drawing Along Rulers
Official interface/diagram image. Author/provider:





Bình luận
0 bình luận
Đăng nhập để tham gia thảo luận cùng cộng đồng!
Đăng nhập ngayĐang tải bình luận...