Line Art Tips: How to Create Dynamic Strokes and Use Vector Layers Effectively
Learn how to draw professional line art with tips for creating sharpness (merihari) and how to use the Vector Layer in Clip Studio Paint for smooth, dynamic lines.
 Free
Free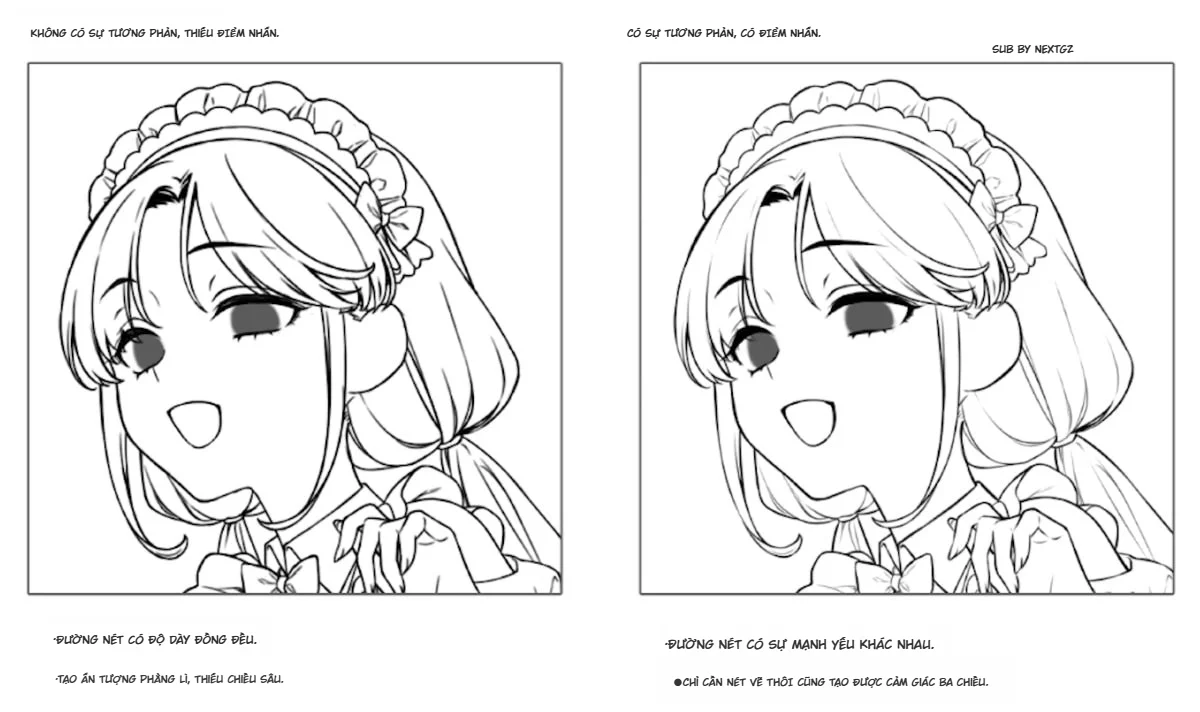
Line Art Tips. Create Sharpness to Bring Your Drawing to Life! Drawing Beautiful Lines with "Vector Layer"
When drawing illustrations or manga, many people have likely experienced the situation where the drawing after inking (line art) doesn't look as expected. The lines aren't beautiful, or the overall picture looks very flat and lacks vitality...
This time, we will introduce techniques to elevate the quality of your line art, from how to draw beautiful lines to tips for creating sharpness (merihari)!
This content is partially quoted from the "Sharp Line Art Drawing Course" by illustrator Hagura Goshi on the Palmie monthly subscription learning system. Let's explore how to draw attractive line art and how to use the convenient Vector Layer!
Line Art Drawing Tips
1. Create Sharpness in Your Lines
What kind of lines should you pay attention to during the drawing process? First, be conscious of creating "sharpness" (merihari) in your line art. When the lines have emphasis, the picture will stand out more even after coloring.
What are Sharp Lines?
Lines without sharpness: The thickness of the lines is uniform. The overall look is flat and gives a feeling of simple graphic shapes.
Lines with sharpness: The lines have strength and weakness (boldness/thinness). For example, the lines inside hair or clothing will be thinner compared to the outer outline.
Creating variation in line strength helps express the softness of hair and fabric and gives a sense of spatial depth.
2. How to Draw Sharp Line Art
Next, let's look at the points to note for creating sharpness.
Positions to draw thick lines:
The overall outline.
Parts that are in shadow.
The base of clothing wrinkles or shadowed areas. Try drawing with thick lines on the outer contours of shapes or areas likely to be in shadow. Drawing the base of hair and wrinkles thickly will also create a sense of volume.

Positions to draw thin lines:
Areas where light hits.
Internal wrinkles. In the explanatory illustration, the internal lines of frills, hair, and skin are drawn thinly. This creates a difference from the outline and brings sharpness.
Positions to fill with black areas (Beta):
Areas with deep shadows. Try adding a bit of solid black to the lining of fabric or areas with deep shadows. This helps create a sense of volume and makes the frame look more solid.

3. How to Draw Line Art for Chibi Characters
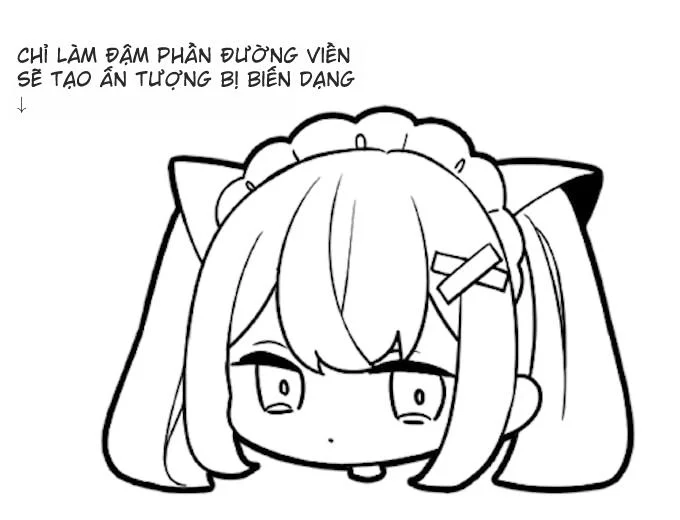
Only thicken the outer outline If you only thicken the outer outline of the character, it creates a stylized (deformed) impression. This makes the drawing look cuter, so try applying it when drawing mini (chibi) characters, or use it for stickers and souvenirs.
The Convenient Vector Layer for Line Art
1. The Difference Between Raster Layer and Vector Layer
In drawing software, there are usually two types of layers: Raster Layer and Vector Layer. Let's look at the difference between them.
What is a Raster Layer? This is the most basic layer type used in most drawing software.
Allows basic drawing operations (drawing lines, coloring, using filters...).
If enlarged or reduced, the image will become pixelated (jagged).
Suitable for sketching and coloring.
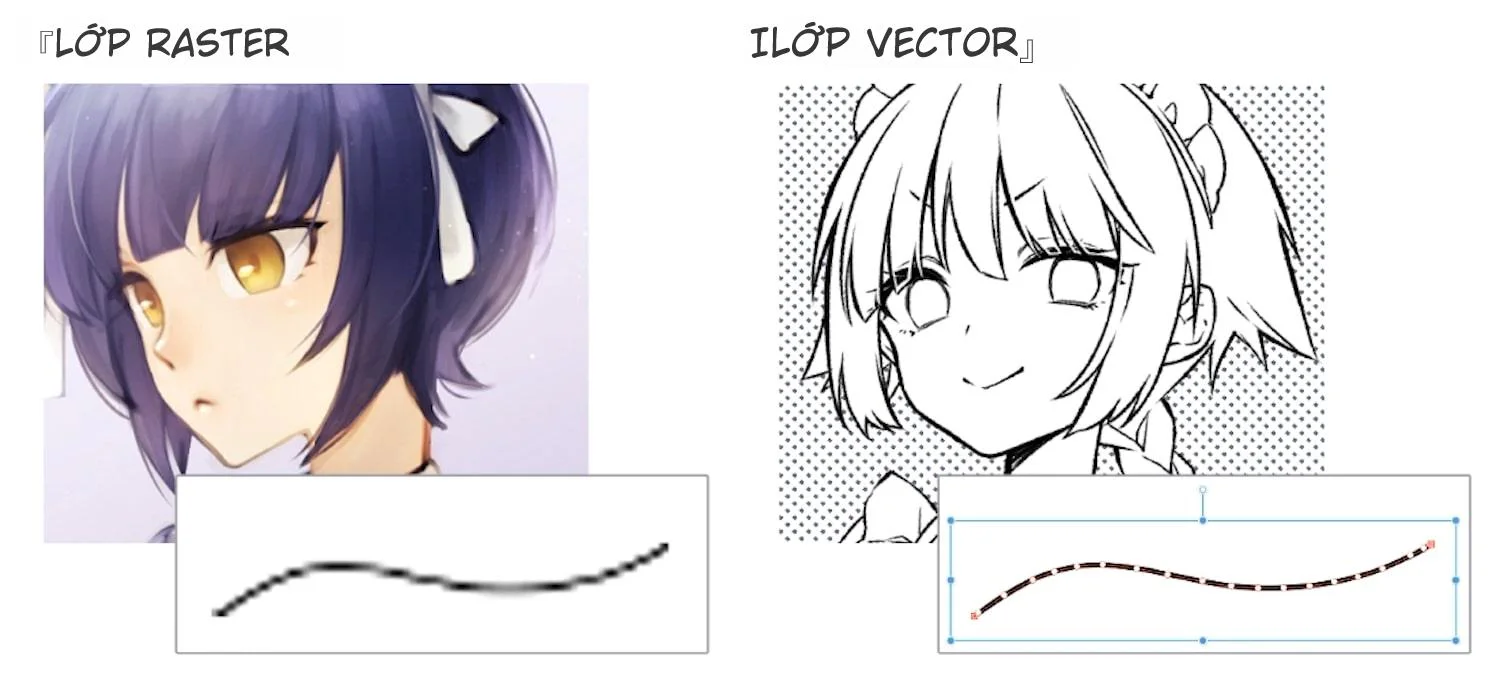
What is a Vector Layer? This is a layer type that records information about the drawn lines.
Specialized for drawing lines, cannot be filled with color (solid fill).
Image quality does not degrade even when enlarged or reduced many times.
Suitable for sharp line art or black-and-white manuscripts. The advantage of Vector Layer is that quality is not lost when transforming shapes. Also, because it retains line information, you can change the thickness or type of line after drawing.
2. Introduction to Tools for Vector Layer
In CLIP STUDIO PAINT (Christa), you can use both layer types. Christa has very rich functions for Vector Layers.
"Vector Eraser": In the Eraser tool, there is a "Vector Eraser" item. You can choose 1 of 3 effects:
Erase touched parts only: Works like a regular eraser.
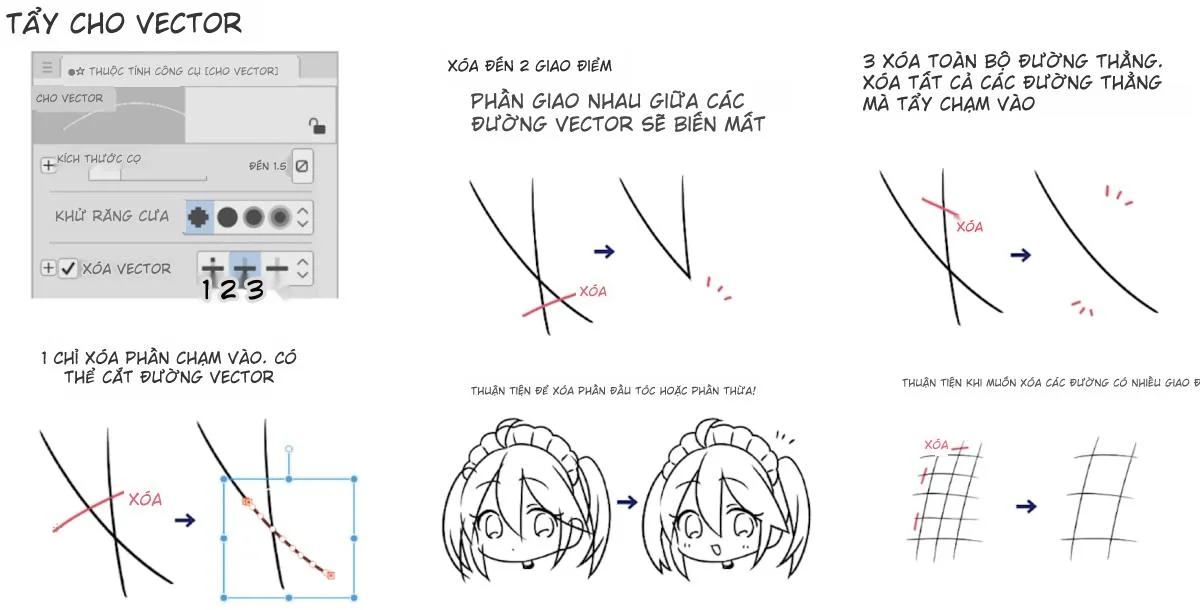
Erase up to intersection: Automatically erases up to the point where lines intersect. Very convenient for erasing excess lines when drawing hair ends.
Erase entire line: Touch a part, and the entire line disappears.
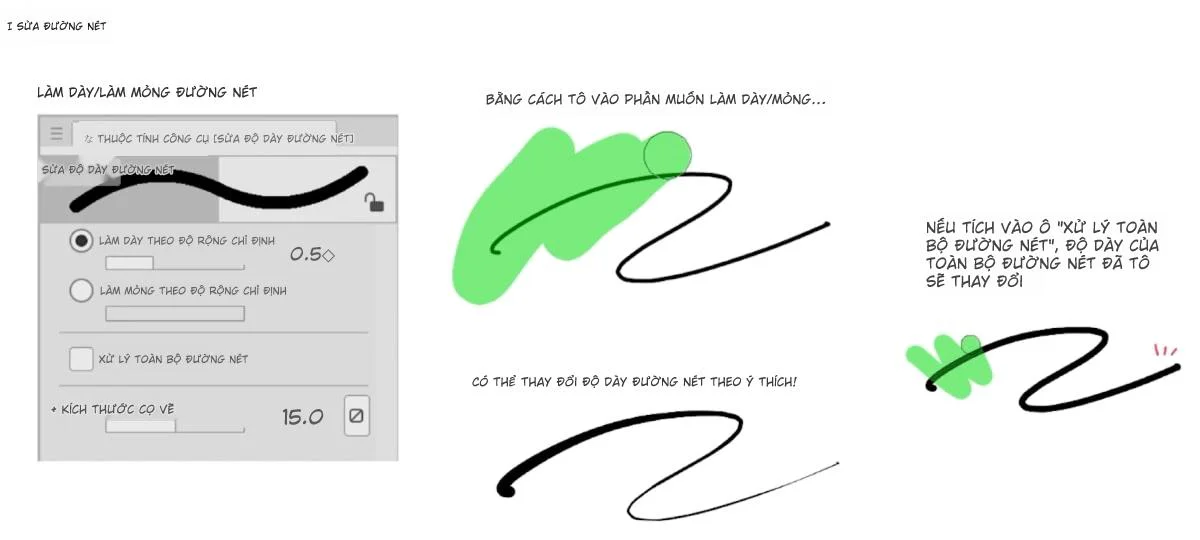
"Line Correction Tool": The "Adjust line width" function allows you to change the thickness of a drawn line. You simply hover over the part you want to change to thicken or thin the line as desired.
Line Art Drawing Process
Below are the practical steps for drawing line art for a character using Vector Layer in Christa.
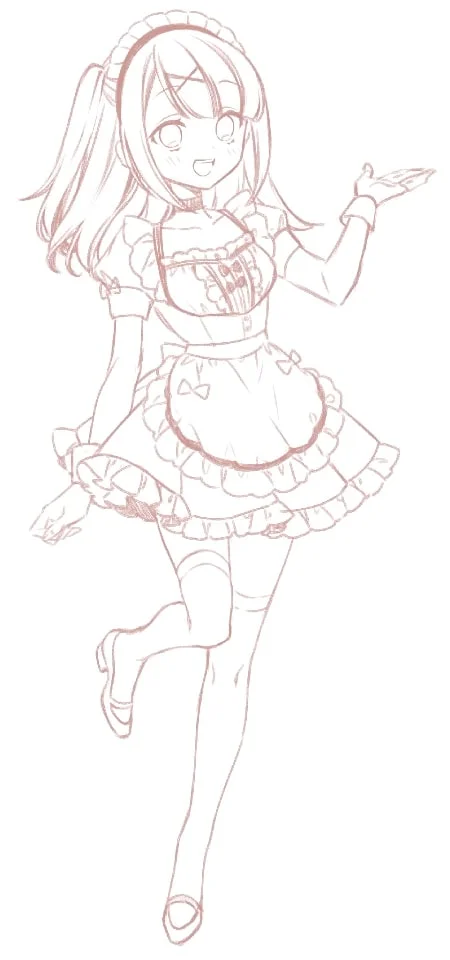
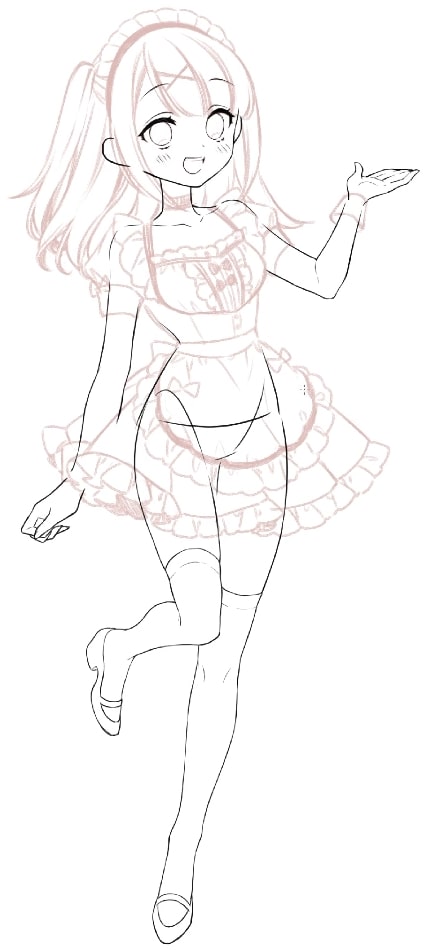
Step 1: Prepare the Sketch
If you find it difficult to draw line art, it might be because your sketch is too rough. Draw the parts in detail up to the stage where it's easiest to ink. Then, lower the opacity of the sketch layer and draw the lines on a new layer (Vector Layer).
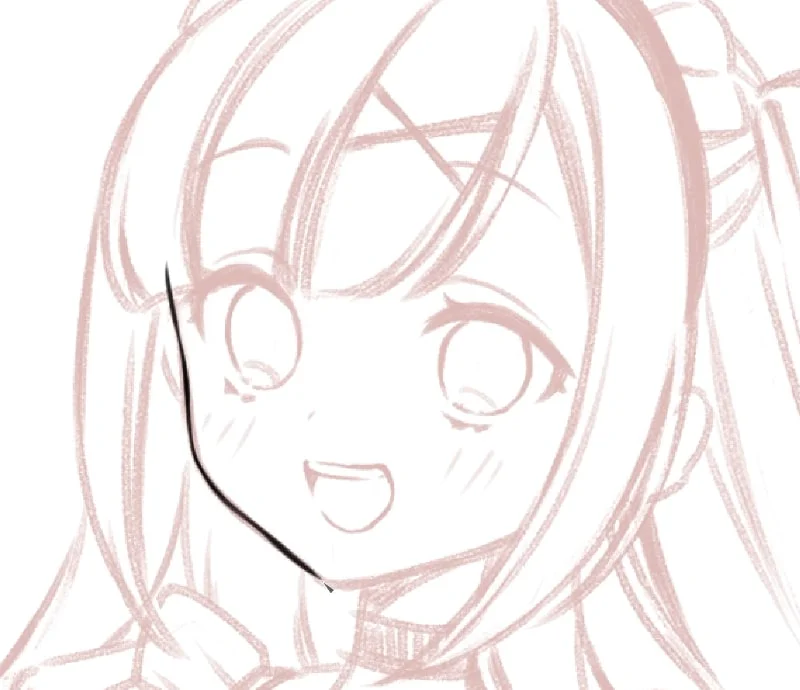
Step 2: Draw the Facial Lines
Depending on your habit, you can flip the Canvas to draw lines from the most comfortable angle. For parts like eyes, nose, and mouth, create separate Vector Layers. For eyelashes, drawing overlapping lines creates a feeling of thick, natural lashes rather than completely filling them in black.
Step 3: Draw the Body Lines
With Vector Layer, you can freely enlarge/reduce parts (like hands) if the proportions don't match without worrying about pixelation. A small tip is to draw even the parts hidden by clothing to ensure accurate anatomical structure. Remember to create sharpness by drawing thickly on the outline and thinly on internal details like collarbones or knees.


Step 4: Complete the Line Art
Continue drawing hair, clothing, and accessories. Finally, use the "Adjust line width" tool to fine-tune the thickness of all lines, add accent lines to hair and clothing to complete the line art.
3. Drawing the Body Sketch
Vector graphic layers can be enlarged or reduced.
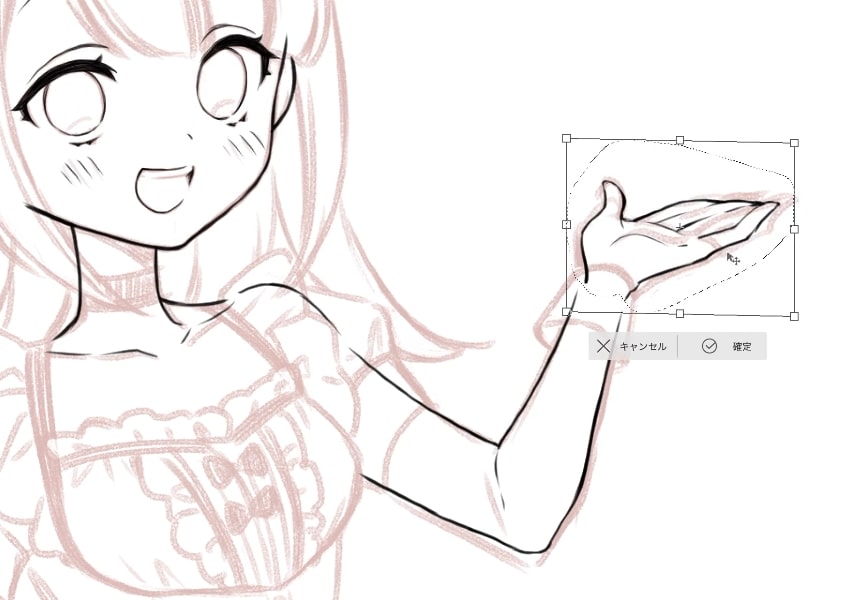
The hand is a bit big so I will adjust it.
I select the hand area using [Select] → [Lasso selection] and use [Transform] to make the hand smaller.
Lines drawn on a vector layer do not lose quality even when enlarged or reduced.
It's convenient to be able to change the size of the line drawing midway.
Draw even the parts that are not visible.
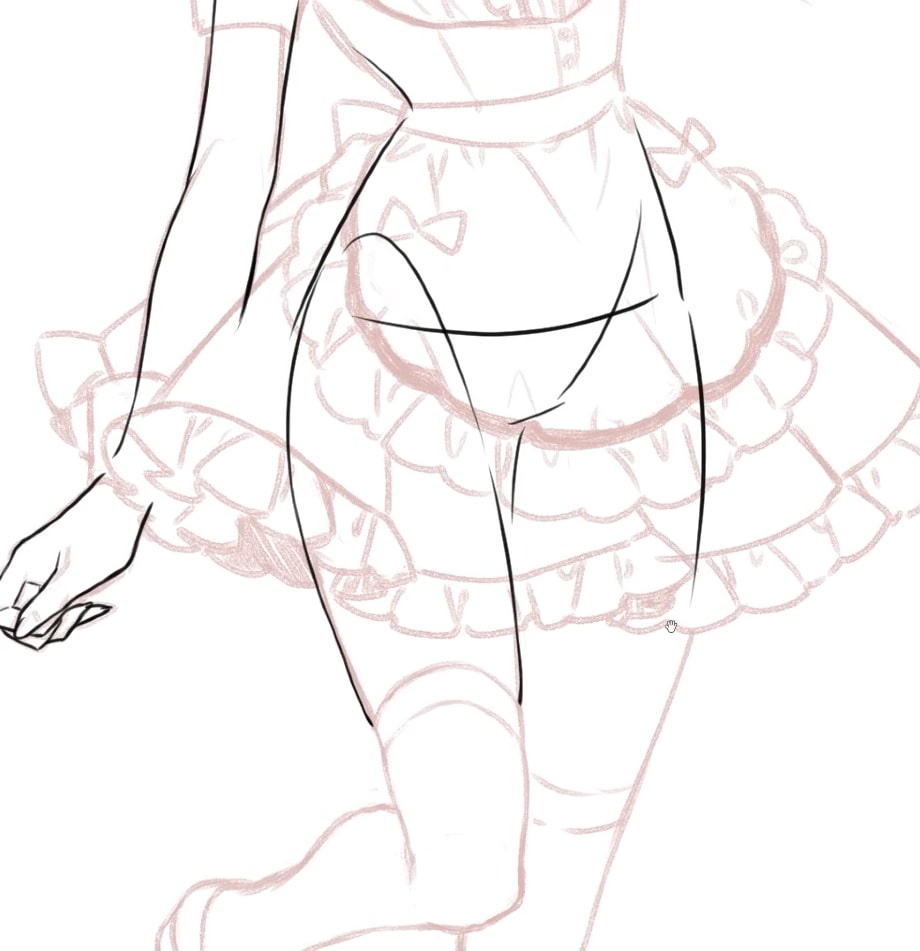
You should draw body lines, even for parts that will be hidden by clothing.
Drawing the body lines makes it easier to dress the character and helps easily detect errors in the drawing.
Helping to define the body lines.
The collarbone, the protrusion of the knee, and the elastic of the knee-high socks are all internal lines, so draw them very thinly.
The outer contours and the boundary between the thigh and the knee-high socks are drawn with thick lines to create contrast.
④Complete the Line Drawing
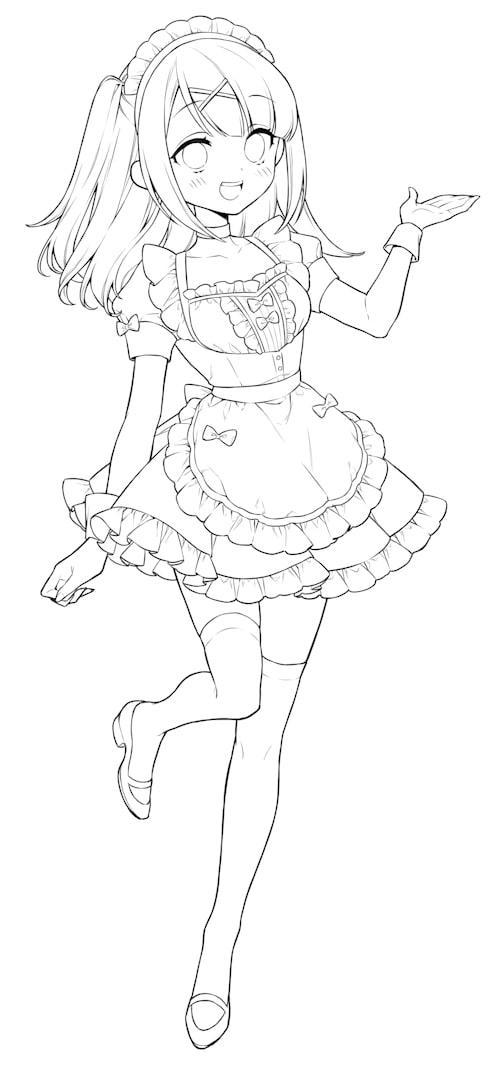
Next, we continue drawing lines for hair, clothing, and accessories.
In this illustration process, the lines are drawn on a vector layer, so you can adjust the line thickness by using [Line Correction Tool] → [Adjust line width].
Adjust the line thickness of the entire character, add accent lines for hair and clothing, and the line drawing is complete!
Đánh giá bài viết
More from author
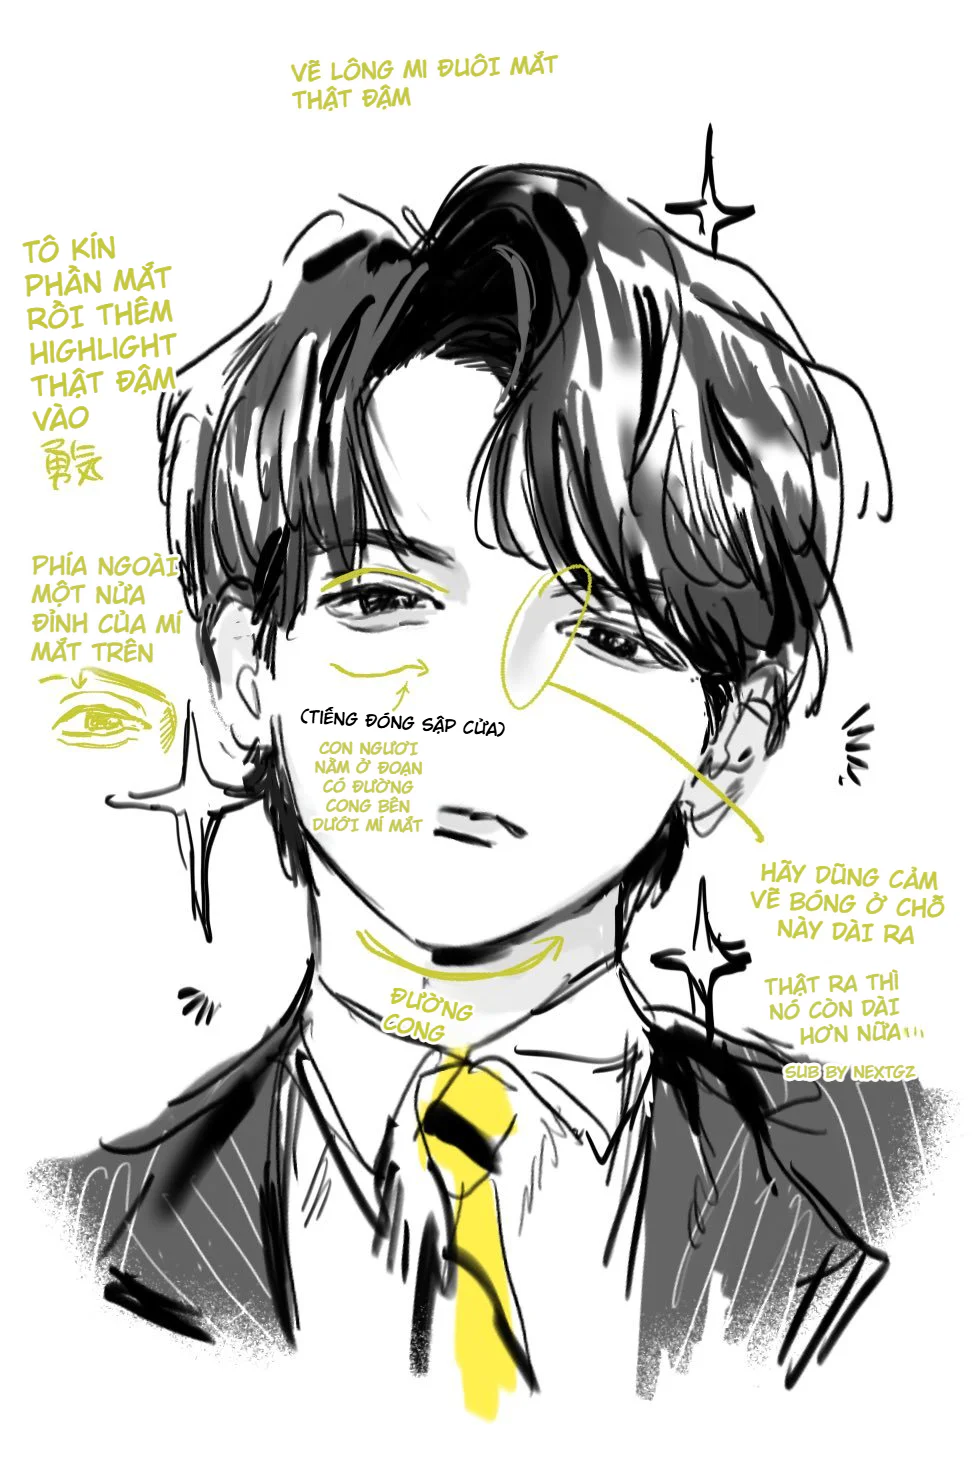
Cách vẽ nhân vật nam manga ngầu bằng mắt cụp, tóc đen bóng và halftone
So sánh các cách học Mẹo Vẽ Ký Họa Cảnh Đường và cách chọn hướng

Tự Học Clip Studio Paint Cơ Bản: Hướng Dẫn Toàn Diện Cho Người Mới Bắt Đầu

Bộ Sưu Tập 48 Brush Information Volume Tạo Chi Tiết Và Texture Cực Đỉnh Cho PS, Procreate, CSP
You might also like
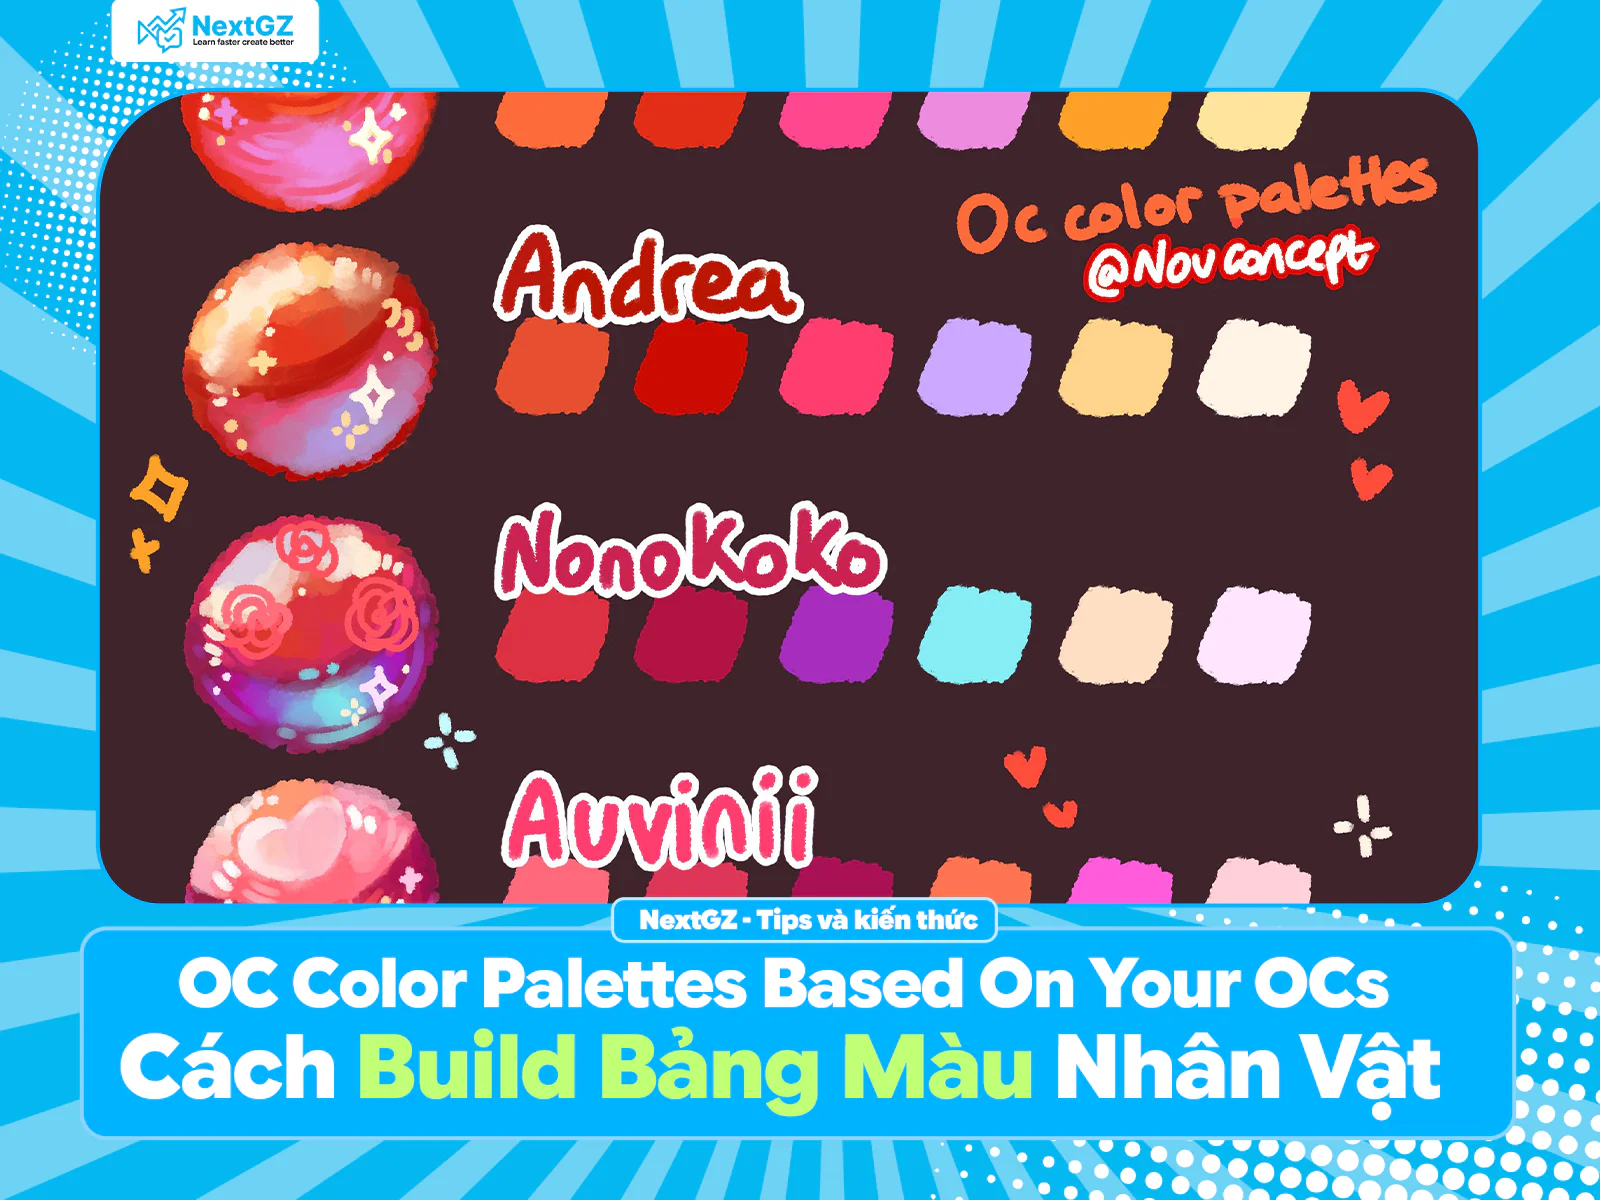
OC Color Palettes Based On Your OCs: Cách Build Bảng Màu Nhân Vật Dễ Thương, Dễ Nhớ, Tô Là Đẹp

Bí Quyết Vẽ Góc Mặt Nghiêng Siêu Đơn Giản Cho Người Mới Bắt Đầu
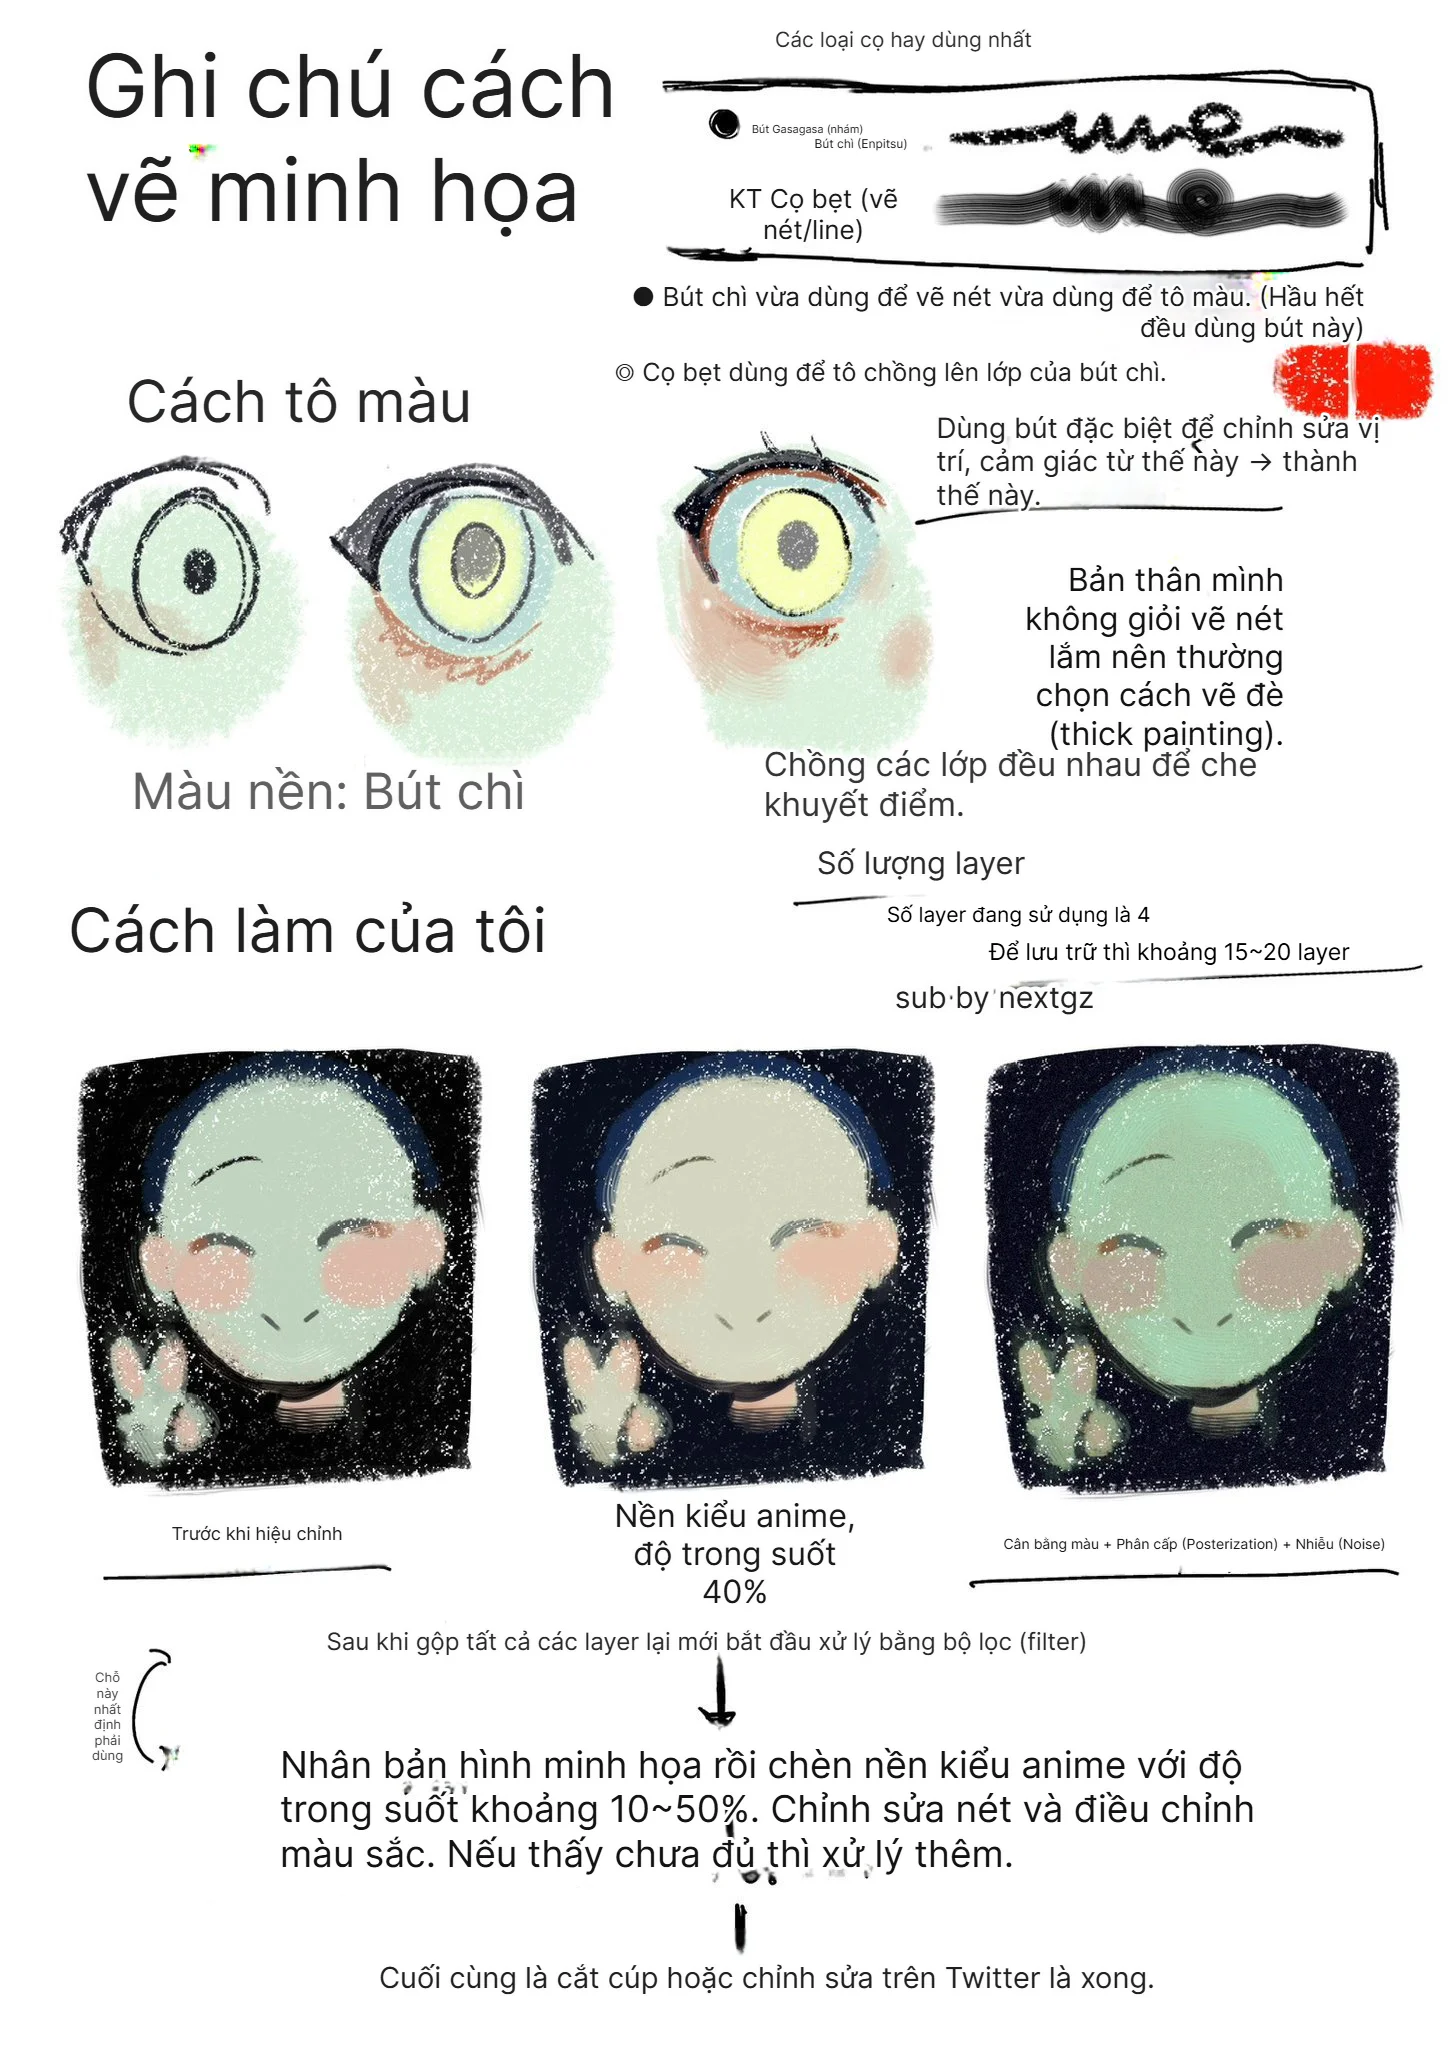
Quy trình vẽ minh họa anime kiểu tô-lớp dày: từ rough sketch đến hậu kỳ hoàn thiện
Bình luận
0 bình luận
Đăng nhập để tham gia thảo luận cùng cộng đồng!
Đăng nhập ngayĐang tải bình luận...