 Brushes & Tài nguyên
 Procreate




Complete the following requirements to unlock:
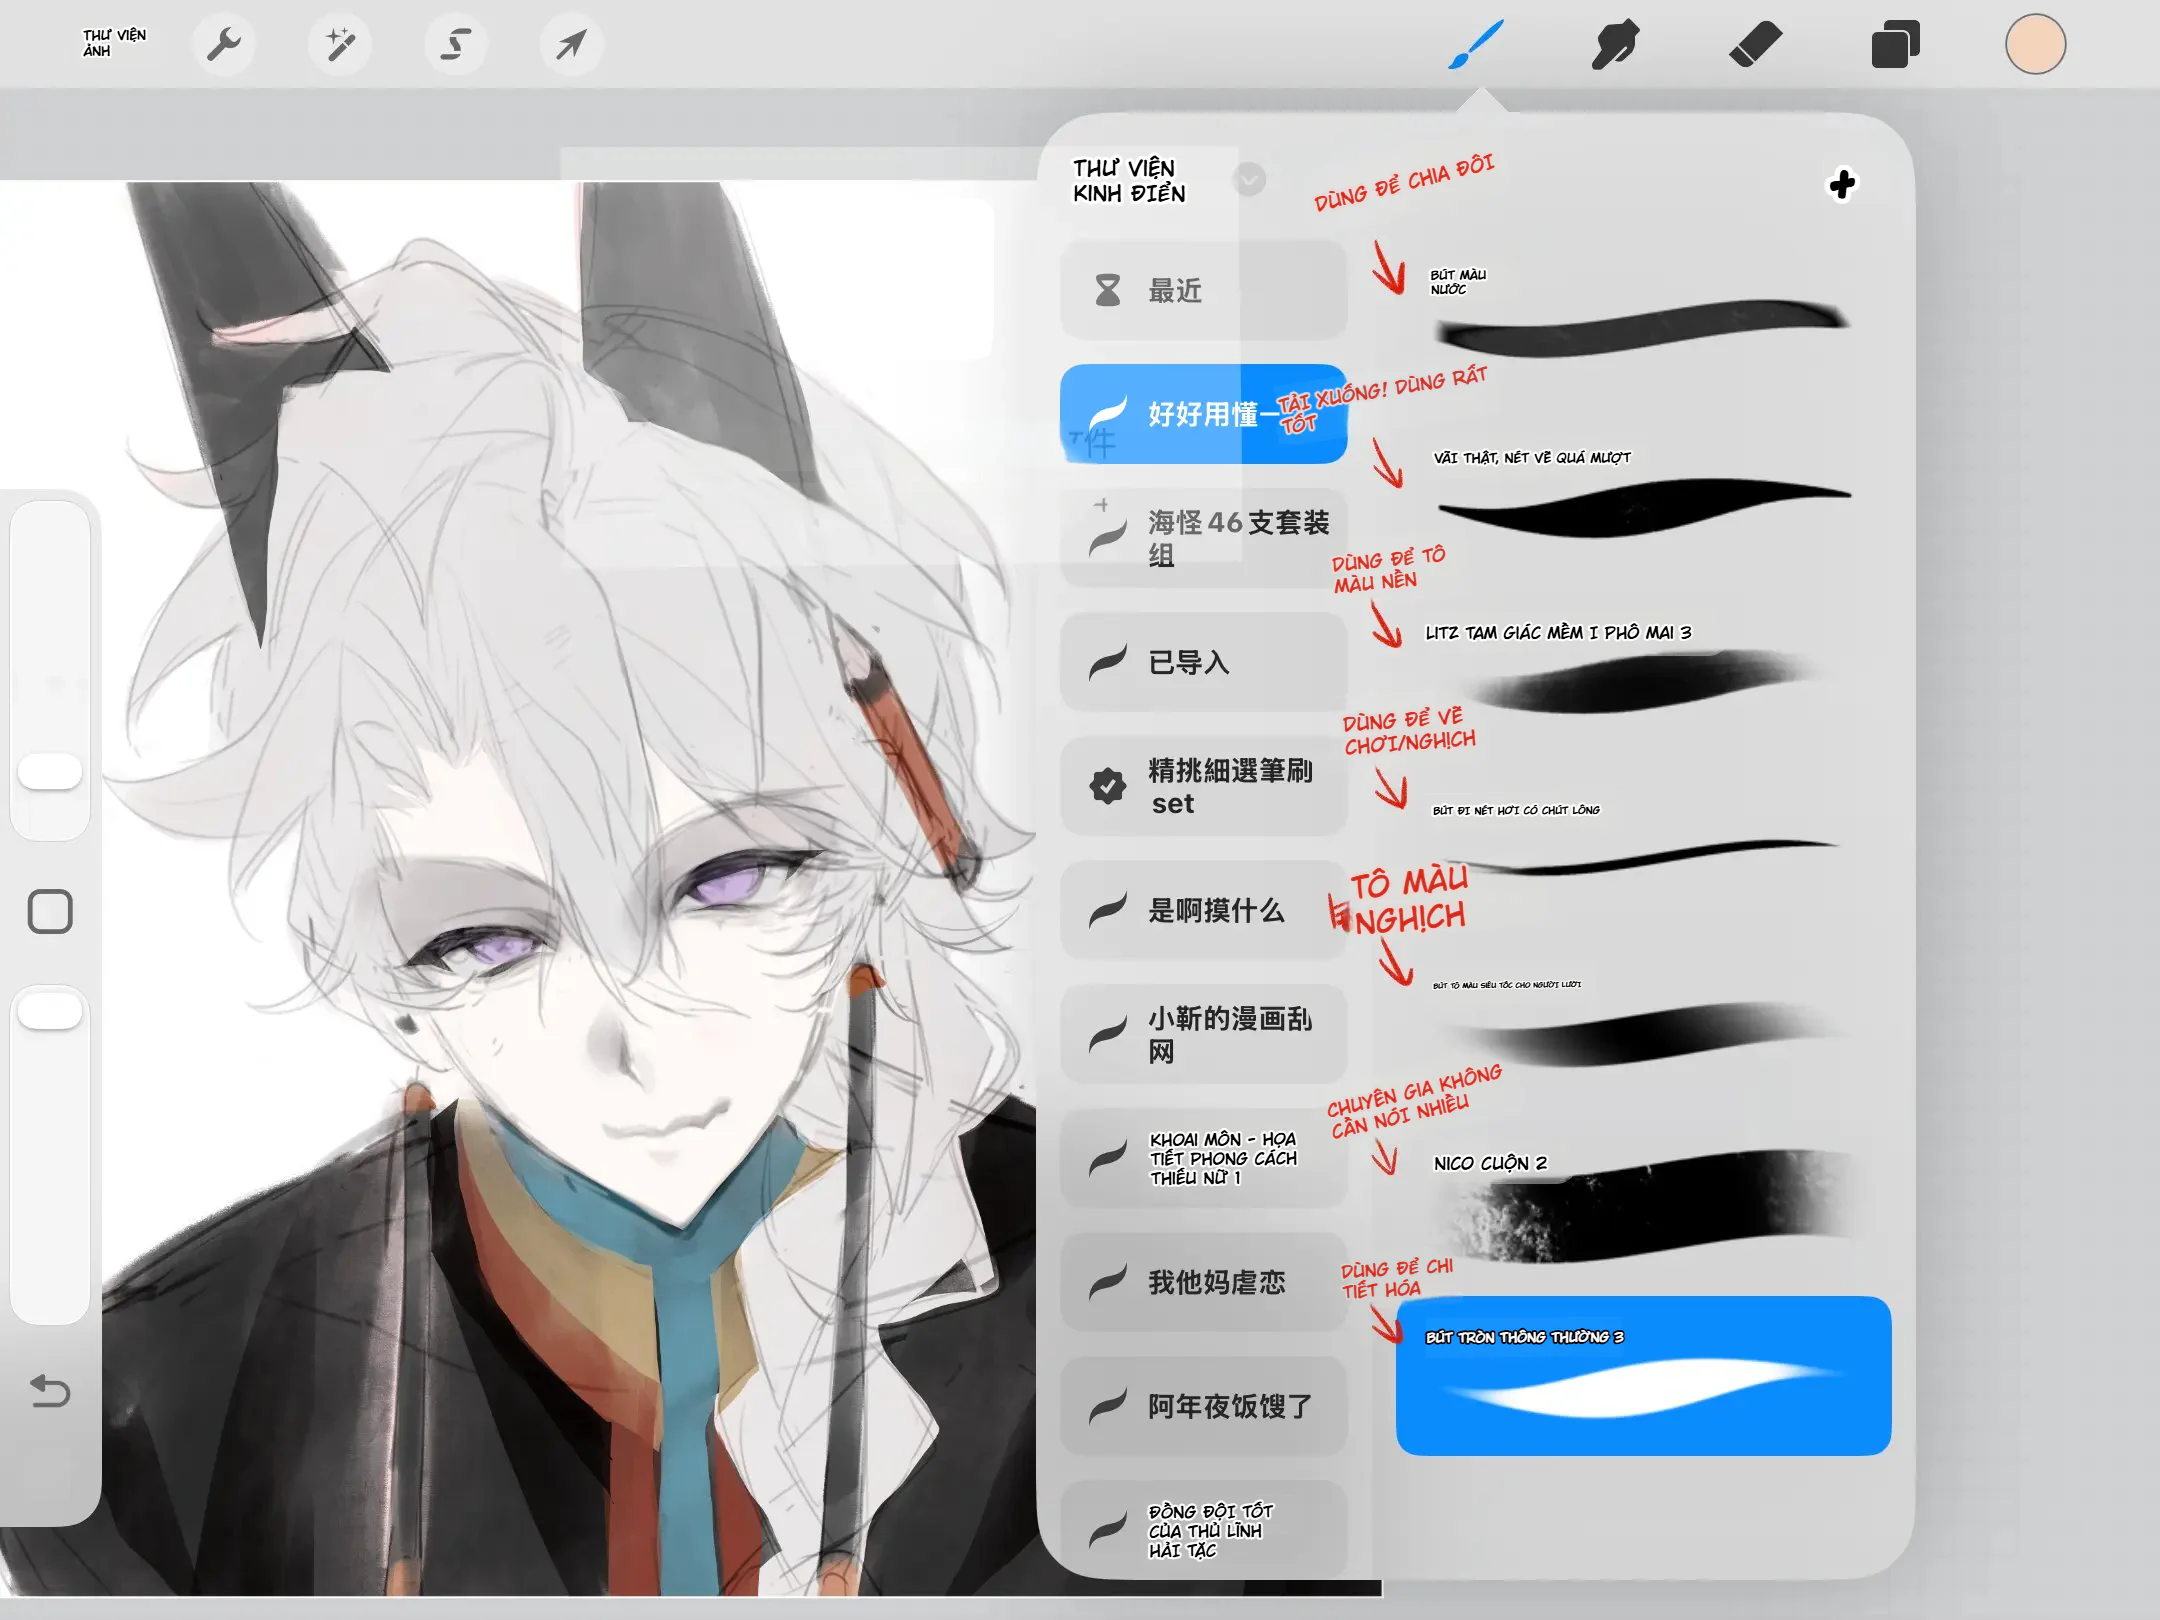
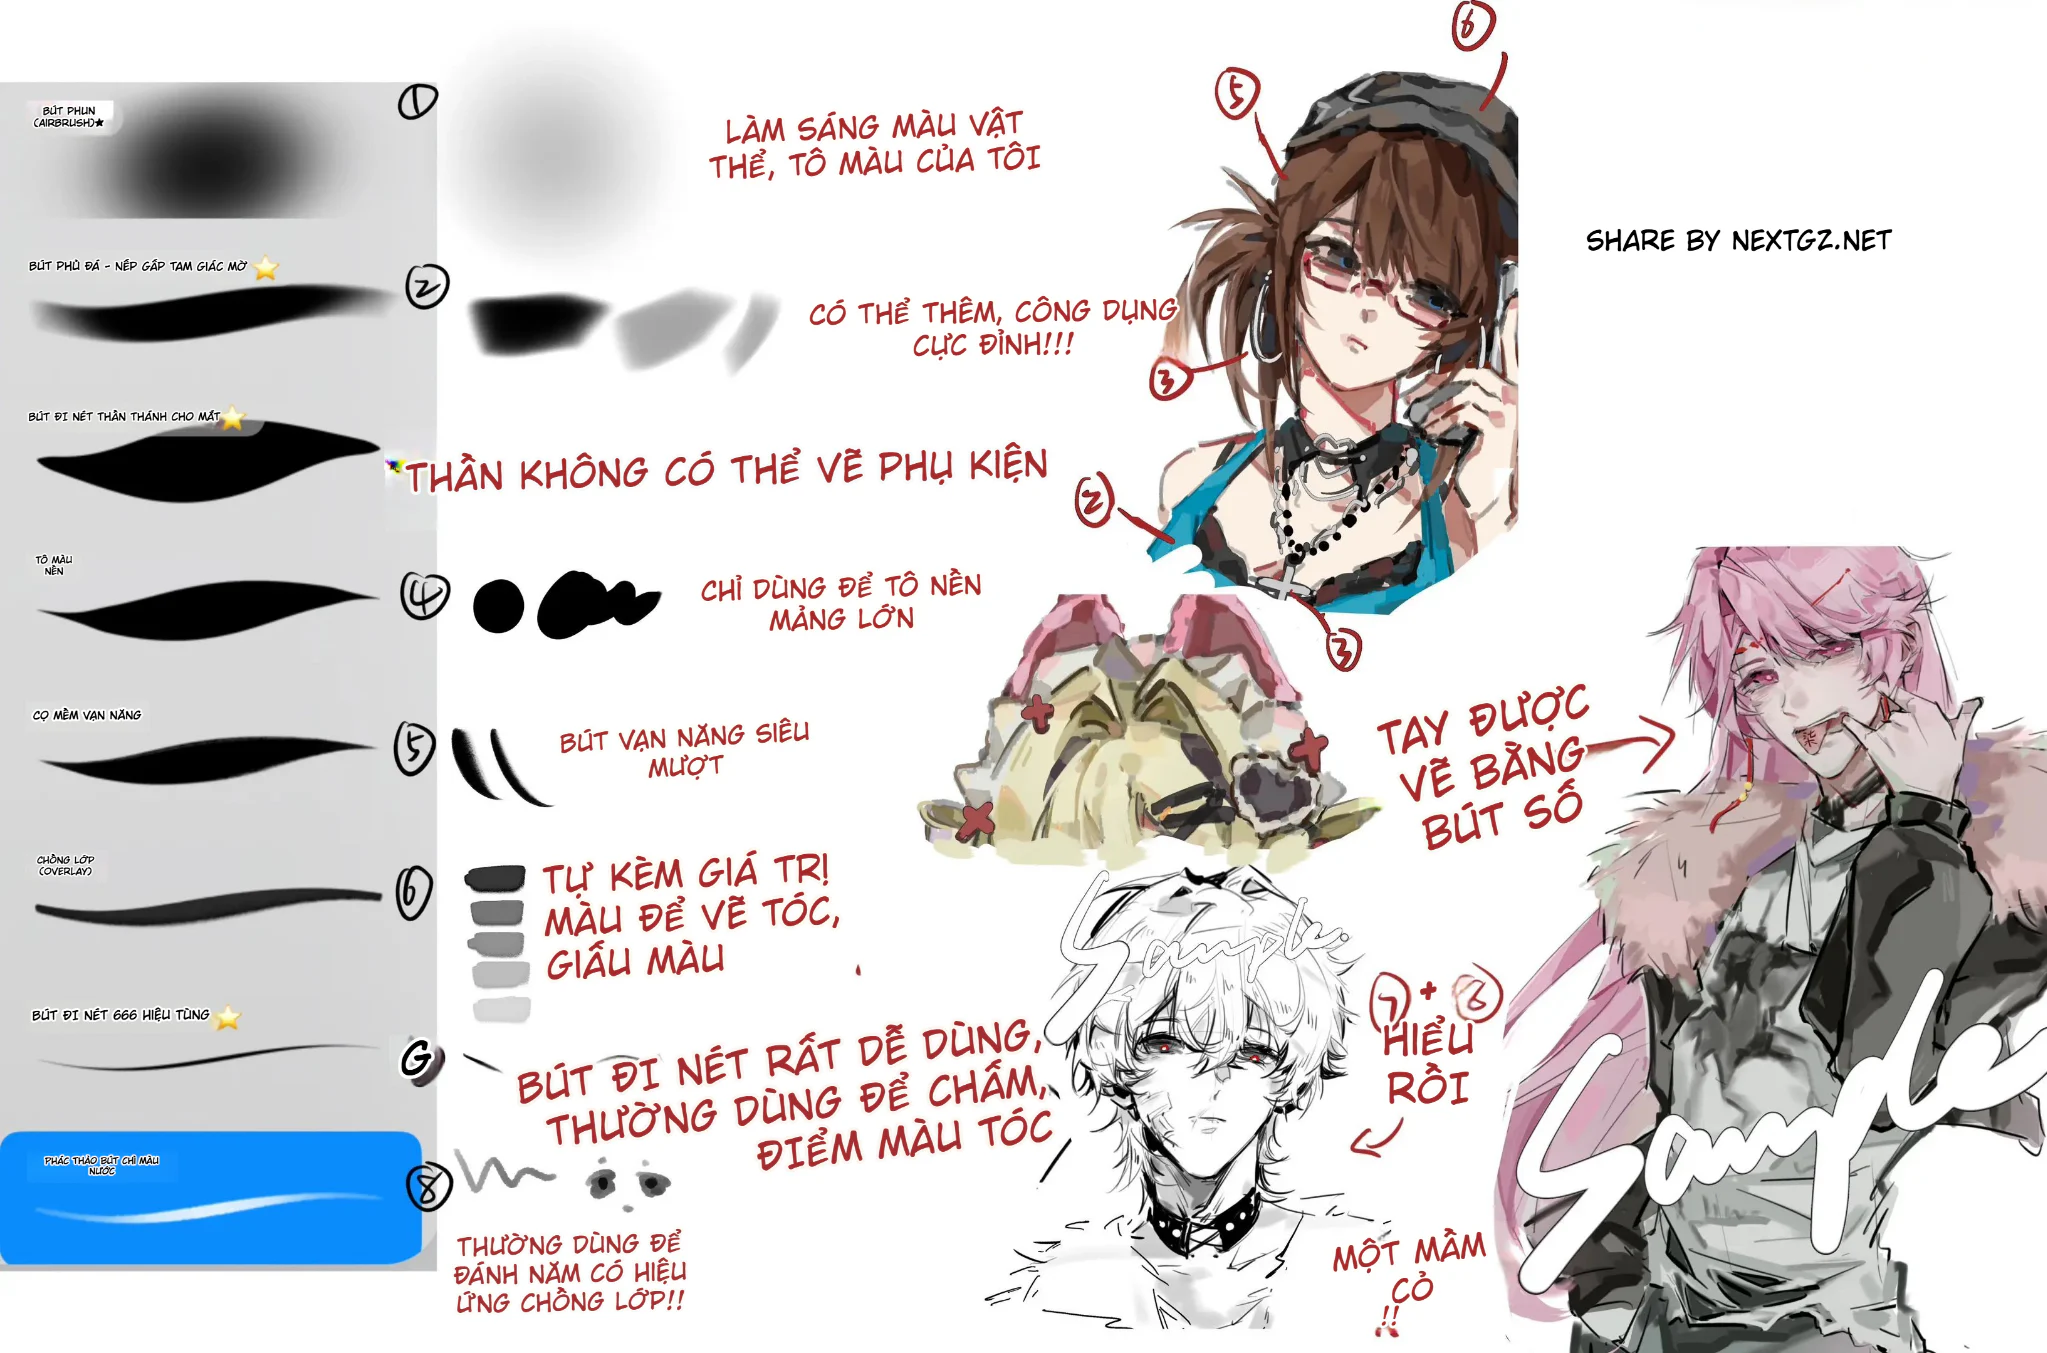
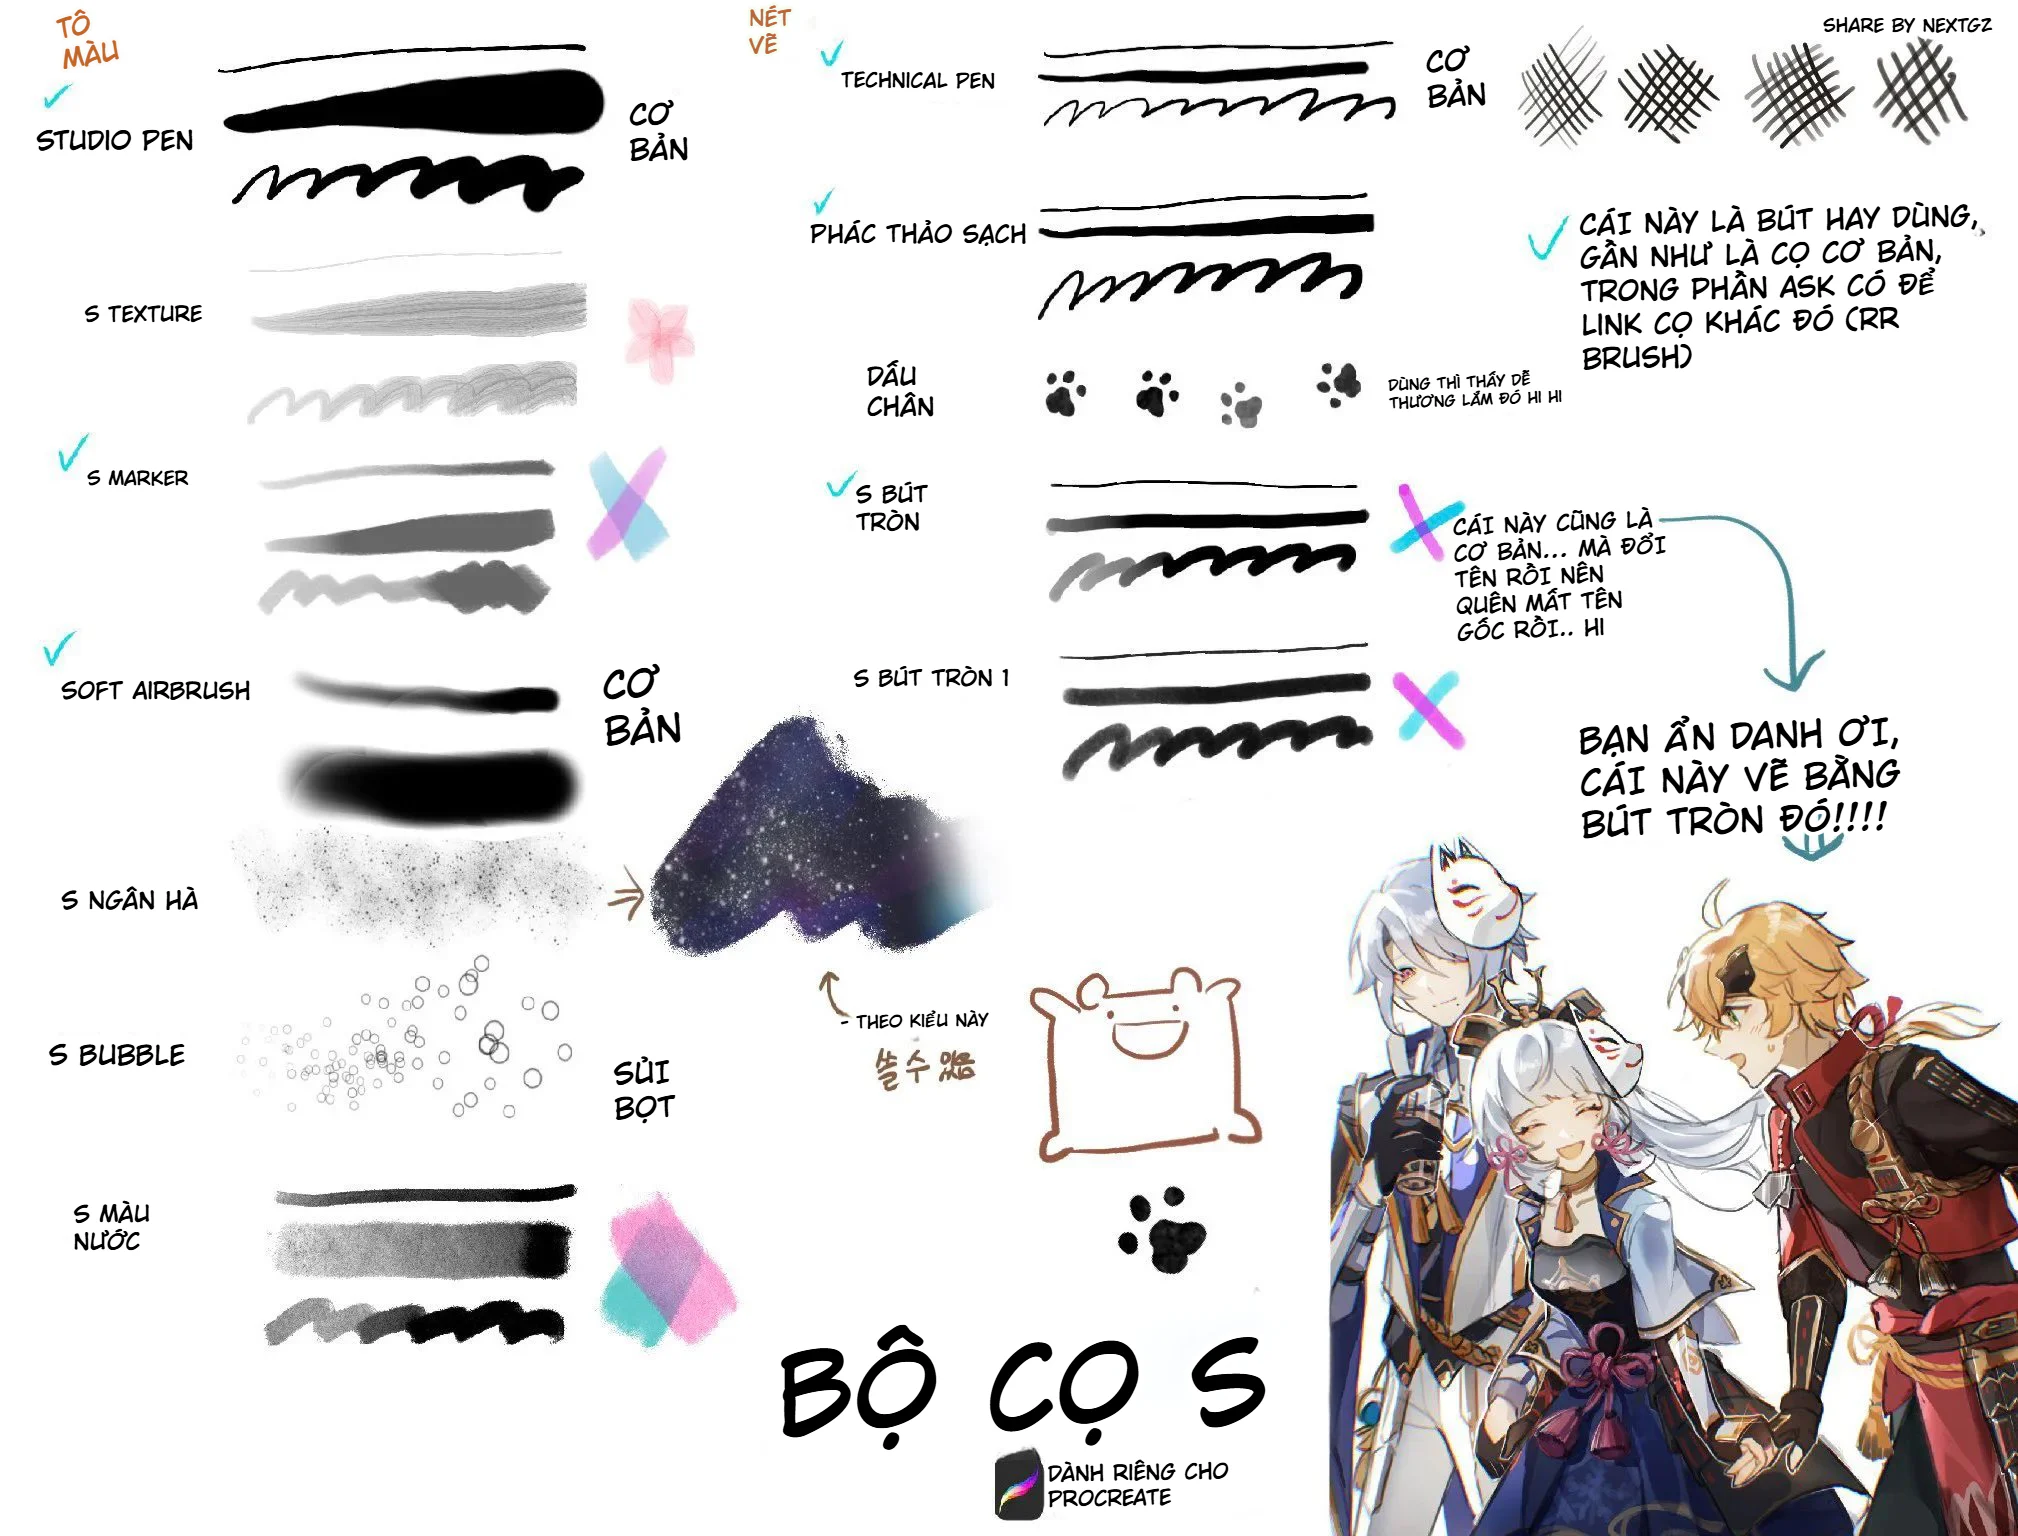
There are brush sets that look very impressive at first glance, but when you actually draw with them, you only end up using one or two brushes. The brush set in this post takes a different approach: each group of strokes handles a fairly distinct stage, from laying down the sketch, cleaning up the lines, coloring, blending, to working on hair, clothing, and the painting's surface.
If you enjoy illustrating anime characters with soft, slightly loose lines, colors that aren't overly industrial, and still retain a hand-drawn feel, this is a brush set worth trying on Procreate.
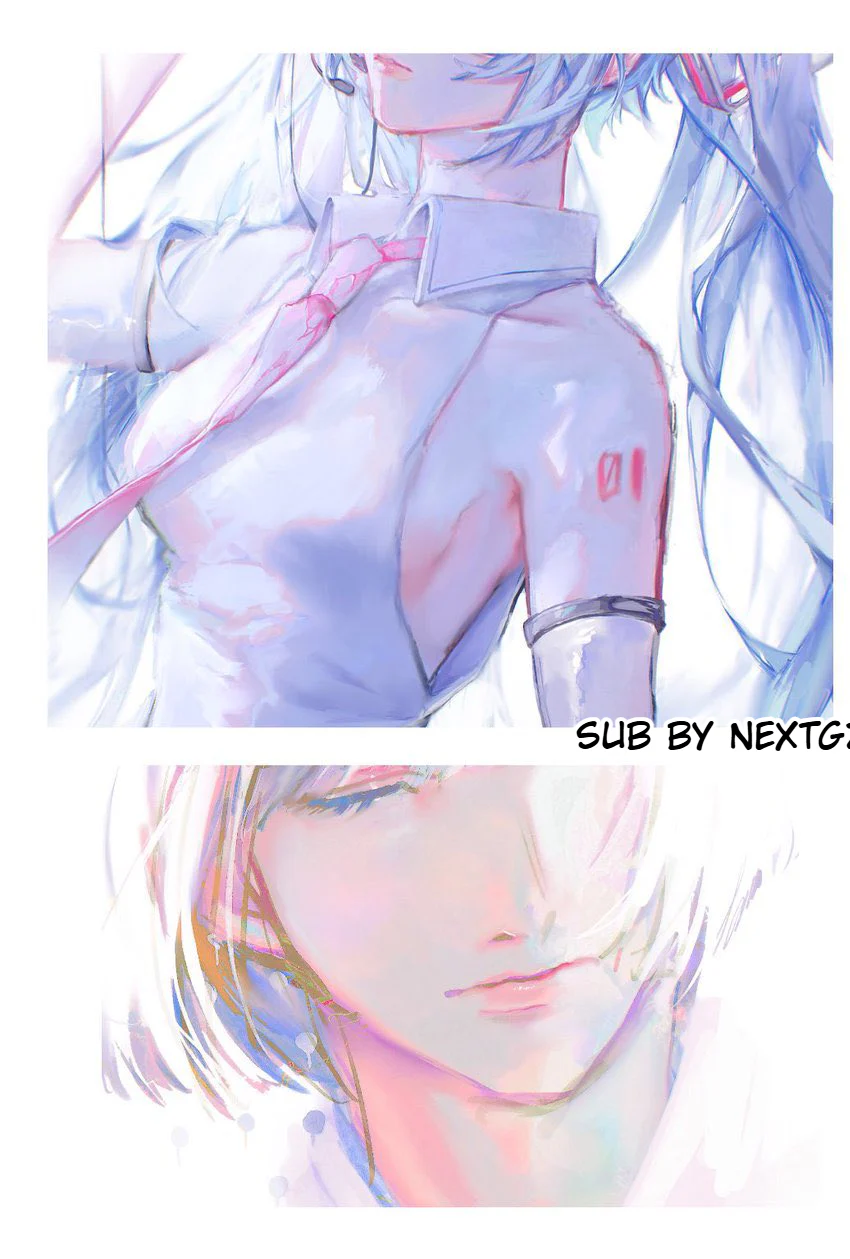
This brush set is especially suited for character portraits, long hair, historical costumes, dark-toned paintings, semi-realistic male and female characters, and pieces that need a combination of clean lines with a slightly textured surface.
What stands out about this brush set?
The biggest strength is not in the quantity, but in its ability to cover many stages of a single painting.
You can start with a loose line brush to find the shapes, switch to a finer brush to adjust the hair and face, use a broad brush to lay down base colors, add a soft brush for gradient areas, then finish with a round brush or a texture brush.
This way, the artist doesn't have to switch between too many different brush sets within the same painting.
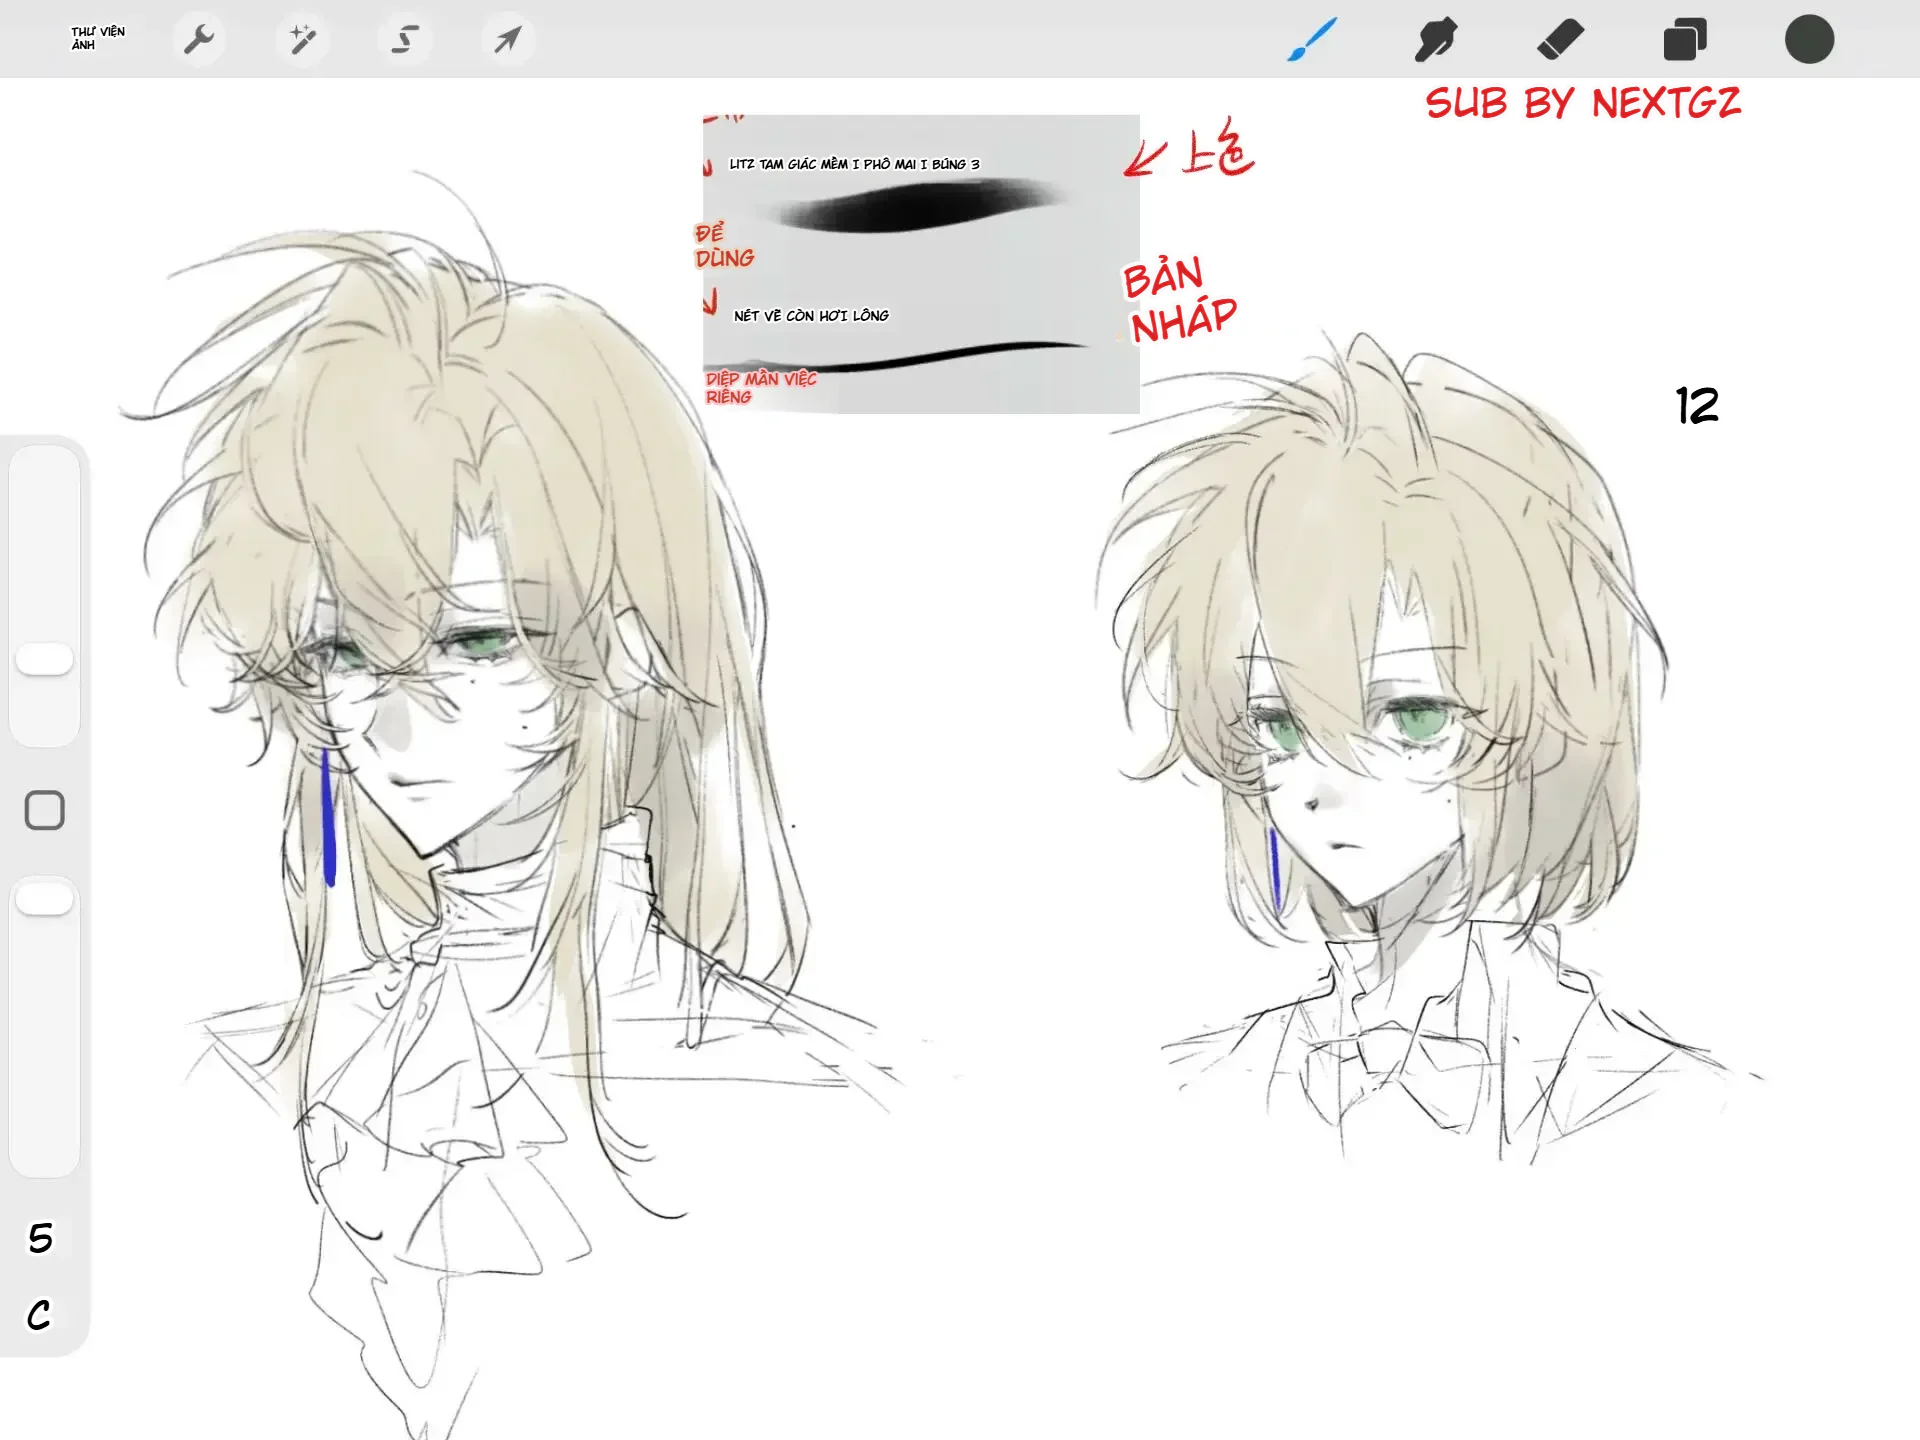
Soft and natural sketching brushes
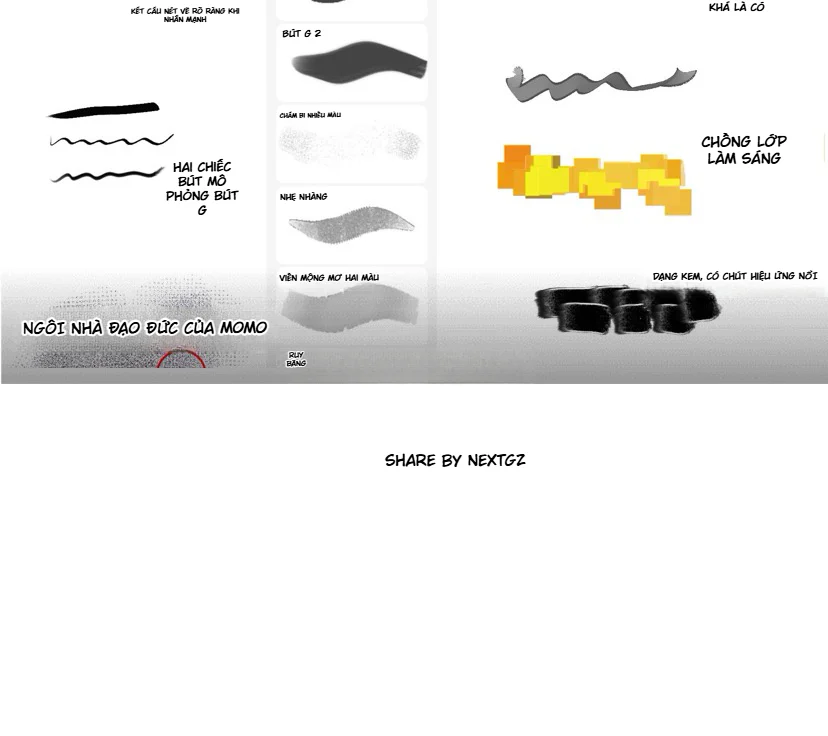
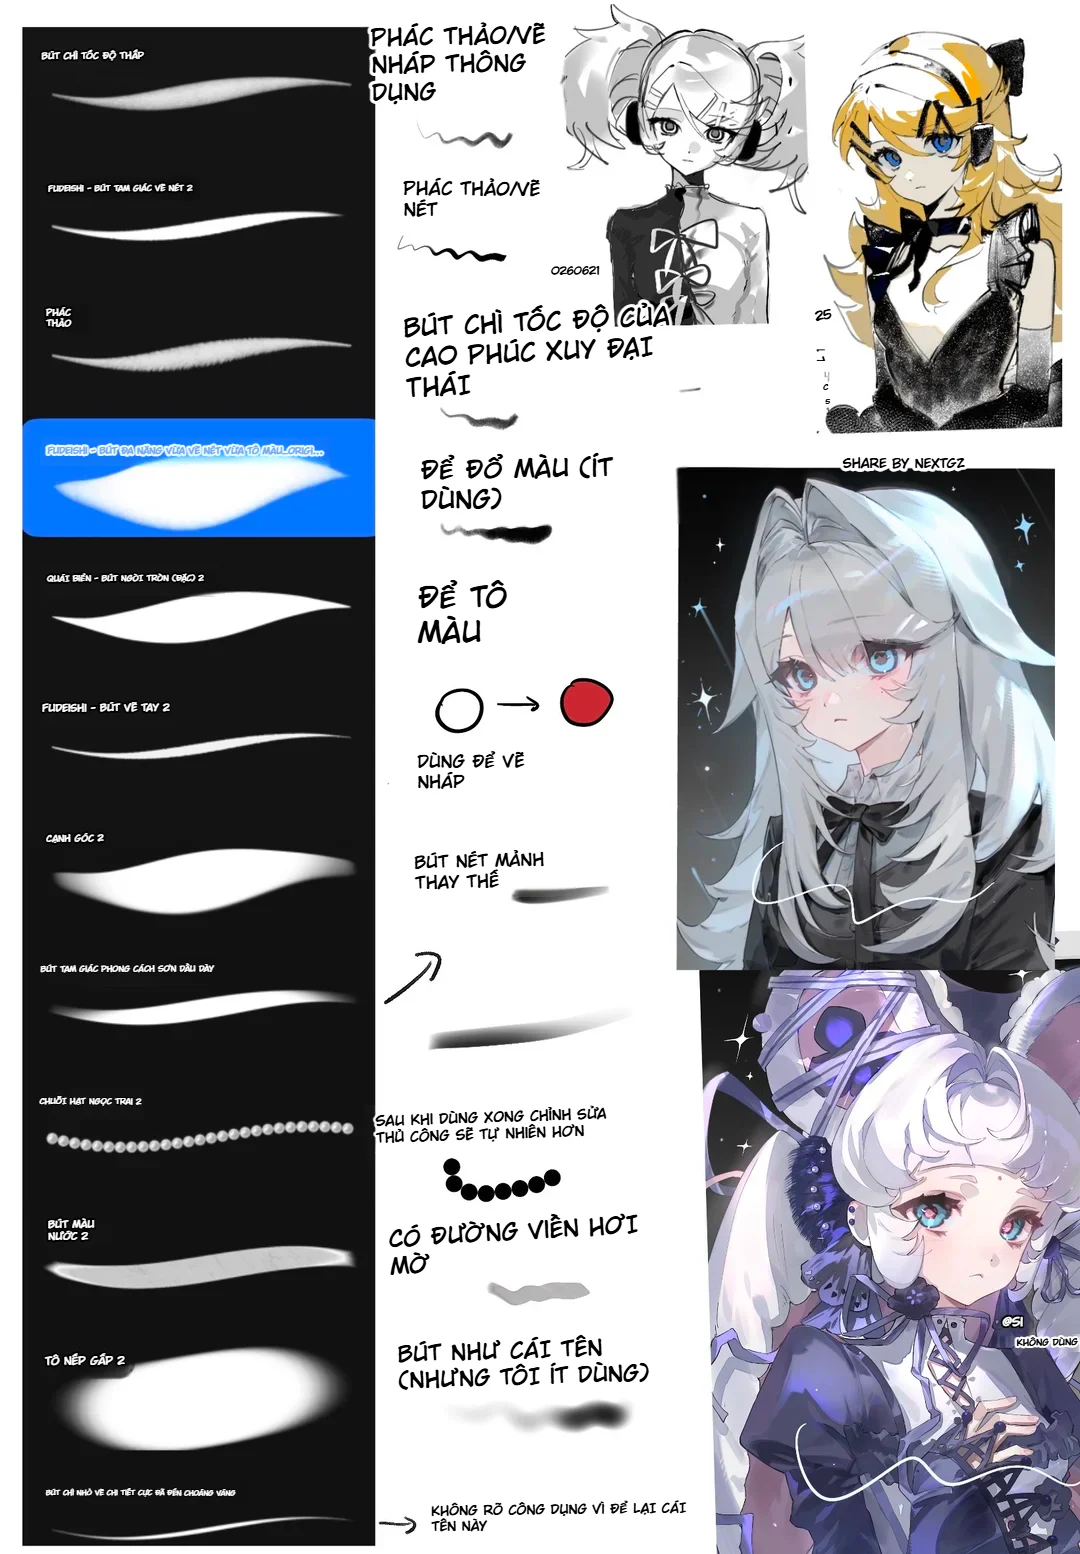
The sketching brush group has thin strokes, moderate transparency, and fairly responsive pen pressure. When you apply light pressure, the line is faint and delicate; when you increase pressure, the stroke becomes bolder but still not too stiff.
This type of response is suitable for laying down:
facial shapes;
positions of eyes, nose, and mouth;
large hair clusters;
bows, collars, and jewelry;
the drape of clothing;
character portrait drafts.
The strokes have just enough looseness so that the artist can easily try out multiple approaches without feeling the sketch is locked in too early.
Inking brushes for hair and face
Some brushes have a tapered body, with small tips at both ends and a relatively smooth path. This group is ideal for cleaning up important areas after the sketch is settled.
You can use them for eyelids, eyelashes, jawline, lips, nose bridge, bangs, and clothing edges. For hair, it's best to go over large clusters first, then separate a few fine strands at the outer edges.
There's no need to make the entire lineart uniformly thick. Outer contours and shadowed areas can be bolder, while details in highlighted areas should be thin and light.
Base coloring and color blocking brushes
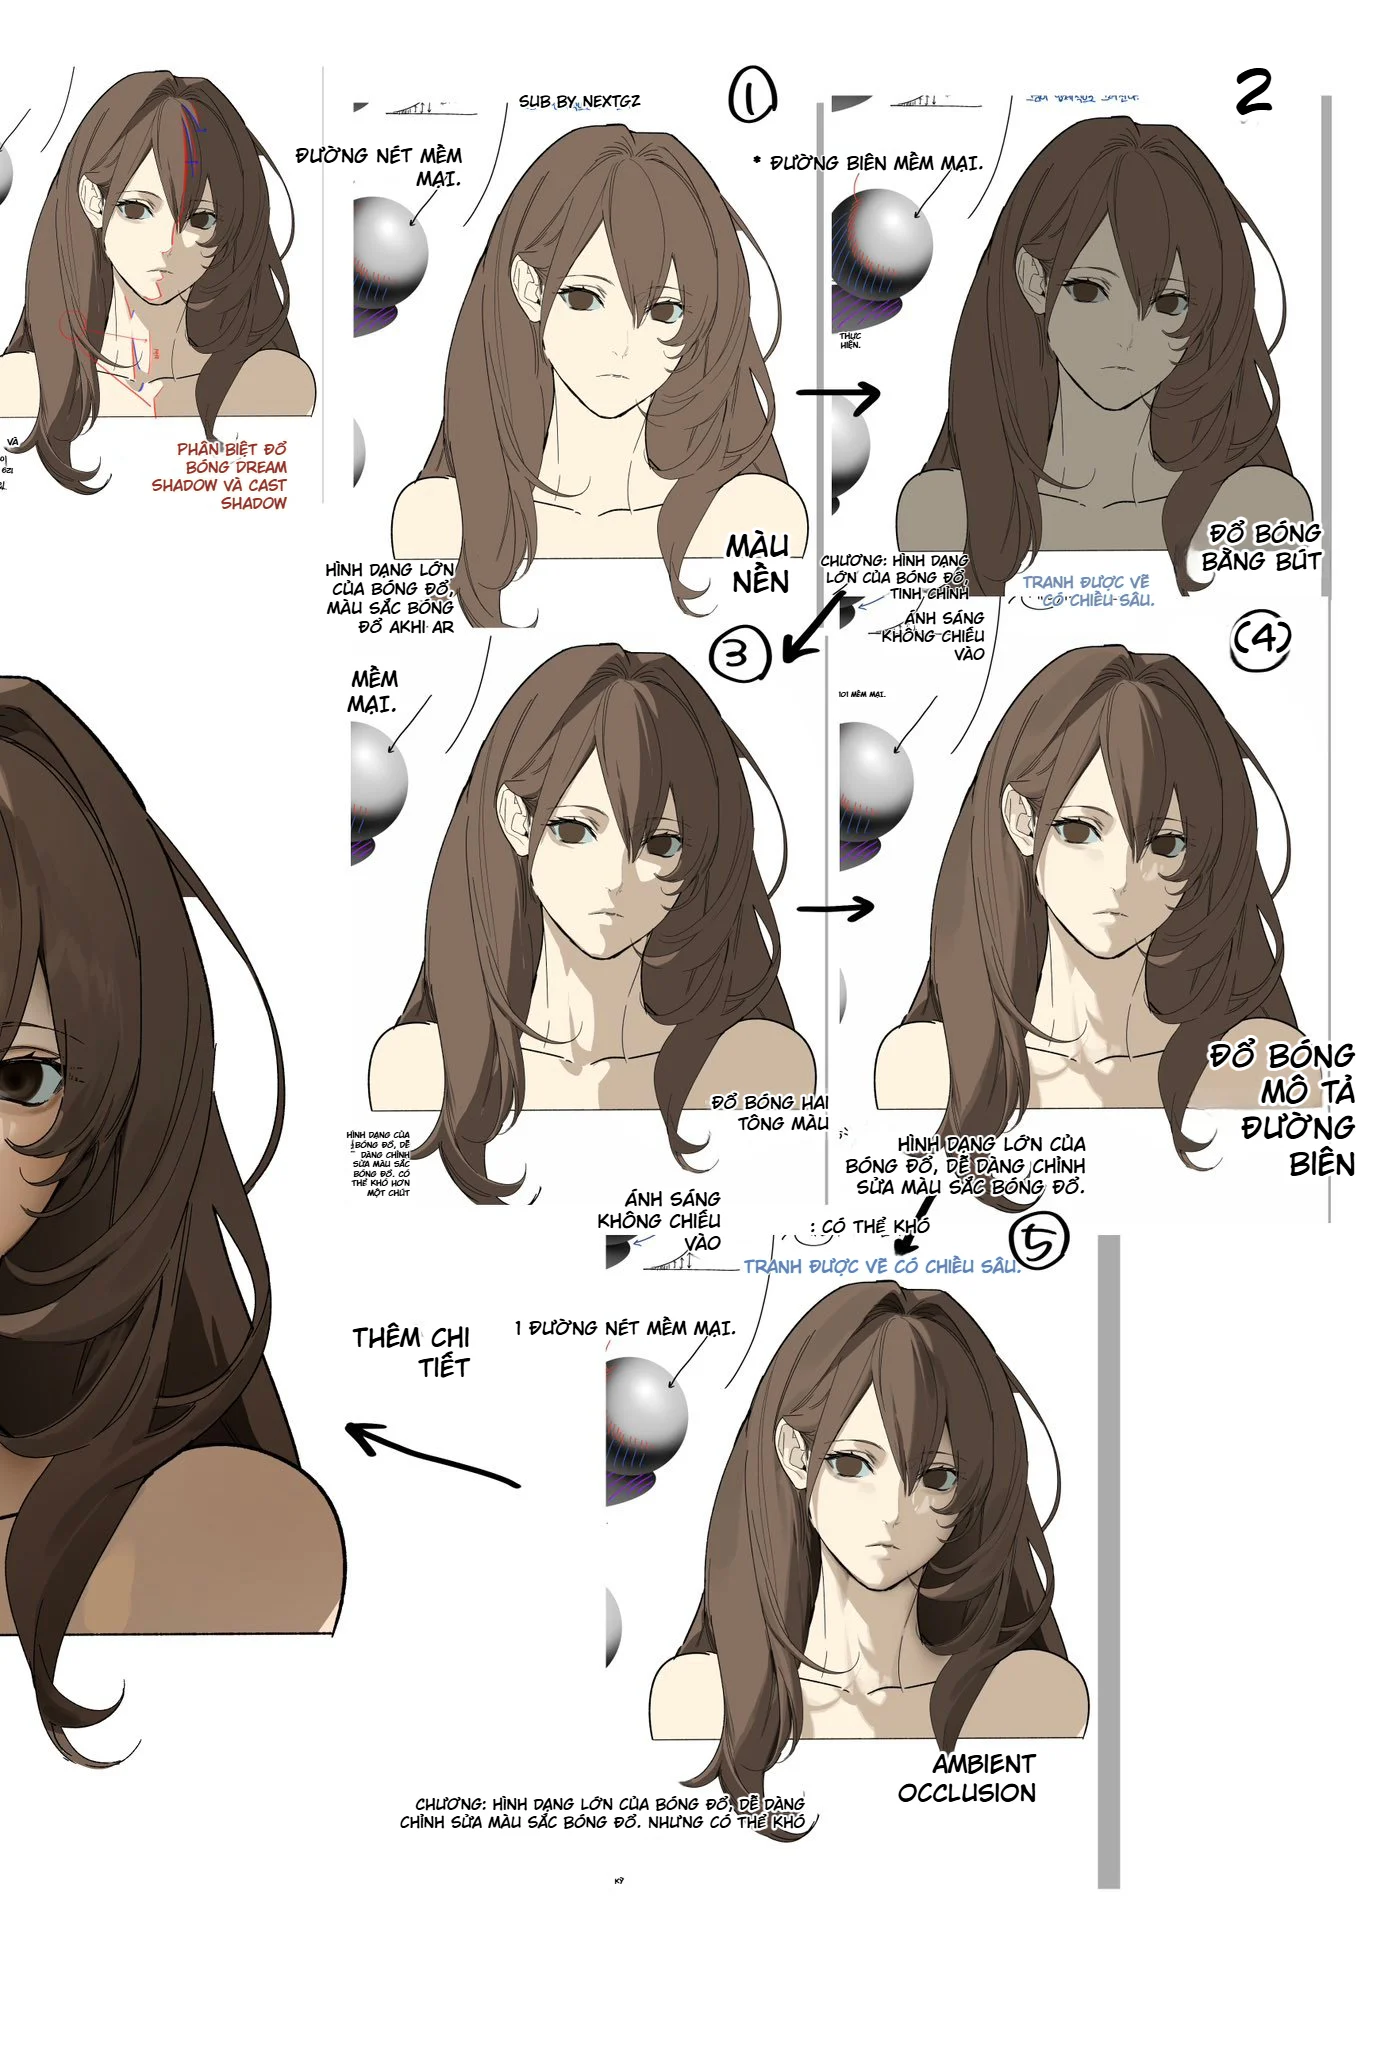
The broad brush group helps quickly cover color for hair, skin, and clothing. The brush body is dense enough that you don't have to go over the same area too many times, but it still retains slight surface variation so the painting doesn't look flat like auto-filled color.
These brushes should be used after the main areas have been clearly defined. Separate hair, skin, clothing, and accessories into individual layers to make color adjustments easier.
At the initial stage, just lay down the base colors. Don't render too many shadows or highlights yet. Once the overall color palette is balanced, then move on to the soft brushes and texture brushes.
Soft triangular brushes for blending and gentle shading
Soft brushes with a feathered edge are suitable for skin areas, hair shadows, clothing color transitions, and ambient light.
The advantage of this brush type is that it creates smooth transitions quickly, but it's also very easy to overuse. If you soften the entire painting, the hair and clothing will lose their structure.
Use the soft brush only where a gentle blend is truly needed, such as cheeks, neck, large areas of hair catching light, or shadows far from the light source. Overlapping edges and deep folds should still keep a clearer boundary.
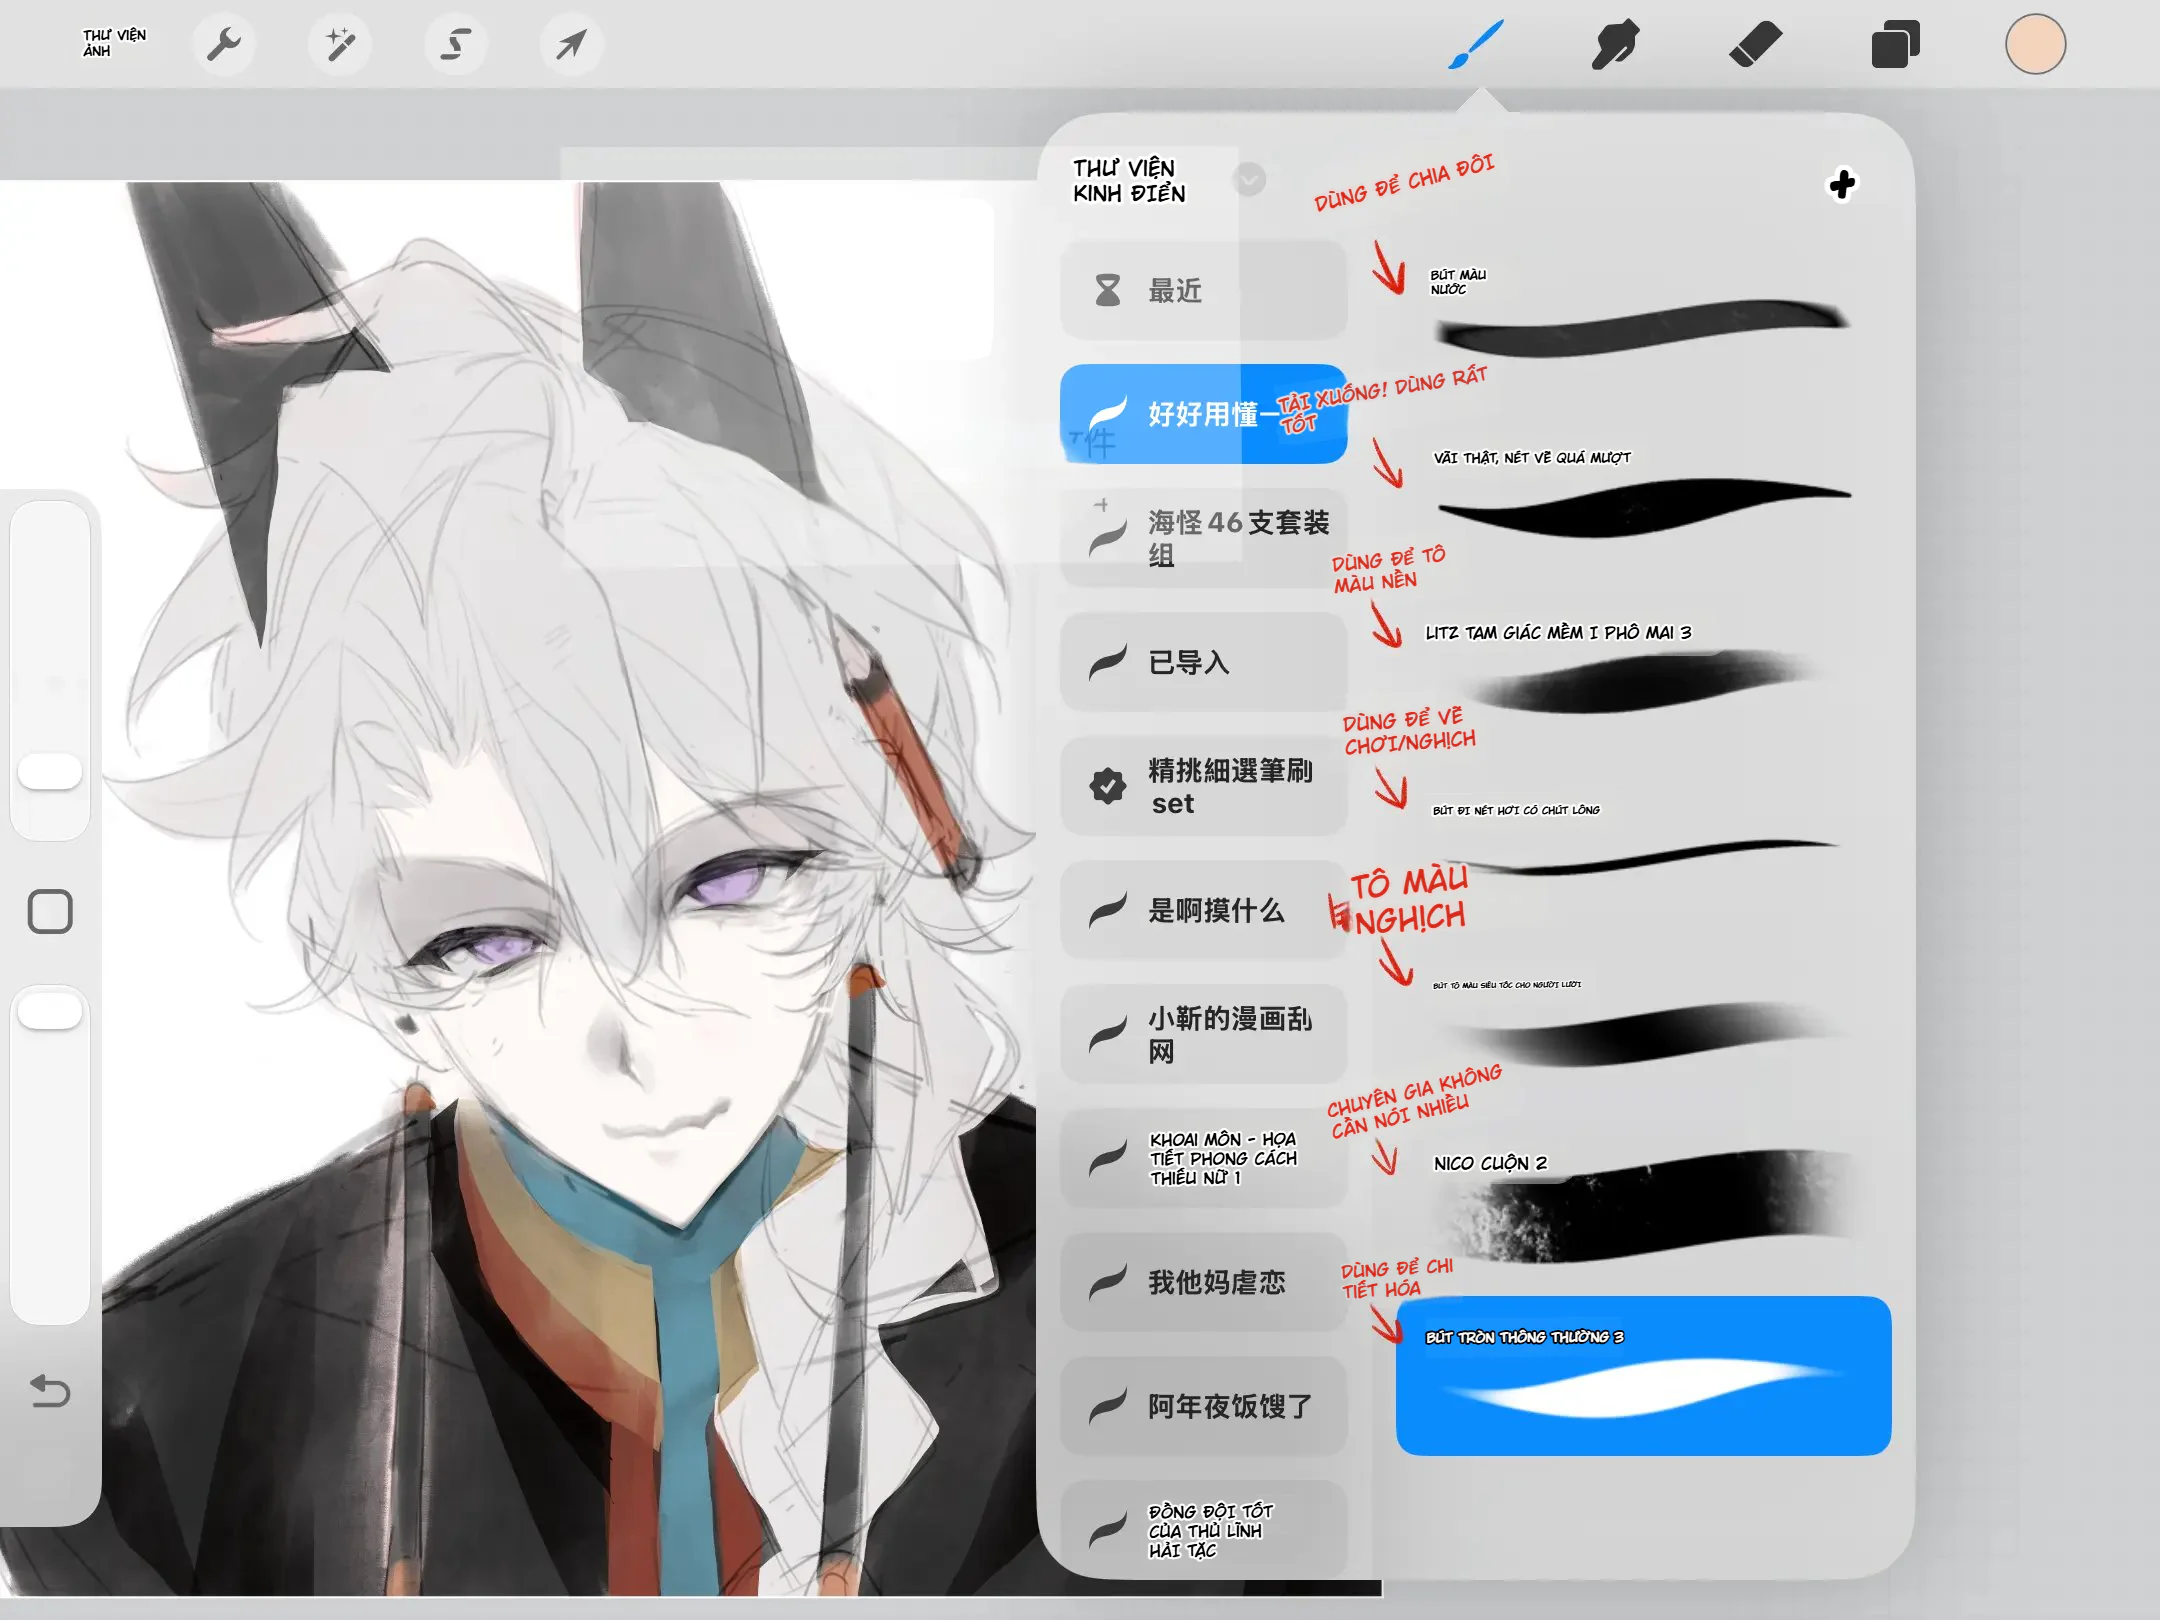
Loose line brushes for expressive drafts
The slightly loose stroke group suits people who like paintings that retain a sketchy quality. The lines aren't perfectly clean like vectors, but it's precisely this slight jitter that makes hair, clothing, and expressions feel more natural.
This type of brush can be used for:
quick portrait sketches;
creating flowing hair;
adding motion lines;
drawing historical costumes;
laying out concept drafts;
creating light lineart for semi-finished paintings.
When a cleaner drawing is needed, use the loose brush for the draft layer, lower its opacity, then trace over it with a more stable brush on the layer above.
Nikko Rull and the texture brush group
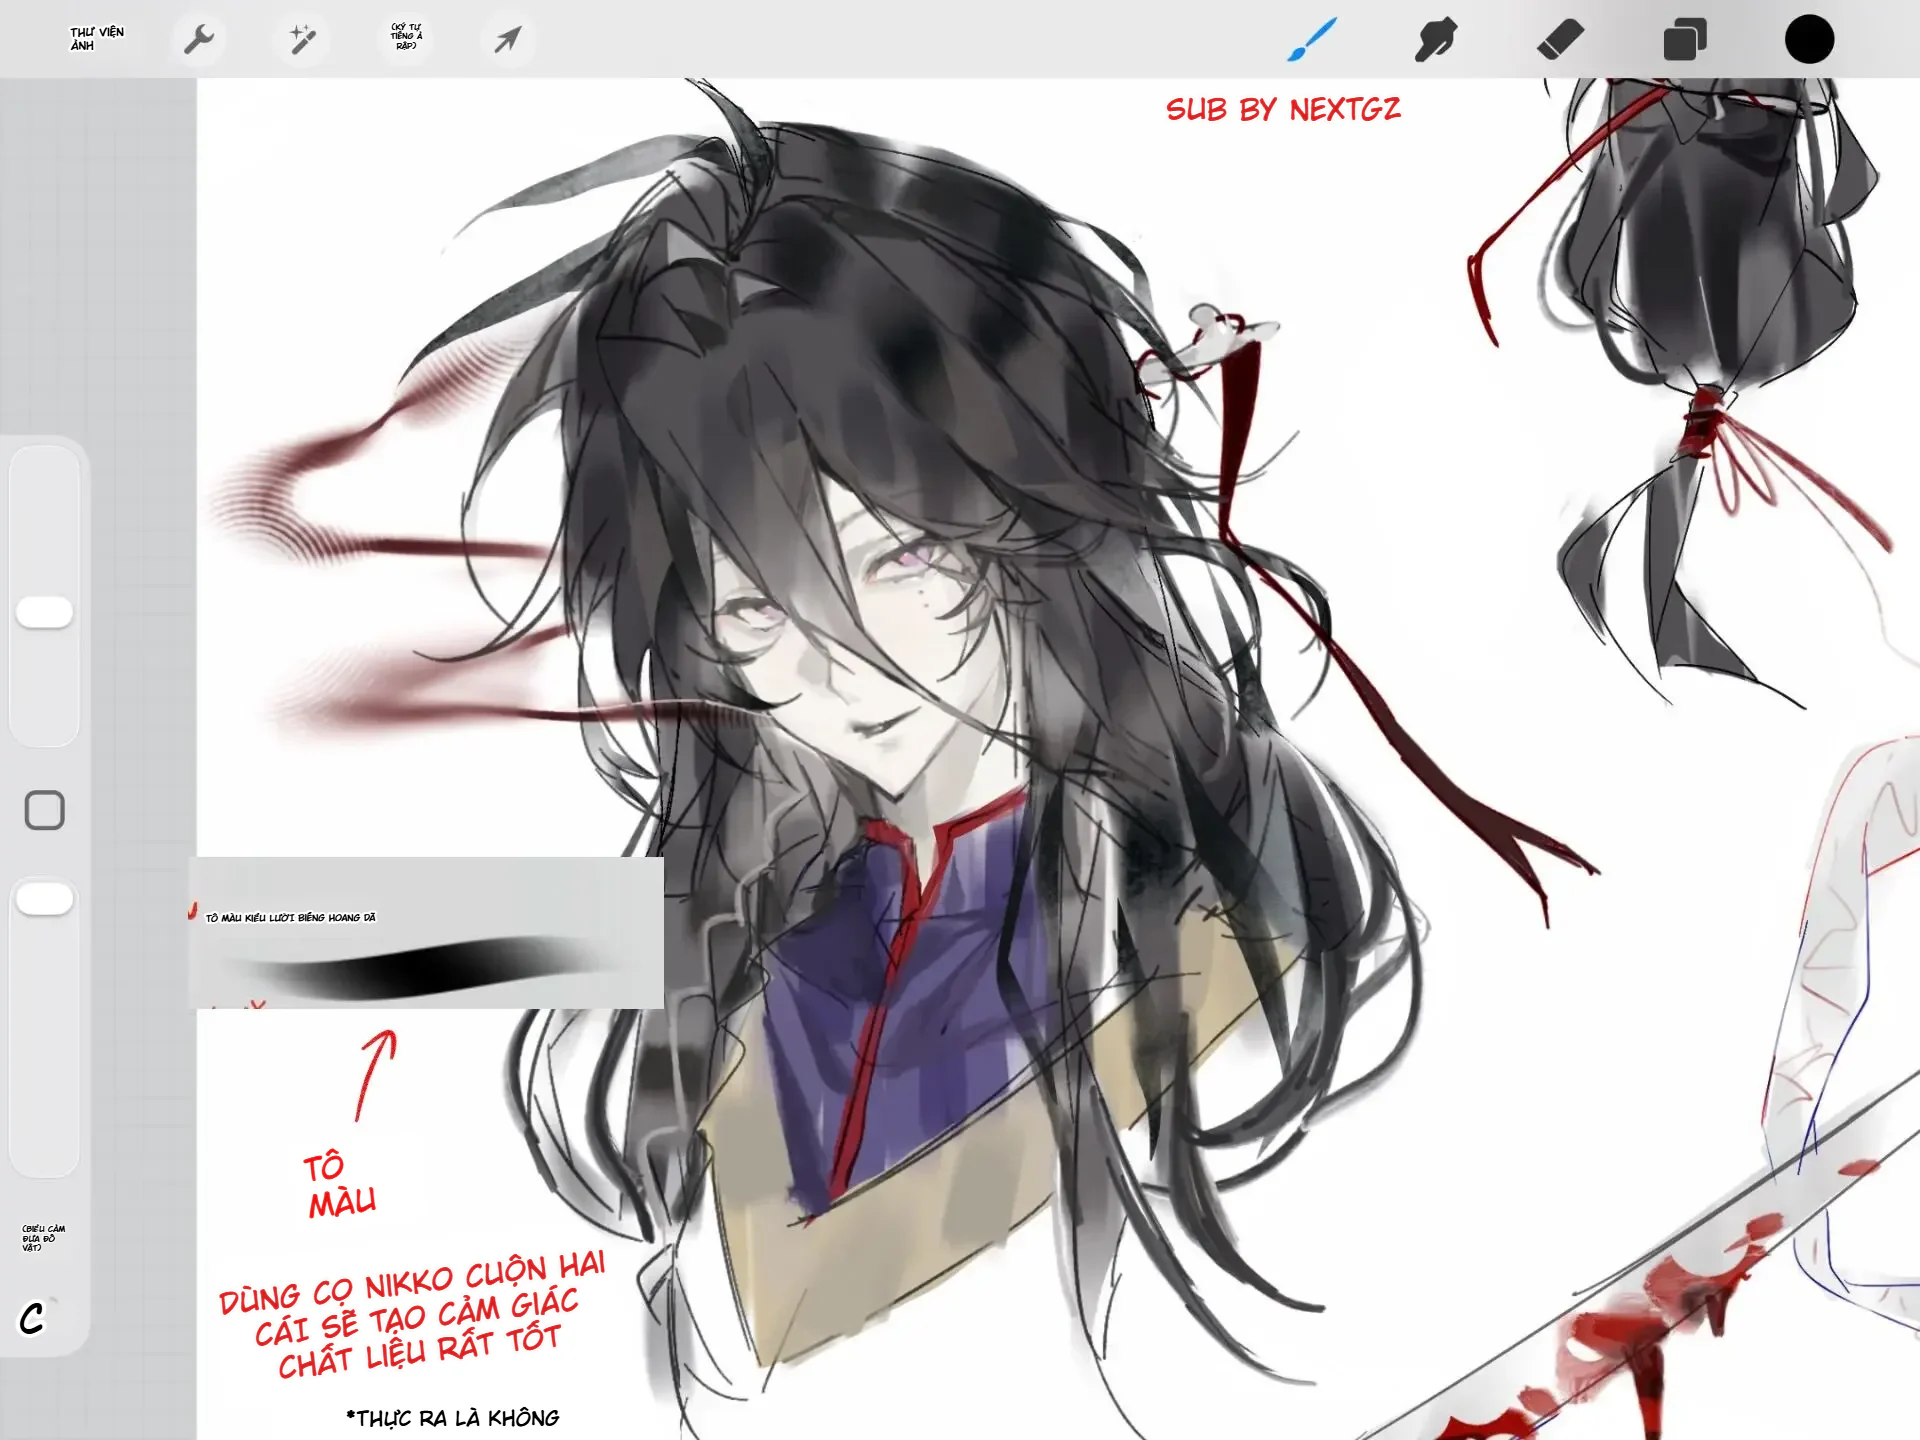
The Nikko Rull style brush is the most notable part if you enjoy surfaces with a painterly feel.
The brush body is wide, the grain is uneven, and the edge of the stroke is slightly rough. When layered multiple times, it creates natural areas of light and dark, similar to color applied with a roller or dry brush.
It is very suitable for handling black hair, cloaks, dark parts of clothing, background shadows, and areas that need a sense of texture.
An effective way to use it is to sweep once to establish the large areas, then add another pass with slightly different pressure or color. Avoid scrubbing too much in one spot, as the surface will quickly become muddy.
Round brushes for the finishing stage
Round brushes have clear edges and good control, making them suitable for eyes, lips, jewelry, patterns, hair details, and parts that need edge corrections.
This is a brush to save for the final stage. When the large masses are settled, you can use it to clarify the focal point, add a few highlights, fix the silhouette, or emphasize important intersections.
Do not use a small brush to render the entire painting from the start. Doing so will waste a lot of time while the image still lacks form.
Suggested workflow for using this brush set
Start with the sketching brush to lay down the face, hair, and clothing. Once the shape is stable, lower the opacity of the draft and trace over the important lines with a smooth inking brush.
Next, lay down base colors with the broad brush. Separate hair, skin, clothing, and accessories into individual layers. Use the soft brush to create large shadows and transition areas, then use the Nikko Rull brush in places that need added grain, fabric texture, or a traditional paint feel.
Finally, go back with the round brush to fix edges, refine the eyes, add hair strands, and place small highlights.
This workflow helps the painting stay neat without losing a hand-drawn quality.
What styles does this brush set suit?
This brush set is best suited for anime illustrations, historical characters, semi-realistic portraits, light-toned paintings, finished sketches, and pieces focused on hair and clothing.
People who prefer perfectly clean lineart, vector-style paintings, or ultra-smooth photorealistic rendering may need to combine it with other specialized brushes.
This brush set excels when the user embraces a bit of looseness, grain, and natural unevenness on the surface.
Key advantages
The brushes have different types of response but still belong to the same visual language. Users can move from sketching to coloring without feeling that the strokes and surface style are mismatched.
The soft brush group creates atmosphere, the line brushes maintain structure, and the Nikko Rull adds texture. This combination is especially effective with dark hair and multi-layered clothing.
Points to note
The images do not fully show the original file names and total number of brushes, so the actual file contents should be checked before posting specific quantities on the product page.
Some brushes may be user-customized versions. When imported into Procreate, the feel of the strokes also depends on canvas size, pen pressure, pressure curve, and the app version.
Both the soft brushes and texture brushes need to be used sparingly. A good brush does not automatically make a painting better if the structure, lighting, and base colors are not under control.
Basic import guide
After downloading the file to your iPad, open the Files app and select the brush file compatible with Procreate. Execute the open or import command into Procreate, then check the brush set in the library.
It's a good idea to create a separate test canvas and draw a few strokes at different sizes and pressures. This way, you'll know which brush is for sketching, which for base coloring, which for shading, and which should only be used for details.
Don't rename or organize them right away without trying them all. After a few drawing sessions, keep the group you use often and place them in a separate folder to speed up your workflow.
Conclusion
This Procreate brush set is suitable for those who want to build a soft, natural, and textured anime drawing workflow. It doesn't just provide inking brushes, but also tools for sketching, base coloring, blending, shading, and surface finishing.
The most valuable aspect is its ability to combine light strokes with grainy color areas. The drawing remains clean, but without feeling overly mechanical.
If you often draw anime characters, long hair, historical costumes, or dark-toned portraits, this is a brush set well worth adding to your Procreate library.
Frequently asked questions
Which software is this brush set for?
The brush set is introduced for use in Procreate on iPad. Check the specific file format before importing.
Is this brush set suitable for beginners?
Yes, especially if the user understands the role of each brush group. Beginners should start with four basic types: sketching brush, inking brush, base coloring brush, and soft brush.
What should the Nikko Rull be used for?
This brush is suitable for creating dark hair masses, clothing, background shadows, and textured surfaces. It should not be used as the main brush for eyes or very small details.
Can I complete an entire painting with just one brush?
You can, but it's not the most efficient method. Using brushes according to their intended role will help clarify the form and save time.
Why do the brush strokes look different on my device compared to the sample?
The feel of the brush can vary depending on canvas size, brush tip size, Apple Pencil pressure, pressure curve, and personal settings in Brush Studio.


Bình luận
0 bình luận
Đăng nhập để tham gia thảo luận cùng cộng đồng!
Đăng nhập ngayĐang tải bình luận...