

Do you want your stage drawing to come alive with sparkling effects? A quick 3-step video guide to creating a professional stage atmosphere. From rim lighting, ground fog, star effects to dot decorations – all are easy to do. Below are the basic techniques to help you master this effect:
Video story highlight
🎨 Do you want your drawing to have a sparkling stage effect? With just 3 simple steps, you can create a truly shimmering atmosphere! Watch the detailed guide now.
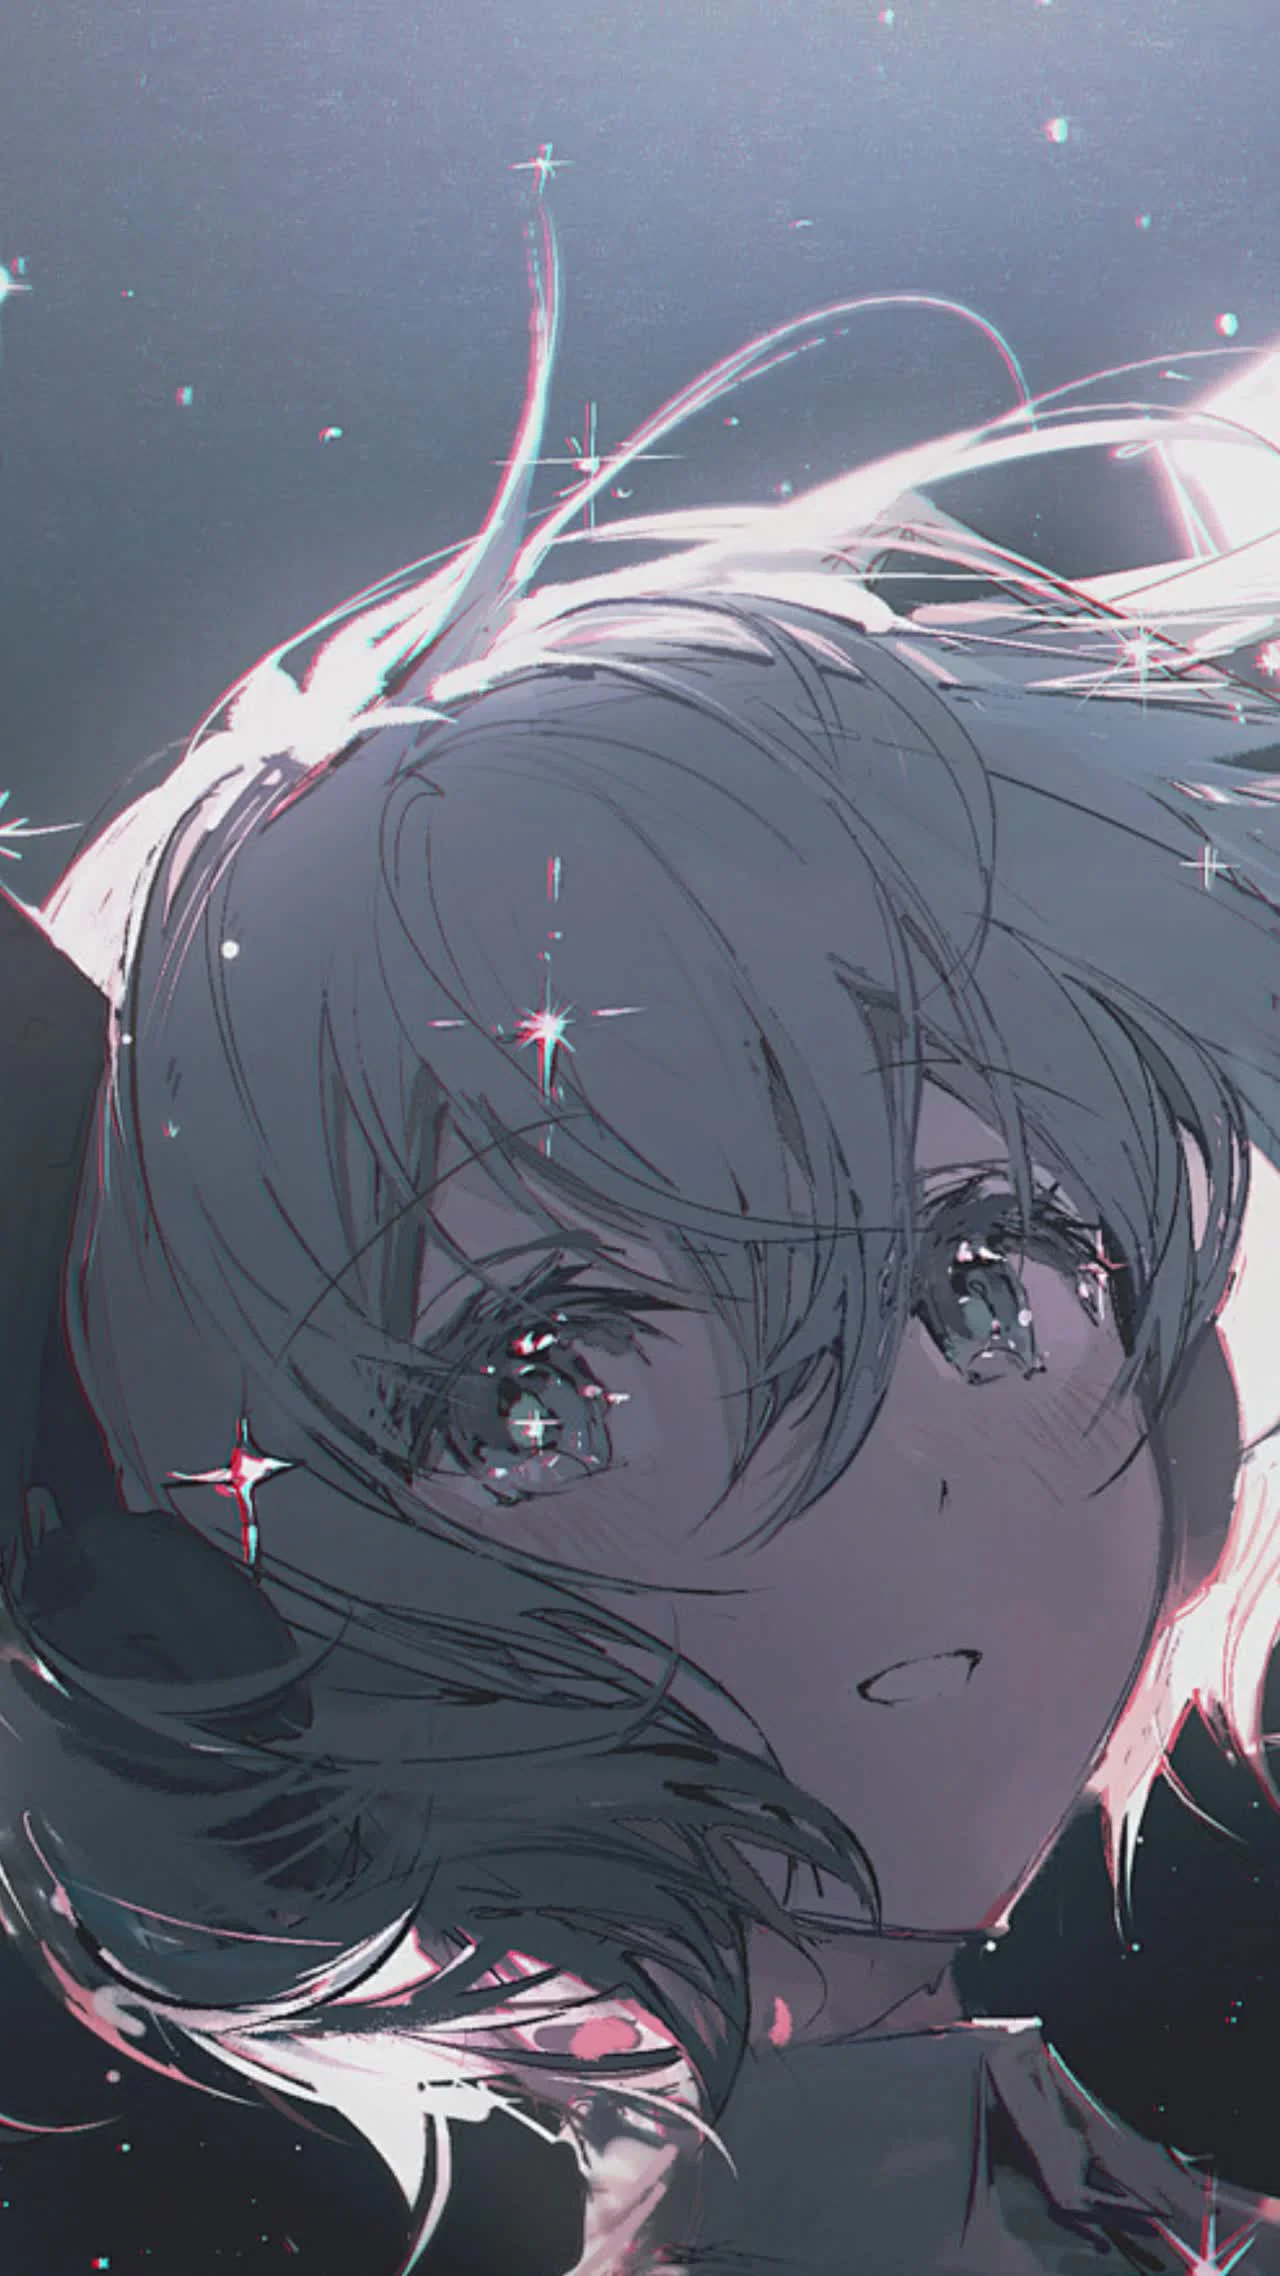
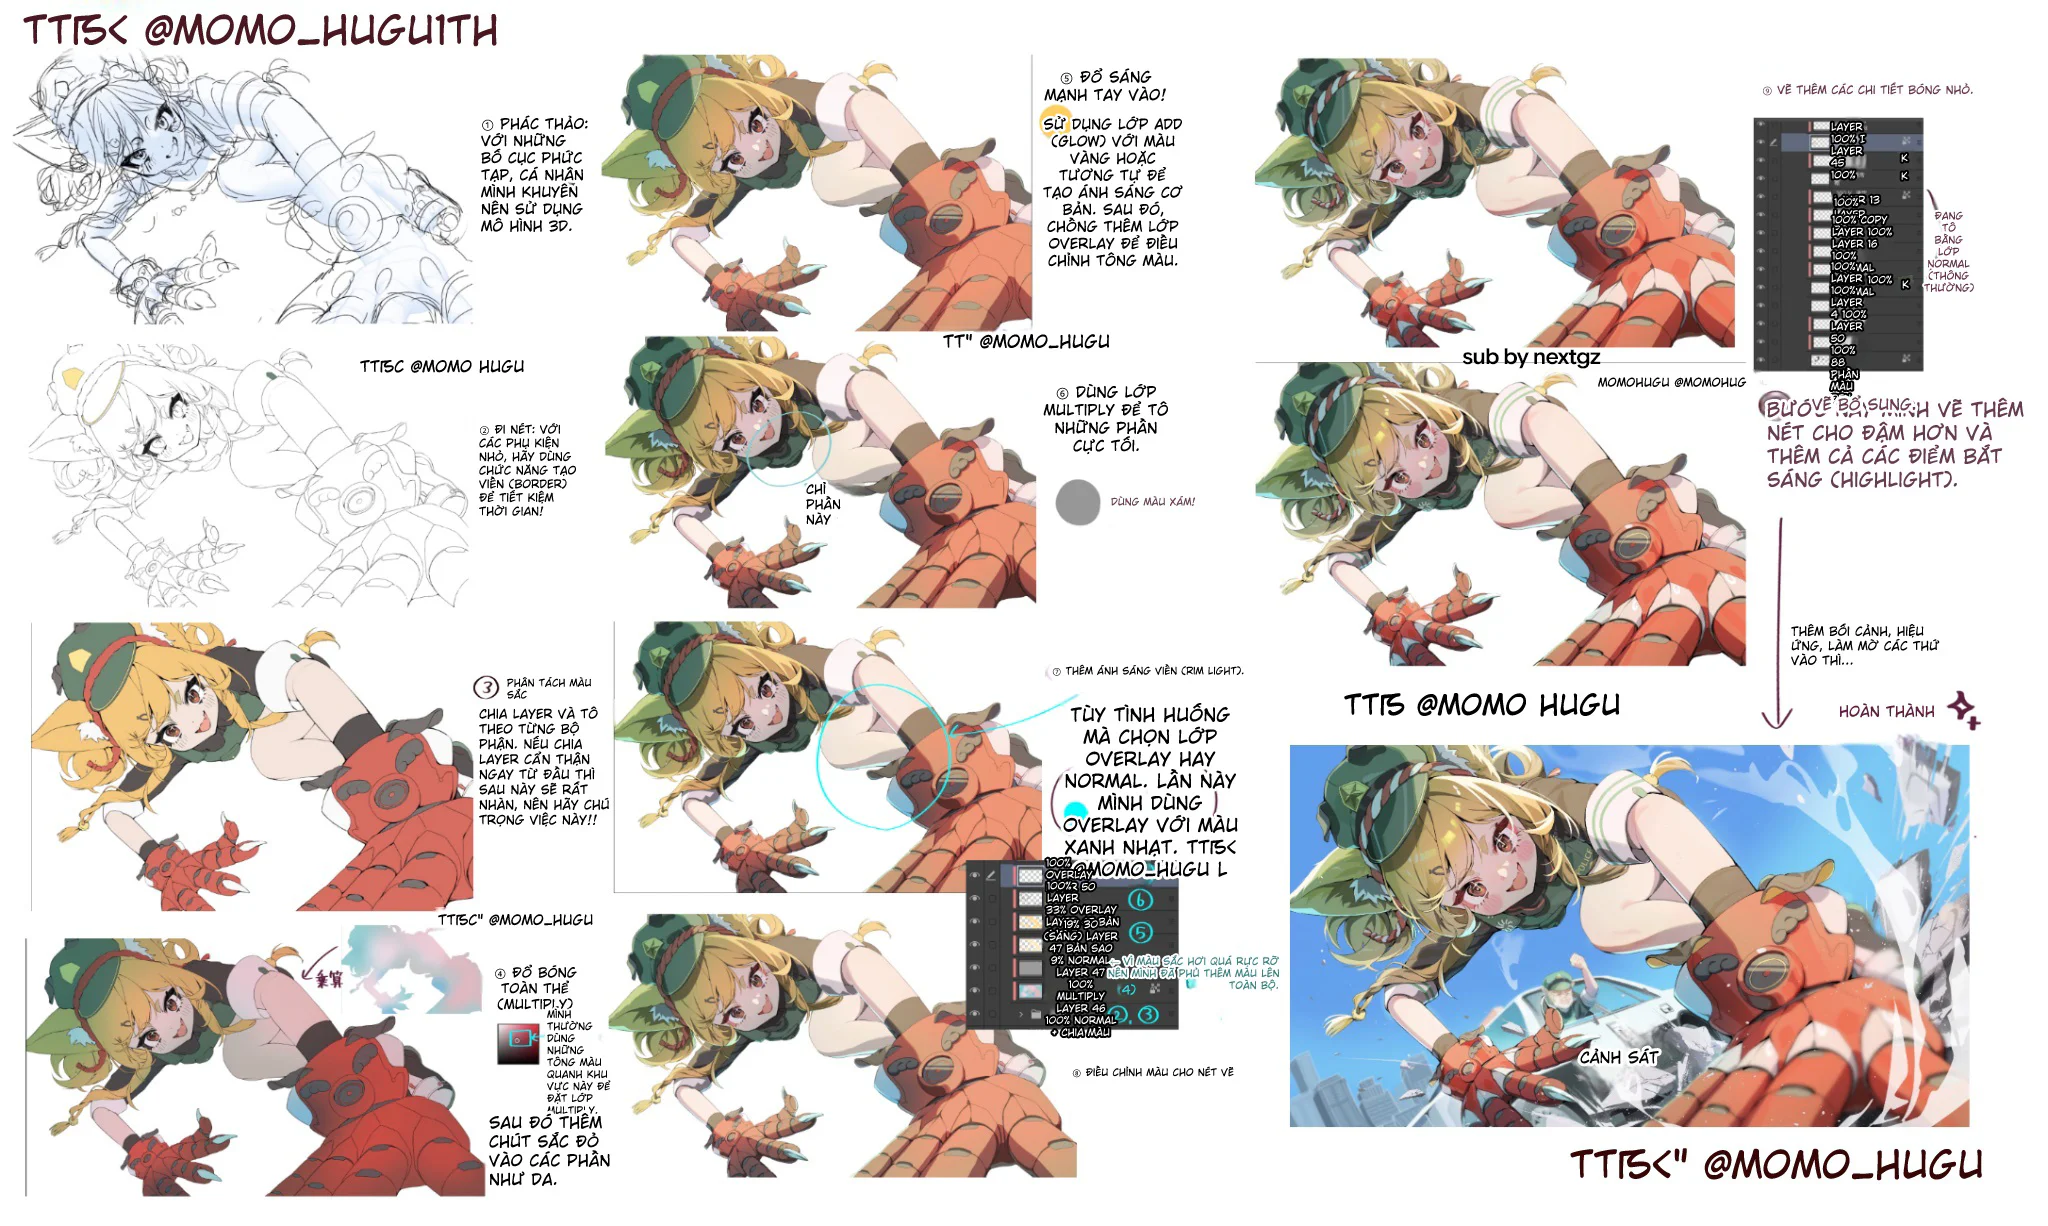
Step 1: Draw rim lighting for the character
Step 1: Draw rim lighting for the character

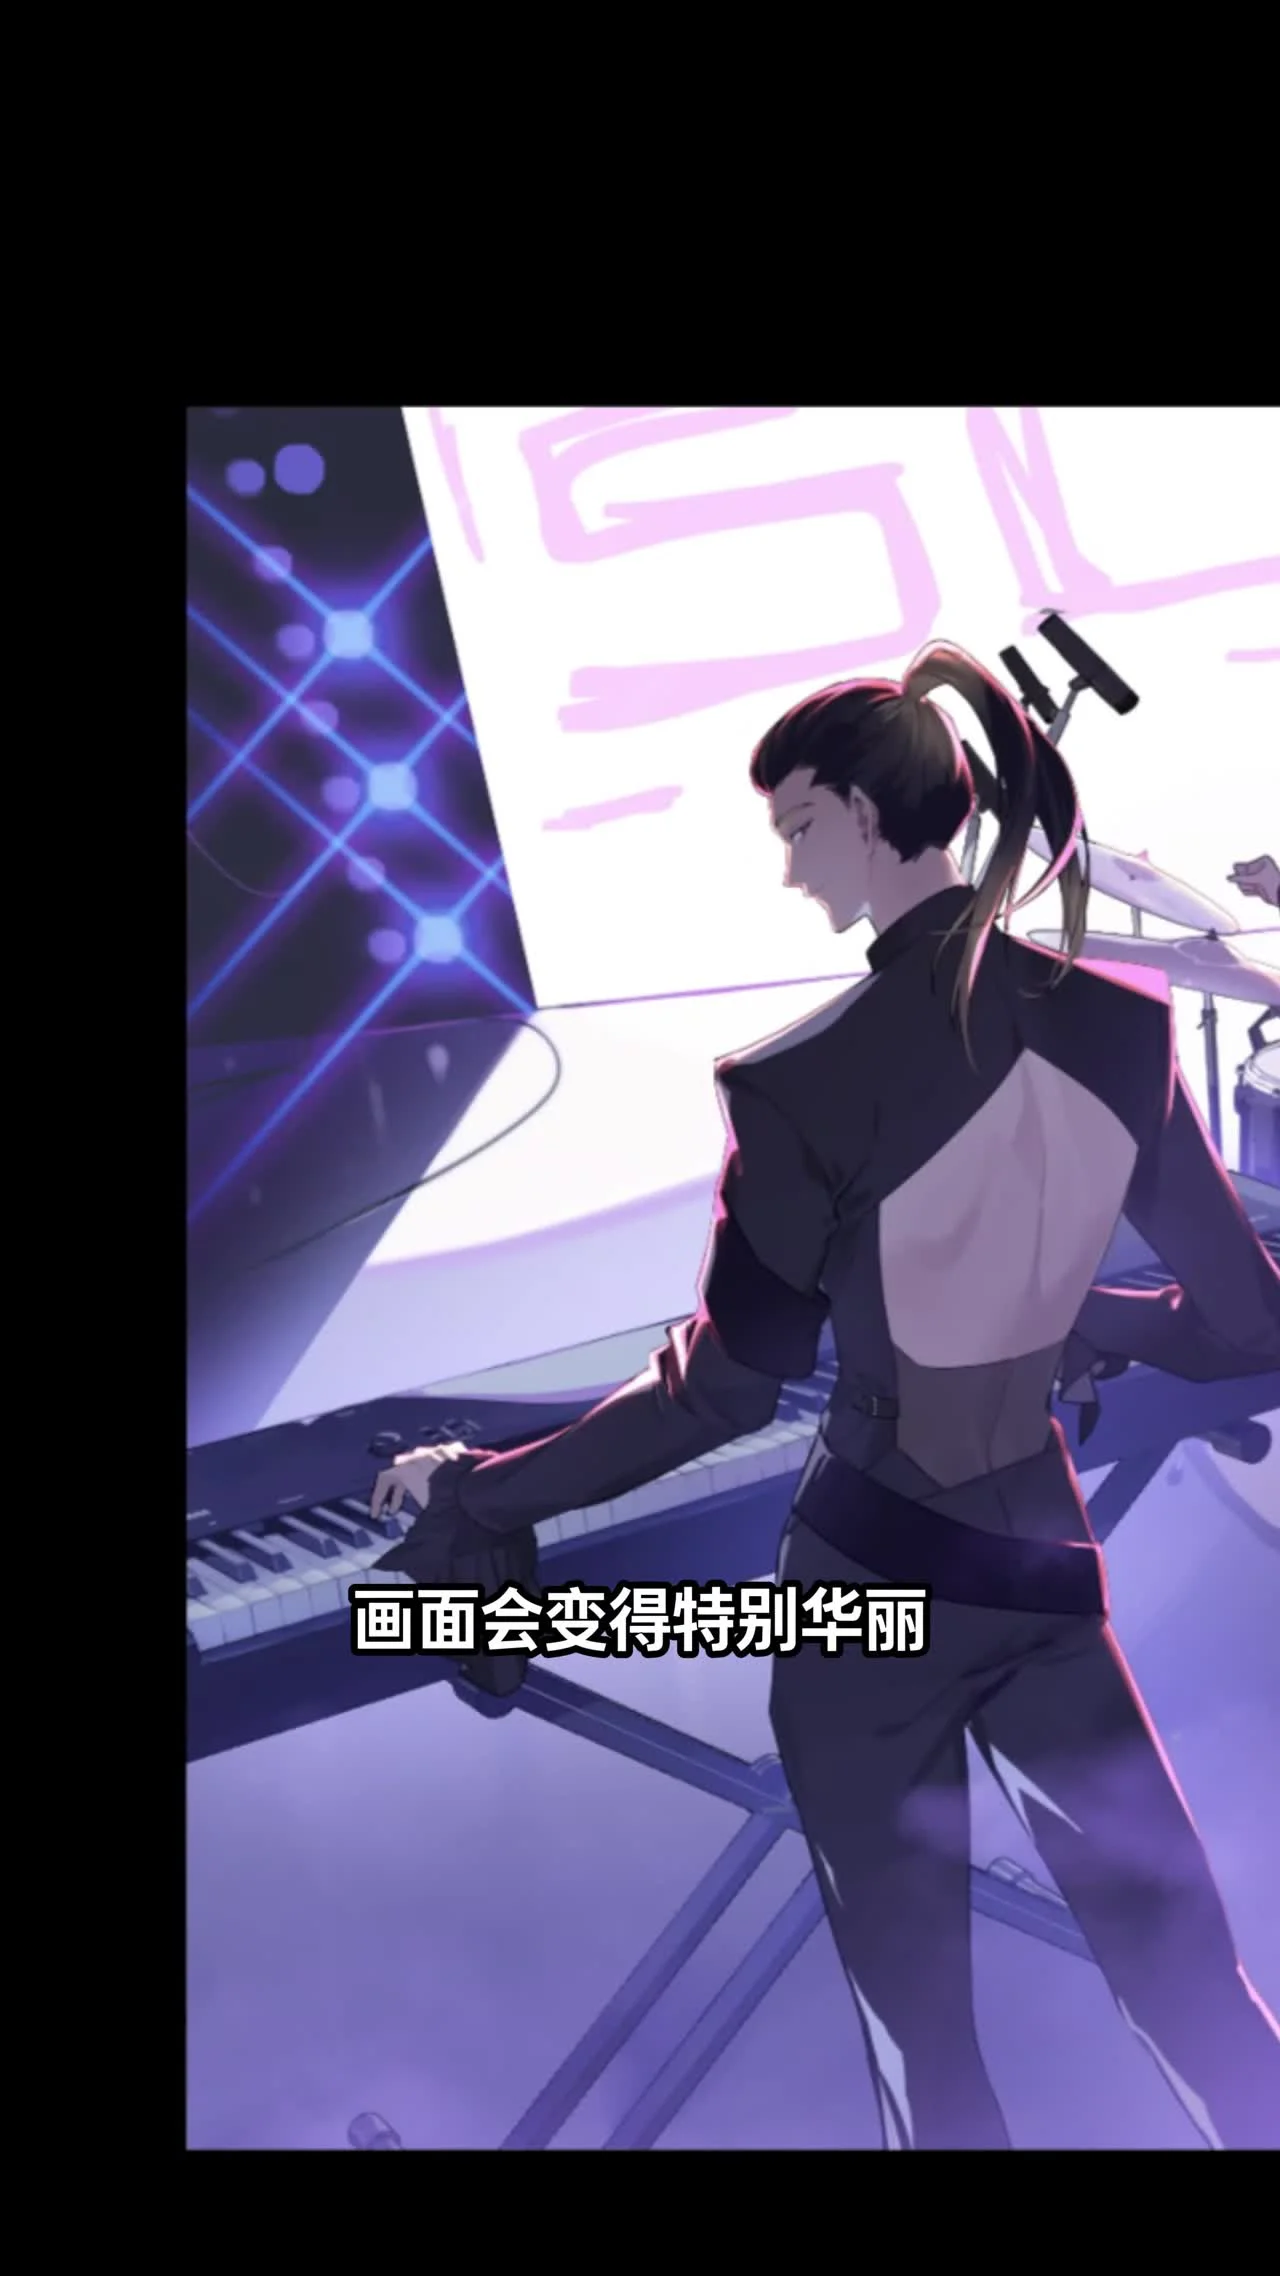
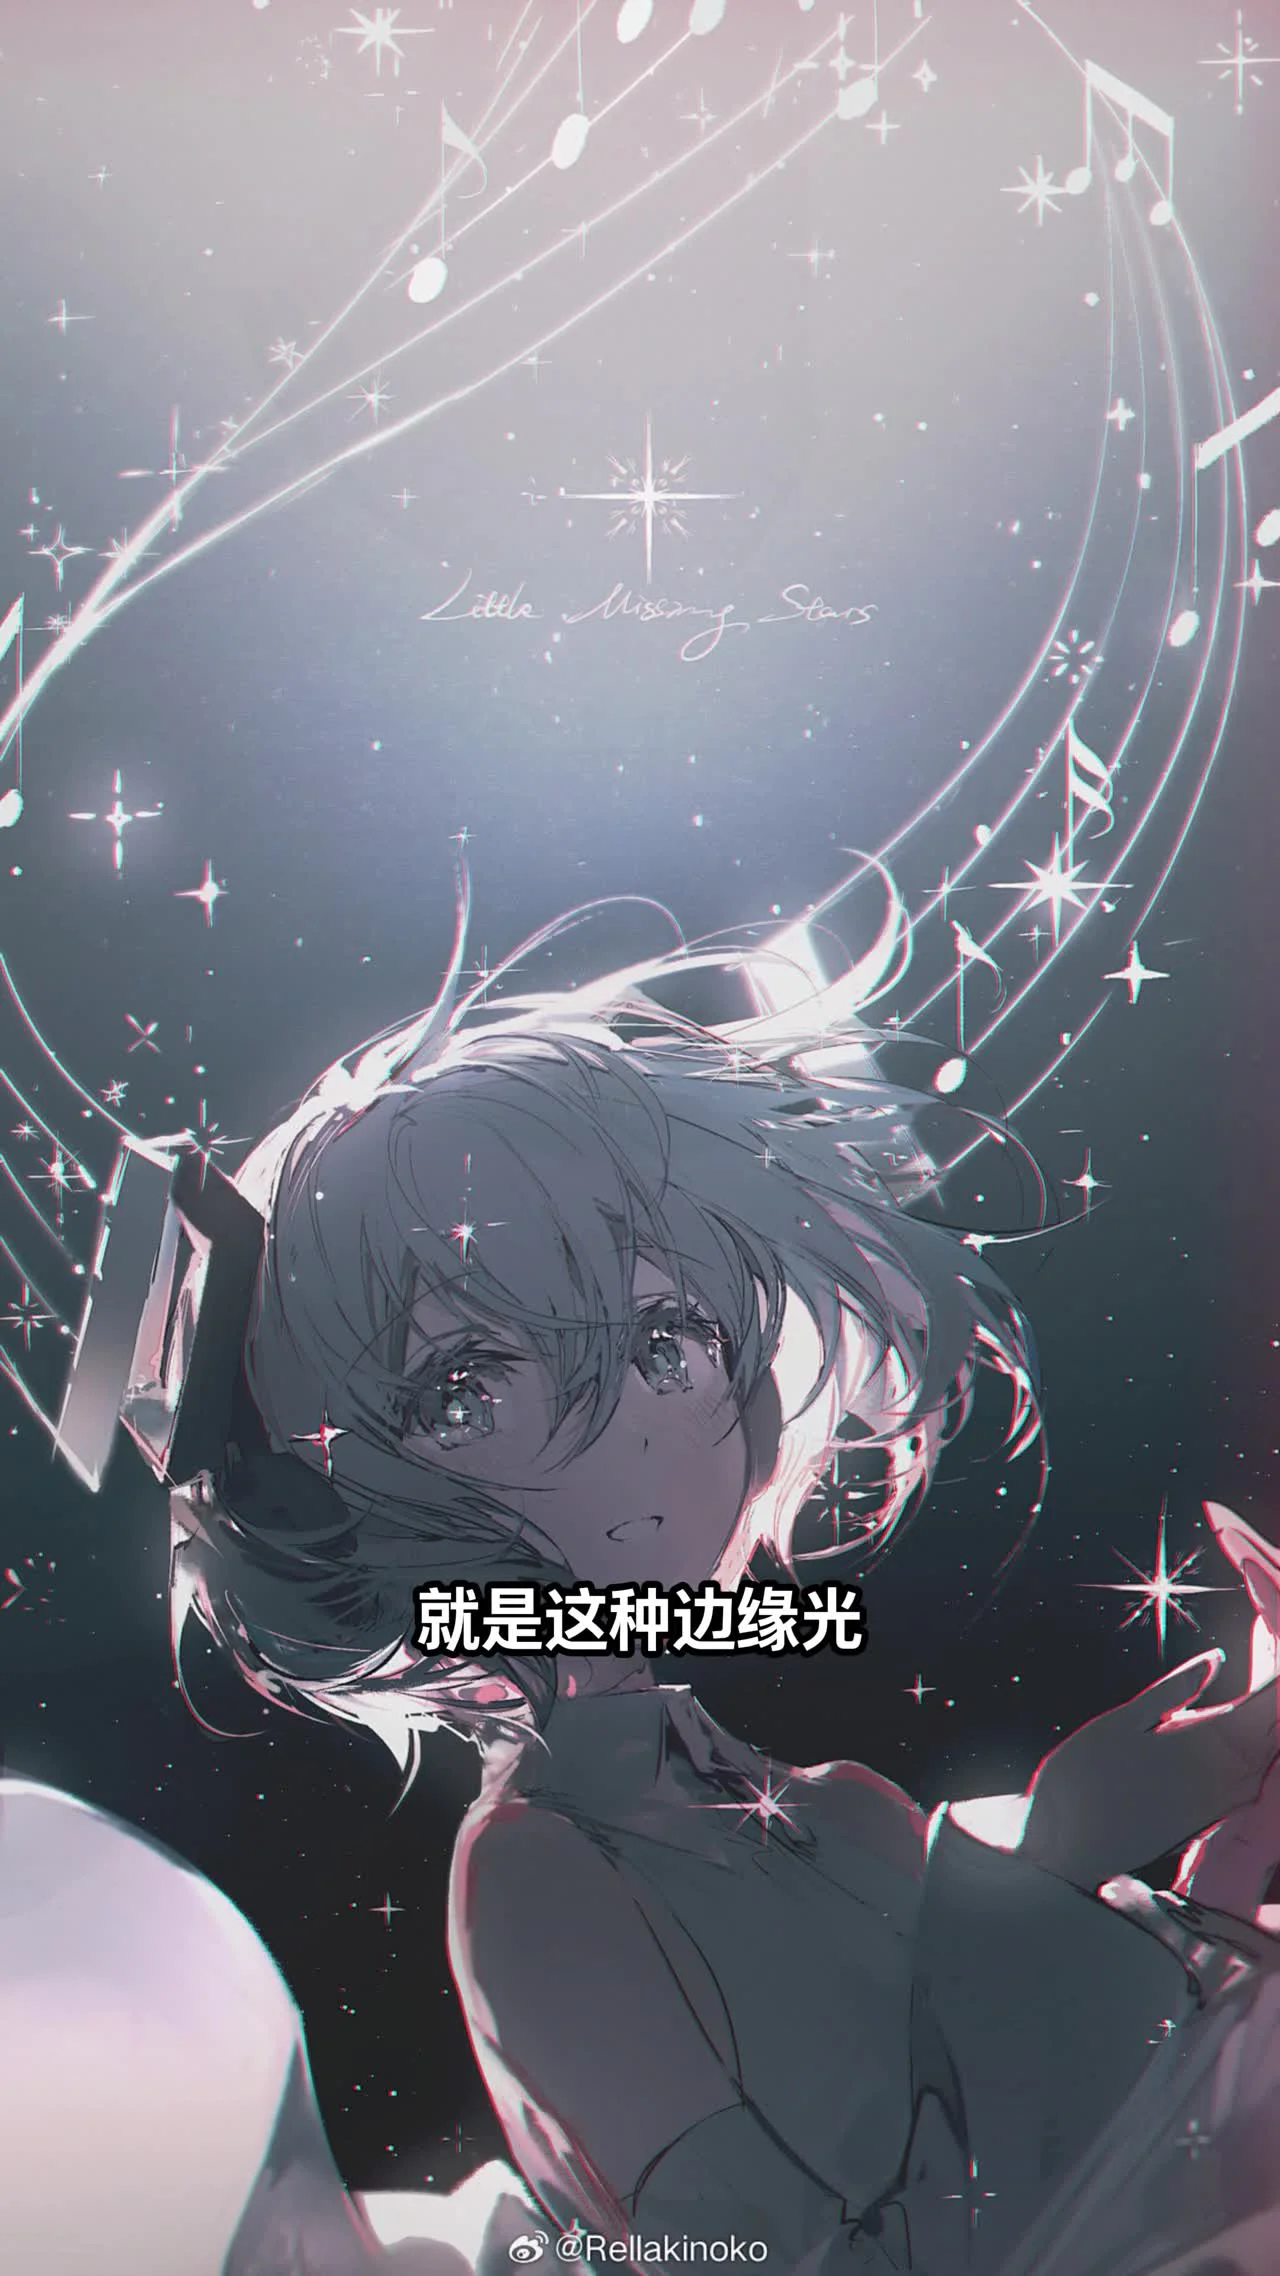
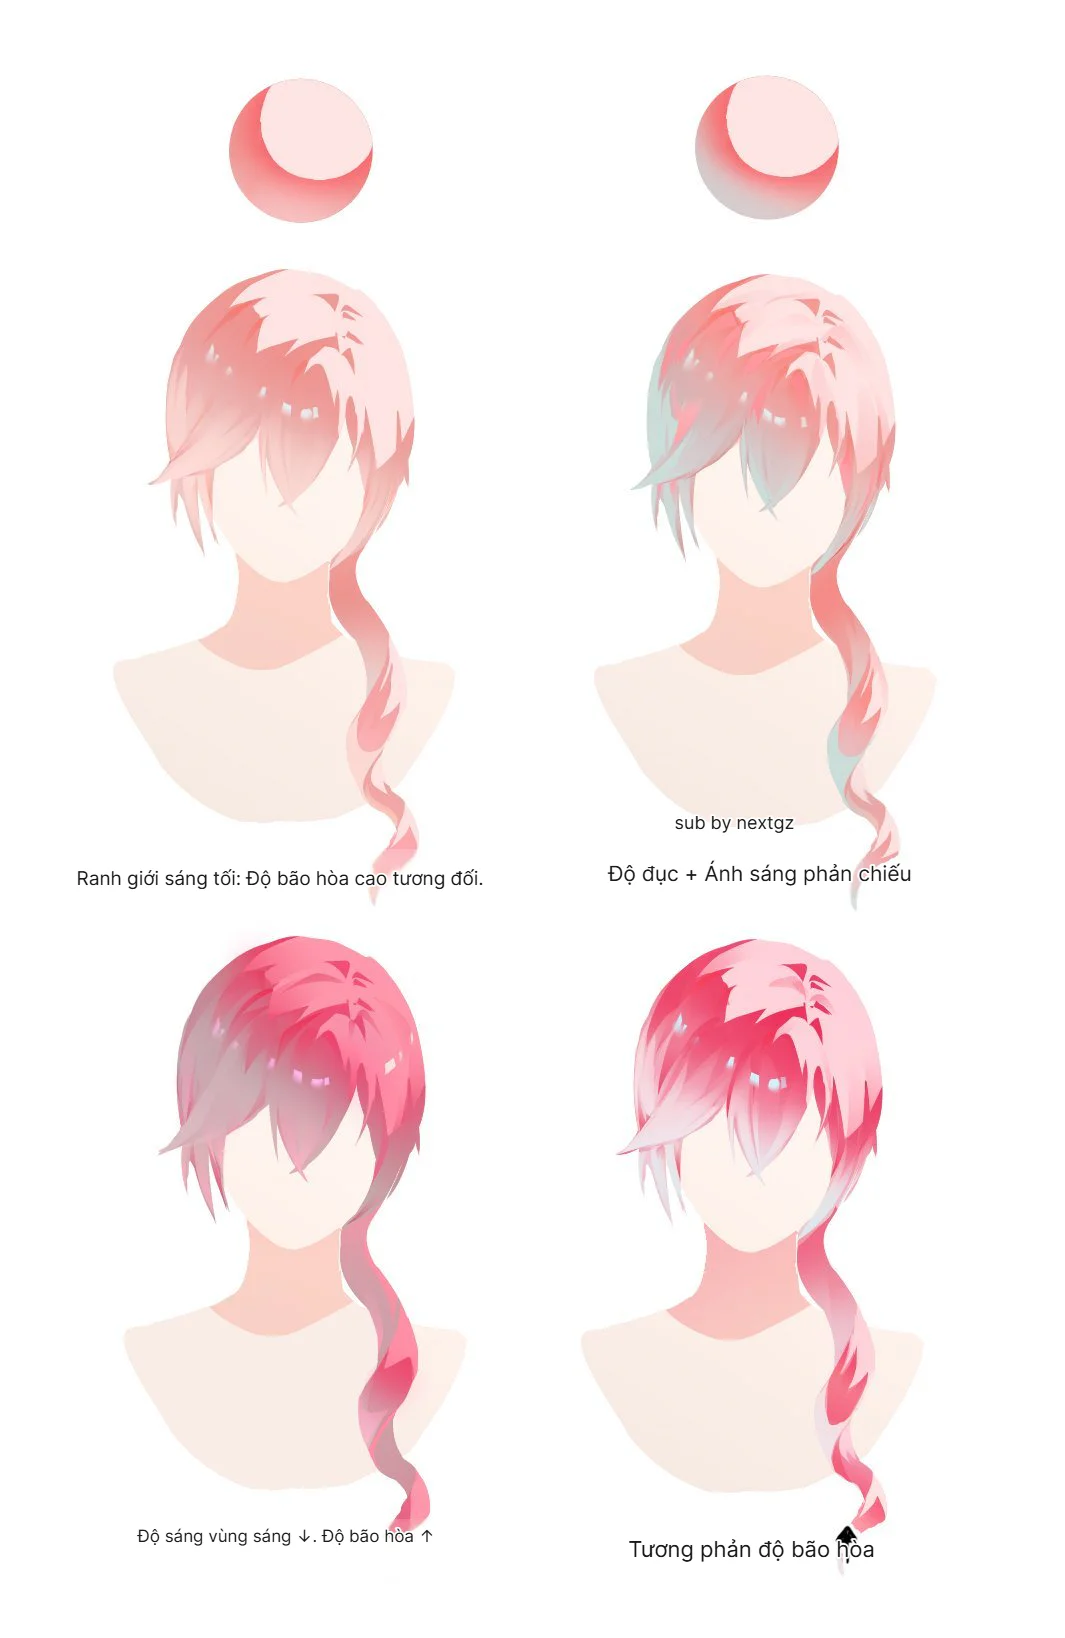
First, you need to darken the character to create contrast. Then, draw rim lighting with high brightness around the character. Because stage lighting is usually very strong, the influence of local colors will be weaker. Choose bright colors like white or light yellow to create a realistic effect.
You can use a soft brush with low opacity to draw the rim. This helps the light blend naturally. Note that rim lighting should only focus on the edges that come into contact with the assumed light source on the stage.
Step 2: Add ground fog and star effects
Step 2: Add ground fog and star effects
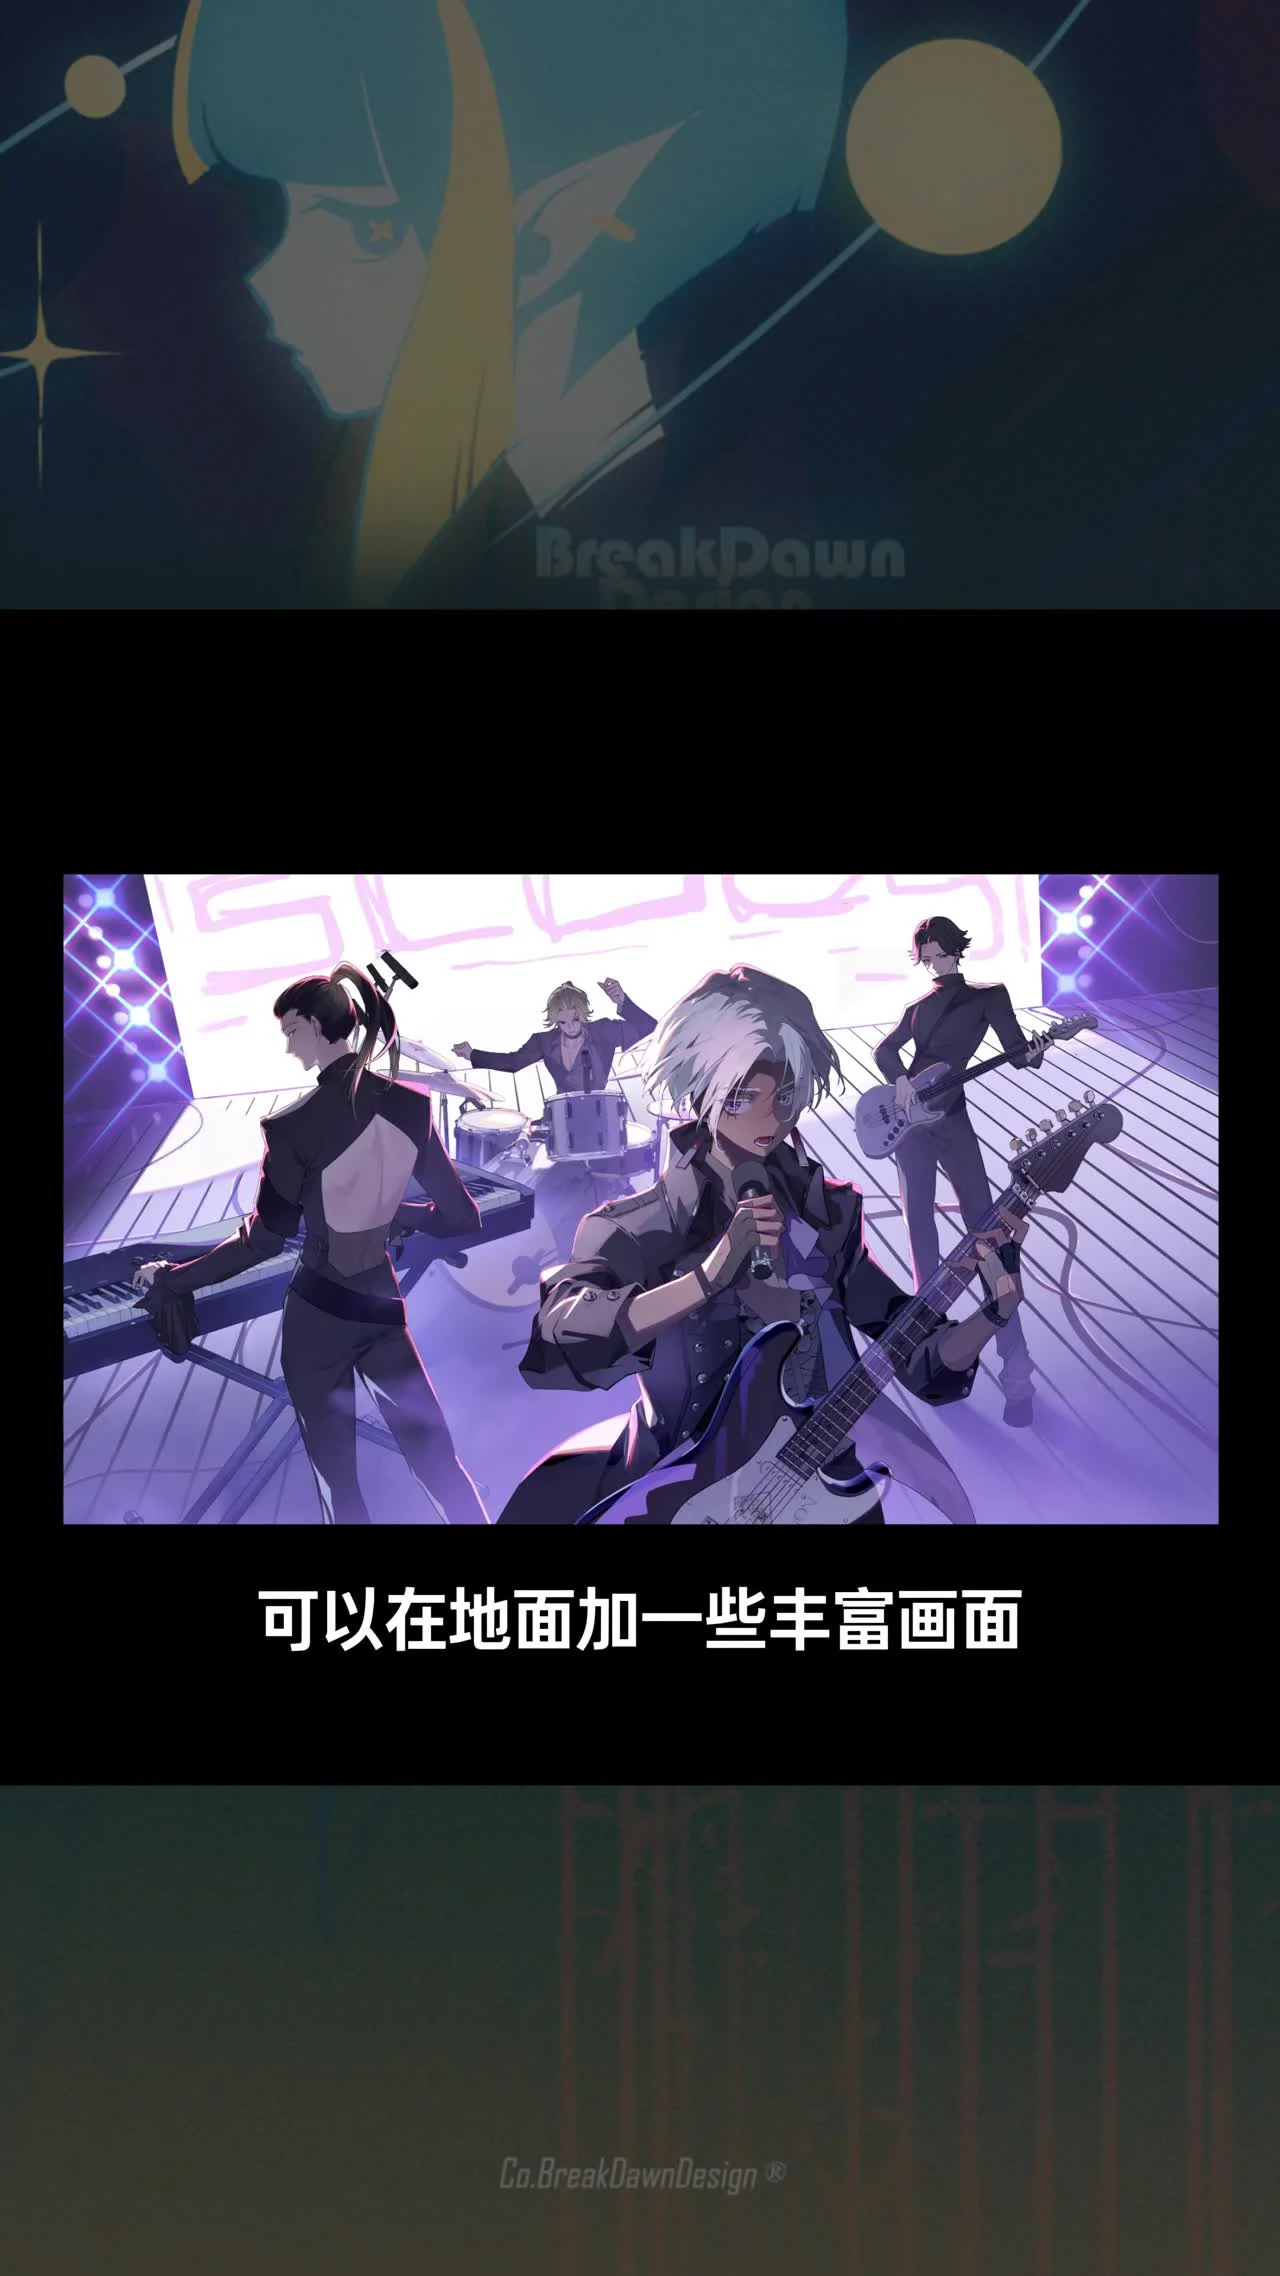
For scenes with many people, you can design ground fog on the floor. Ground fog both layers the characters and enhances the stage atmosphere. Colors should lean towards the environment's colors, for example, earthy brown or light gray. If the background is empty, add a few ground fog details to make the drawing more lively.
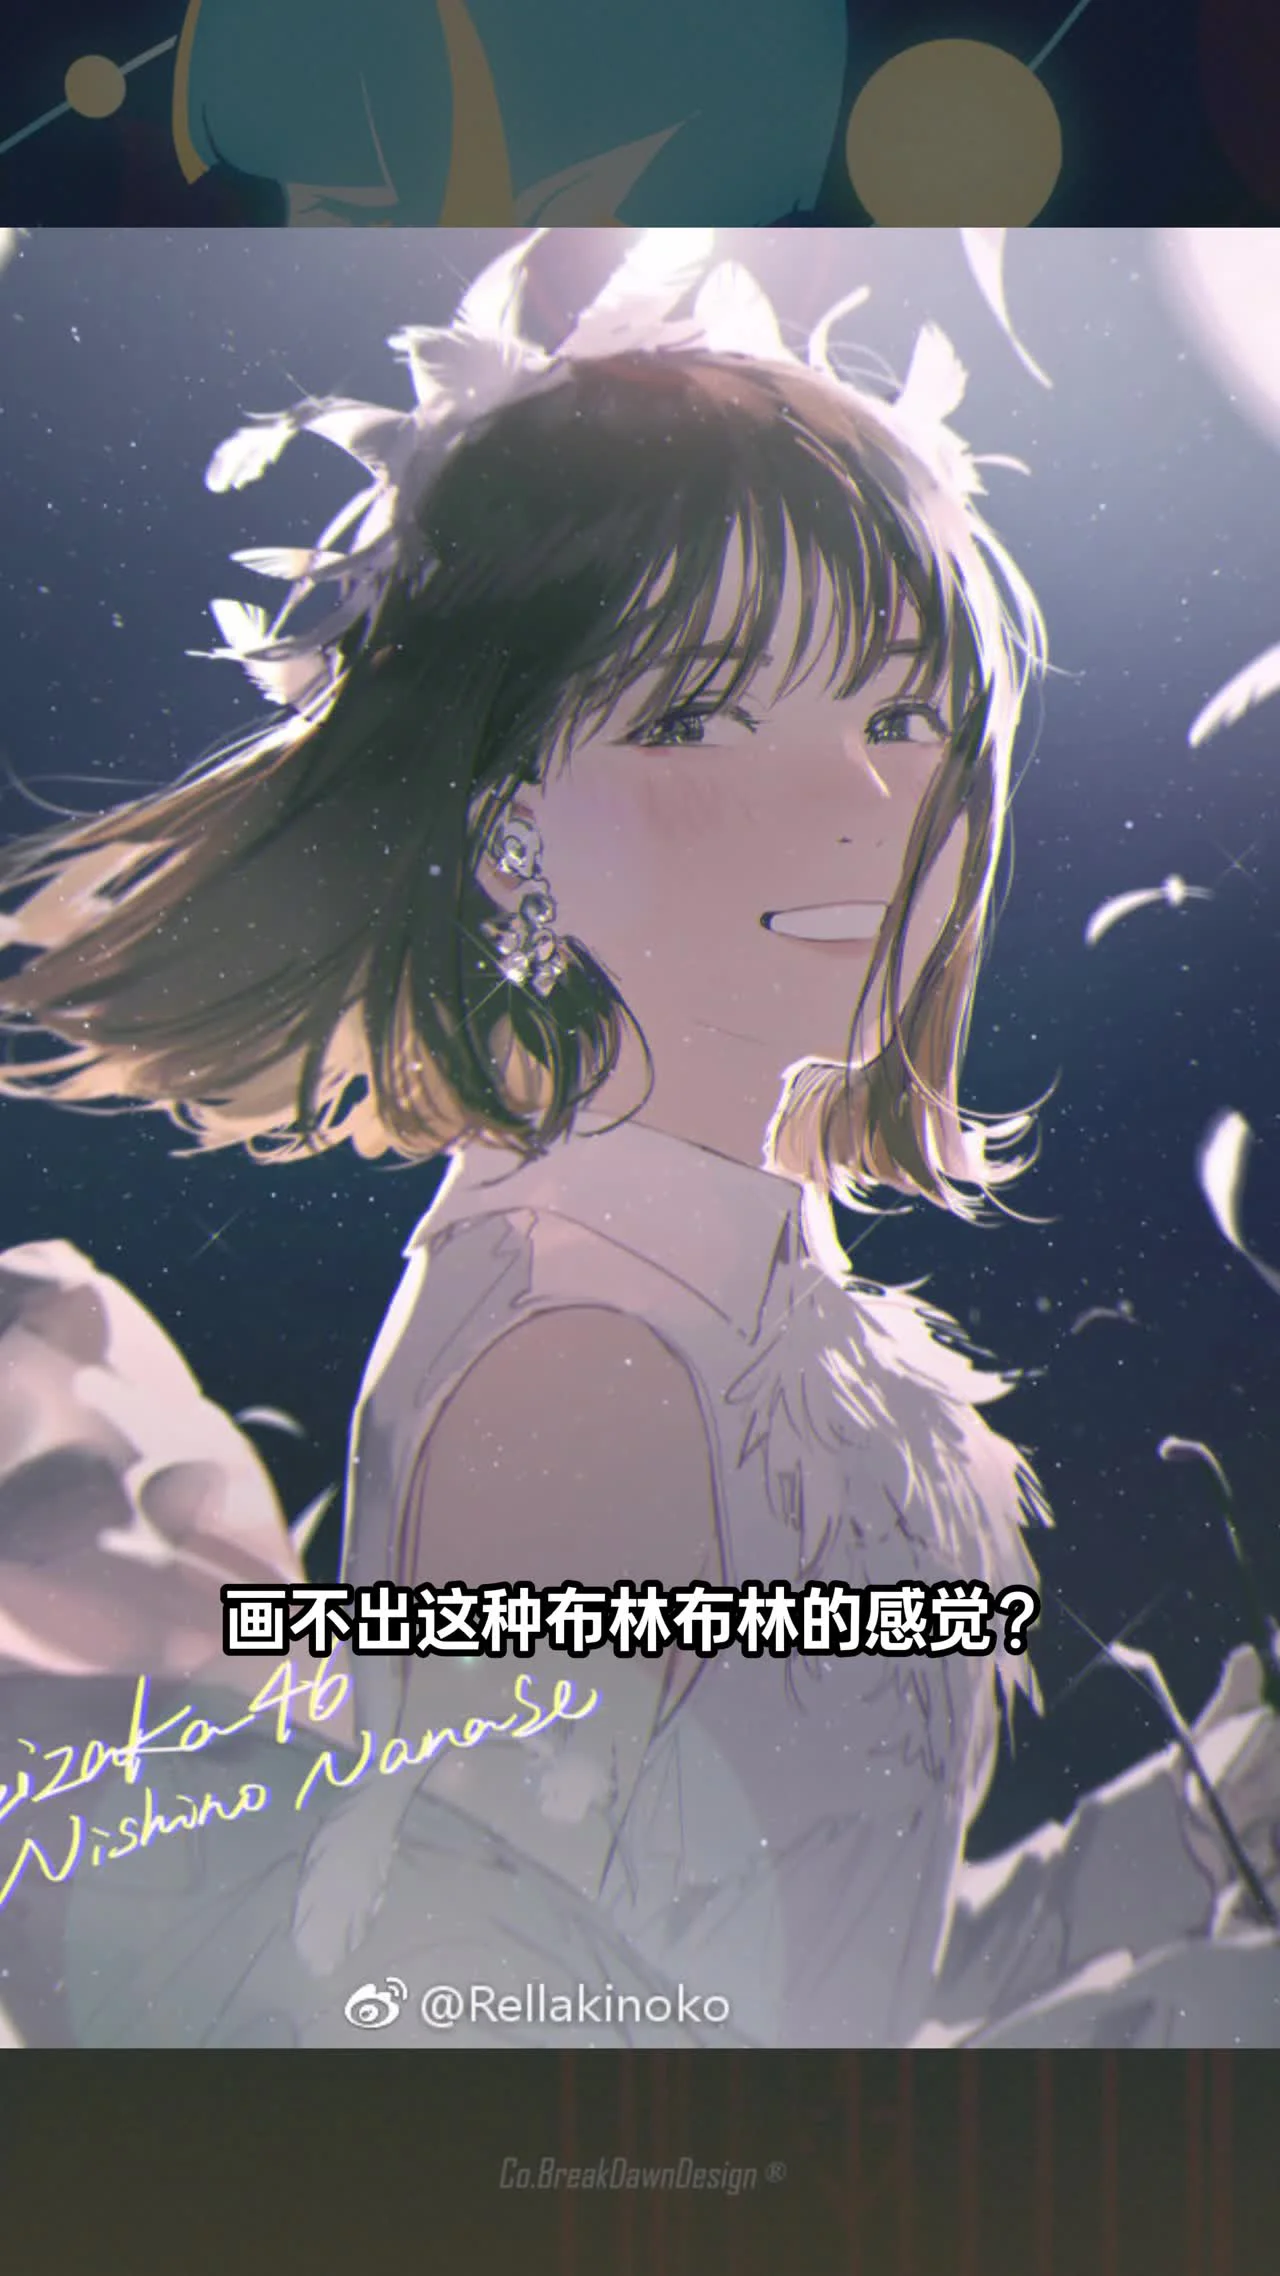
Star effects are an indispensable element in stage images. Adding many star effects to the painting will make the image look magnificent. However, you must exercise restraint and not add them everywhere. Star effects can be drawn manually or you can use pre-made assets, drag them in, and edit them.
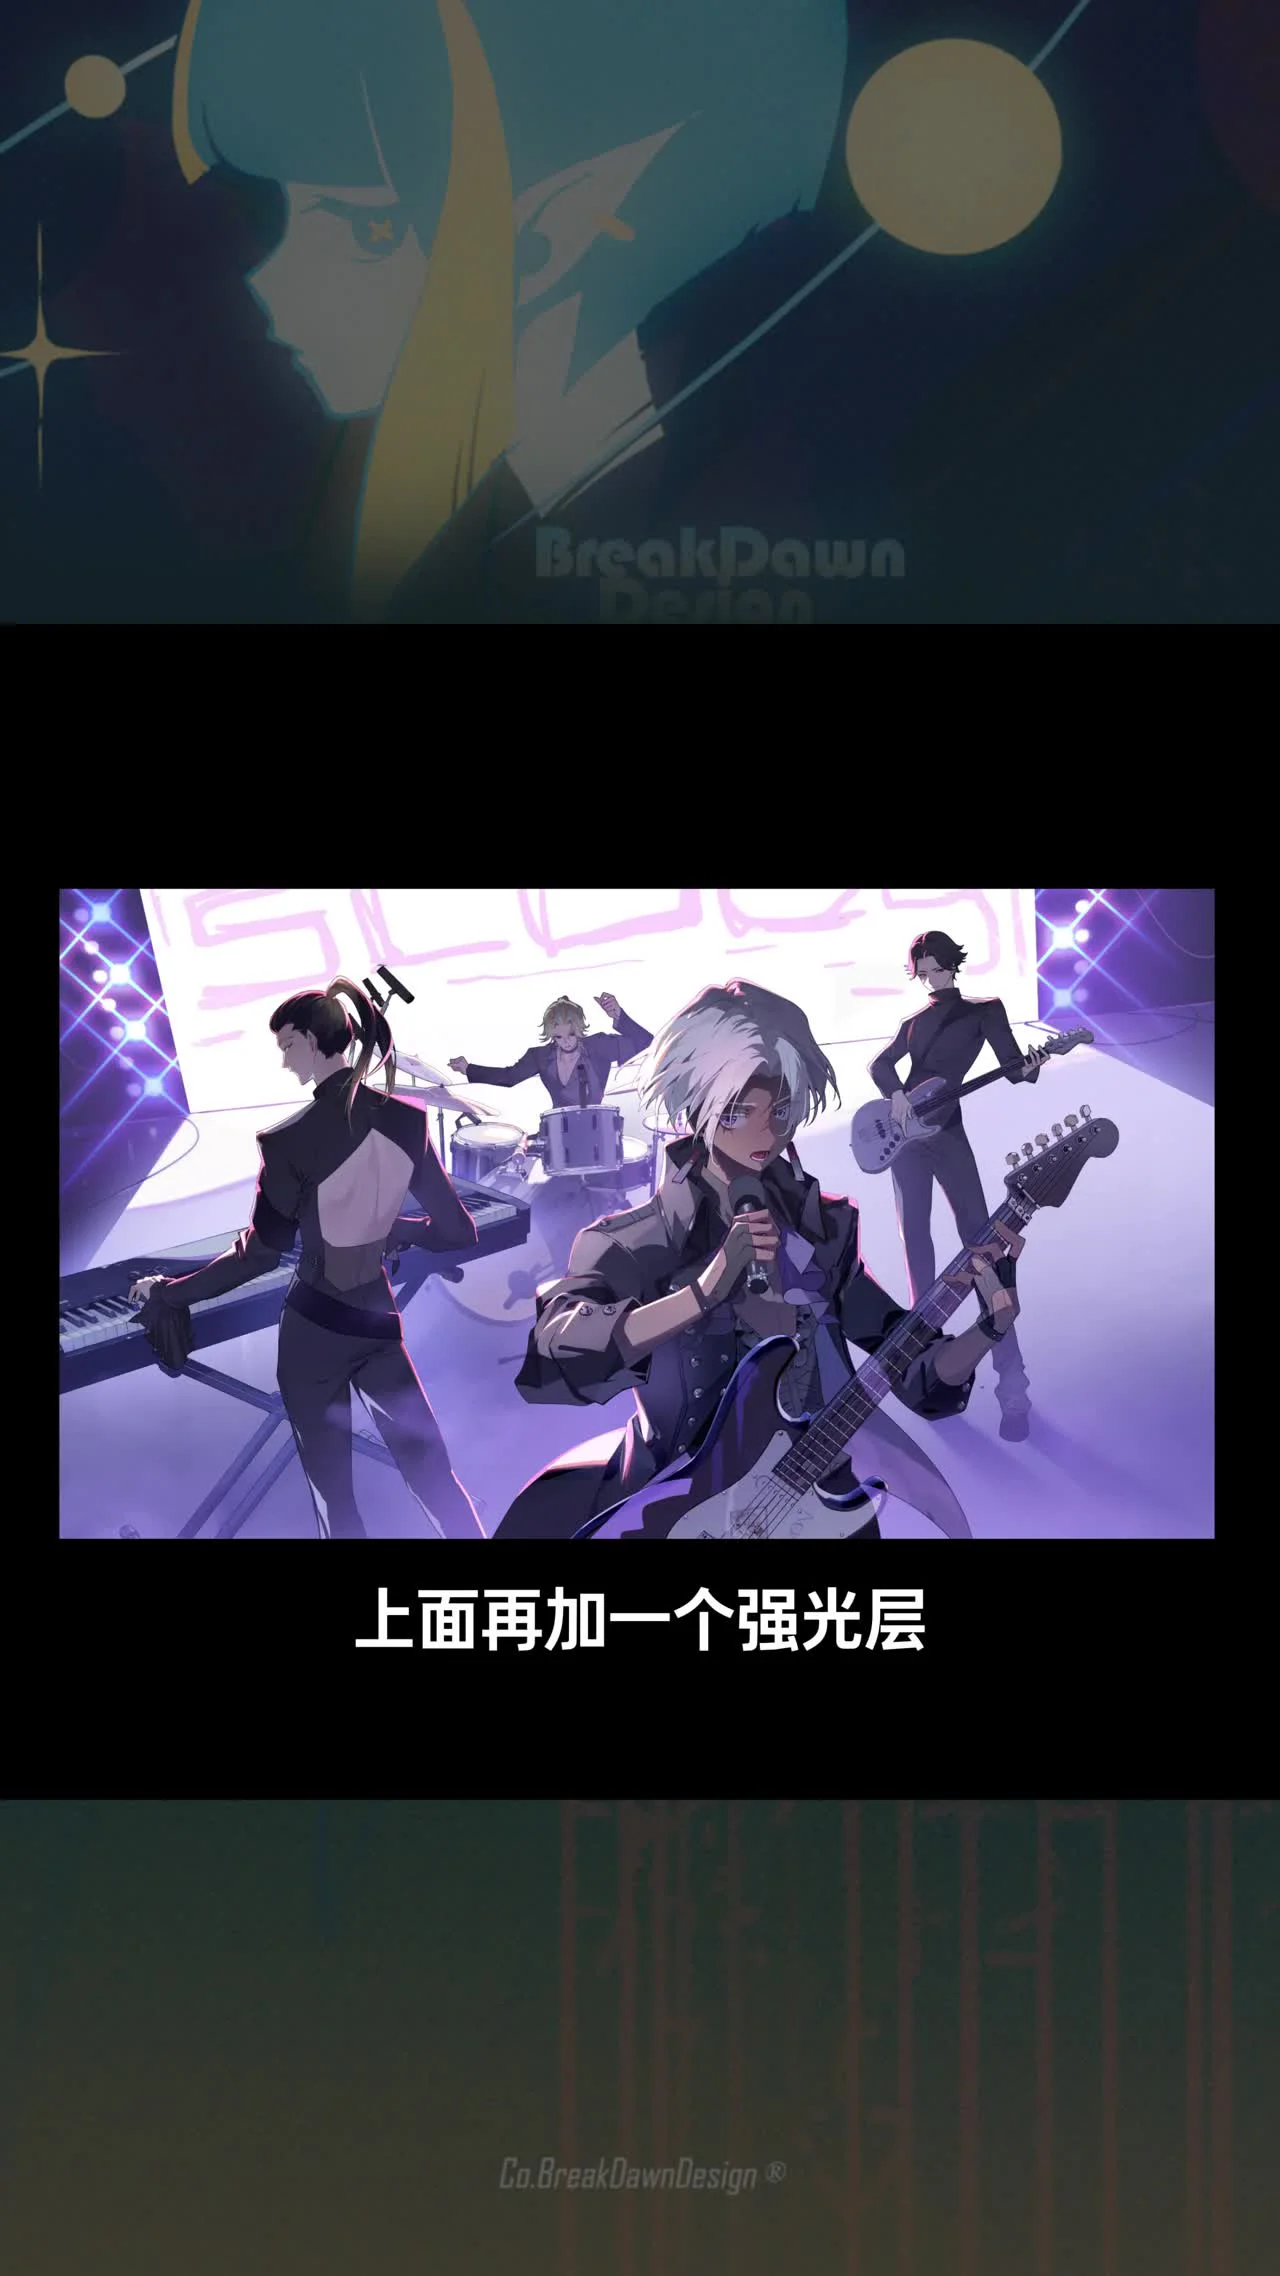
Step 3: Add a strong light layer and cables
Step 3: Add a strong light layer and cables
After having the star effects, add a strong light layer to draw light movement. You can use a brush with low opacity and the 'Screen' blending mode to create a glare effect. For electronic instruments, there are usually cables. Draw additional cables on the ground to enrich the composition.
Note that cables should be dark in color or match the background color to avoid visual clutter. You can refer to real photos to draw accurately.
Step 4: Dot and cross decorations
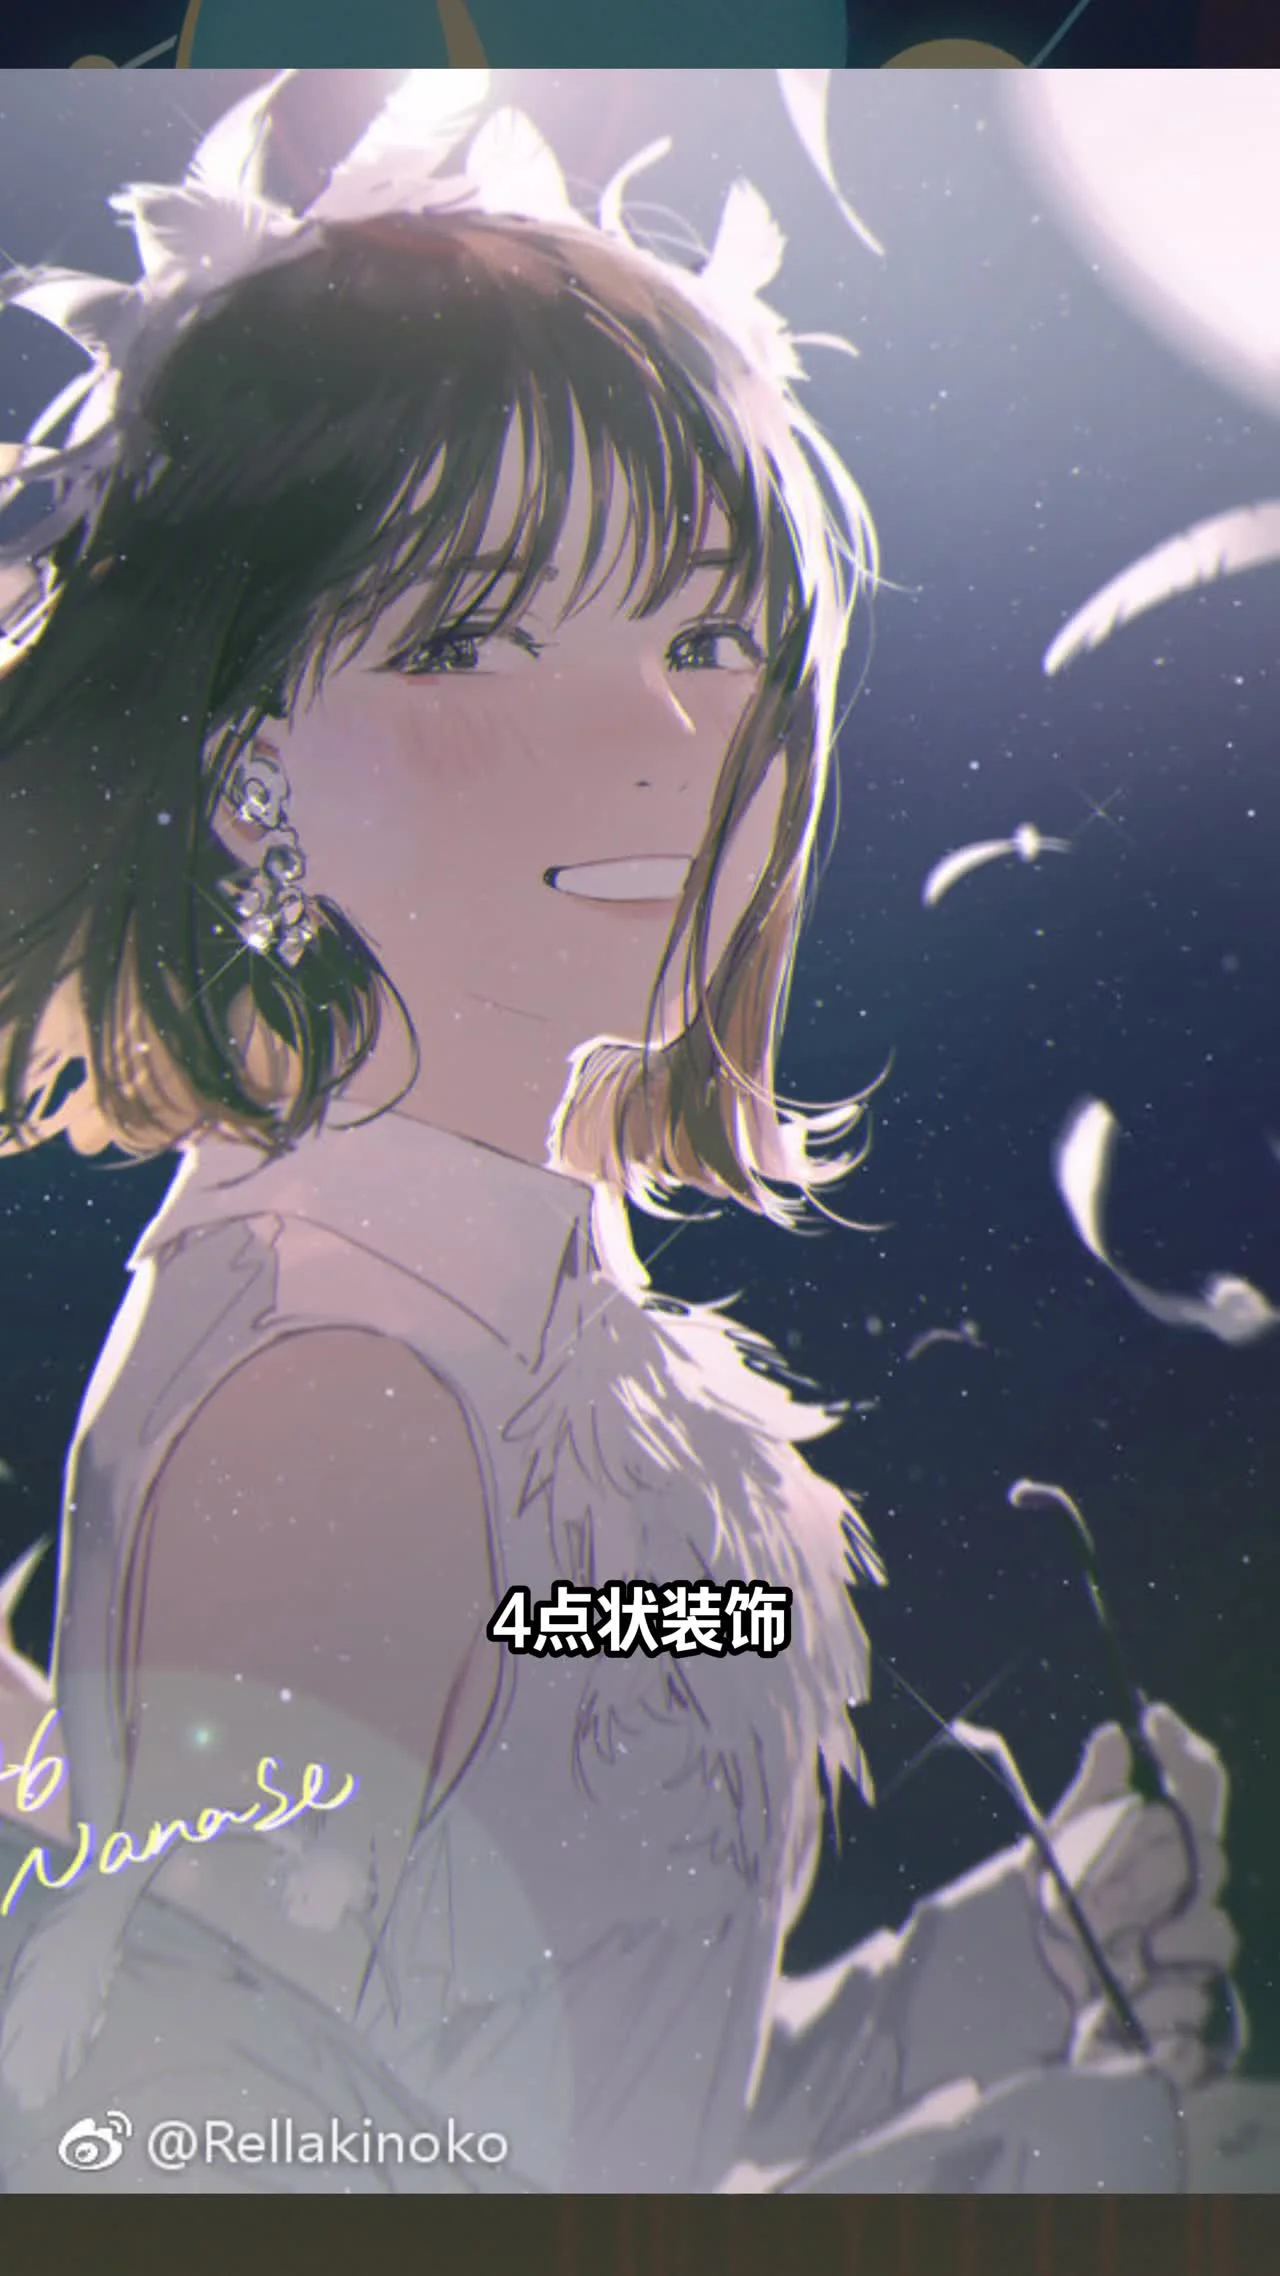
Step 4: Dot and cross decorations
On stage, dot decorations often use ribbons or confetti. This is a pre-made asset; you just need to drag it in and adjust the color to fit. Adding a few small crosses will complete the stage atmosphere. The sparkling feeling will become clearly apparent.
Place the dots and crosses in strategic positions, such as near the light source or around the main character. Avoid overusing them so the drawing doesn't become cluttered.
Tips for choosing colors for stage effects
Tips for choosing colors for stage effects
Color plays an important role in creating the stage atmosphere. Rim lighting should use warm colors like yellow or orange to create a cozy feeling. Ground fog should lean towards environment colors, like brown or gray. Star effects are usually white or light blue.
When mixing colors, remember that stage lighting is very strong, so the local colors of objects will be affected. You can reduce the saturation of the original colors to enhance the lighting effect.
How to use pre-made assets effectively
How to use pre-made assets effectively
In the video, the author suggests using pre-made assets for star effects and dot decorations. You can download brushes or shapes from sites like Procreate or Photoshop. When dragging them in, adjust the size and color to fit your drawing.
Pre-made assets save time, but you still need to adjust them to avoid looking like a copy. Change the rotation angle, opacity, or add blur effects to create uniqueness.
Notes for beginners drawing stage effects
Notes for beginners drawing stage effects
Beginners should focus on one step at a time. Don't try to add all effects at once. Start with rim lighting, then add ground fog, then star effects. Control the number of star effects so the drawing doesn't get cluttered.
This method is suitable when you are drawing a static stage scene or one with a main character. It should not be applied to landscapes lacking light or without a strong light source.
Combining effects to create depth
Combining effects to create depth
Once you are proficient with each effect, you can combine them to create depth. For example, rim lighting highlights the character, ground fog creates space, star effects and dots add magnificence. A harmonious combination will result in a professional stage drawing.
Experiment with different light layers. You can add a soft light layer from a stage spotlight shining from above. This helps the drawing have more depth and realism.
Frequently Asked Questions
How to draw rim lighting without it smudging?
You should use a soft brush with low opacity, drawing along the character's outline. If it smudges, reduce the pen pressure or use a layer mask to fix it.
Is it necessary to draw ground fog for every stage scene?
No. Ground fog is suitable for scenes with many people or outdoor stages. For small or minimalist stages, you can skip this step.
What color should I use for star effects?
Star effects are usually white or light yellow. You can add a bit of blue to create a cool effect.
How to control the number of star effects?
Only add star effects in focal areas, like near the character or light source. Using 5-10 star effects is enough; avoid scattering them throughout the painting.
Can I draw star effects manually instead of using pre-made assets?
Yes. You can draw them using a small round brush, creating bright dots. Then use a blur effect to soften them.
Do dot decorations necessarily have to use ribbons?
Not necessarily. You can use any small shape, like circles or squares. What matters is that the colors harmonize with the overall piece.
Is drawing cables for instruments difficult?
No. Just draw soft, dark-colored curves. You can refer to real photos for an accurate shape.
Try applying the 3 steps above to your drawing and share the results. See more guides on drawing light effects here.

Bình luận
0 bình luận
Đăng nhập để tham gia thảo luận cùng cộng đồng!
Đăng nhập ngayĐang tải bình luận...